一般文件的的上传和下载可以使用基本的I/O流实现。但是从开发的效率和程序运行的效率方面考虑,一般会采用第三方的组件完成文件的上传,而文件的下载则不需要第三方组件。下面介绍Servlet使用第三方组件上传文件和使用Servlet下载文件。
1.下载组件
在实际的Java Web的实际开发中,一般使用commons-fileupload和commons-io组件来完成文件的上传功能,这两个组件都是Apache开发维护的
下载地址:http://commons.apache.org/
2.在项目中web-WebINF添加lib文件夹,然后将解压的jar包拷贝进来,还要右键项目添加依赖才会生效!

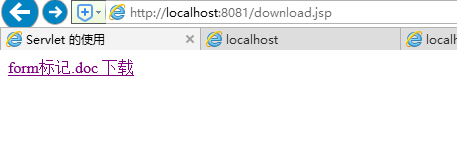
3.创建上传文件的页面(download.jsp)
<%--
  Created by IntelliJ IDEA.
  User: qzf
  Date: 2020/1/16
  Time: 9:48
  To change this template use File | Settings | File Templates.
--%>
<%@ page contentType="text/html;charset=UTF-8" language="java" %>
<html>
<head>
    <title>文件下载</title>
</head>
<body>
<a href="FileDownload">form标记.doc 下载</a>

</body>
</html>
4.创建下载文件的servlet.(FileDownload.jsp)
package servlet;

import javax.servlet.ServletException;
import javax.servlet.annotation.WebServlet;
import javax.servlet.http.HttpServlet;
import javax.servlet.http.HttpServletRequest;
import javax.servlet.http.HttpServletResponse;
import java.io.*;
import java.net.URLEncoder;

@WebServlet(name = "FileDownload")
public class FileDownload extends HttpServlet {
    protected void doGet(HttpServletRequest request, HttpServletResponse response) throws UnsupportedEncodingException {
        //下载文件路径
        String path=this.getServletContext().getRealPath("/upload/form标记.doc");
        String filename=path.substring(path.lastIndexOf("\\")+1);
        //输出文件,并指定文件的位置
        response.setHeader("content-disposition","attachment;filename="+ URLEncoder.encode(filename,"utf-8"));
        InputStream in=null;
        OutputStream out=null;
        try{
            //读取文件的内容
            in=new FileInputStream(path);
            int len=0;
            byte[] buffer=new byte[1024];
            out=response.getOutputStream();
            while((len=in.read(buffer))>0){
                out.write(buffer,0,len);//输出文件内容
            }

        }catch (Exception e){
            throw  new RuntimeException();
        }finally {
            if (in!=null){
                try{
                    in.close();
                }catch (Exception e){
                    throw new RuntimeException();
                }
            }
        }


    }

    protected void doPost(HttpServletRequest request, HttpServletResponse response) throws UnsupportedEncodingException {
        doGet(request,response);

    }
}
5.配置web.xml文件
<?xml version="1.0" encoding="UTF-8"?>
<web-app xmlns="http://xmlns.jcp.org/xml/ns/javaee"
         xmlns:xsi="http://www.w3.org/2001/XMLSchema-instance"
         xsi:schemaLocation="http://xmlns.jcp.org/xml/ns/javaee http://xmlns.jcp.org/xml/ns/javaee/web-app_4_0.xsd"
         version="4.0">
    <servlet>
        <servlet-name>FileDownload</servlet-name>
        <servlet-class>servlet.FileDownload</servlet-class>
    </servlet>
    <servlet-mapping>
        <servlet-name>FileDownload</servlet-name>
        <url-pattern>/FileDownload</url-pattern>
    </servlet-mapping>
</web-app>
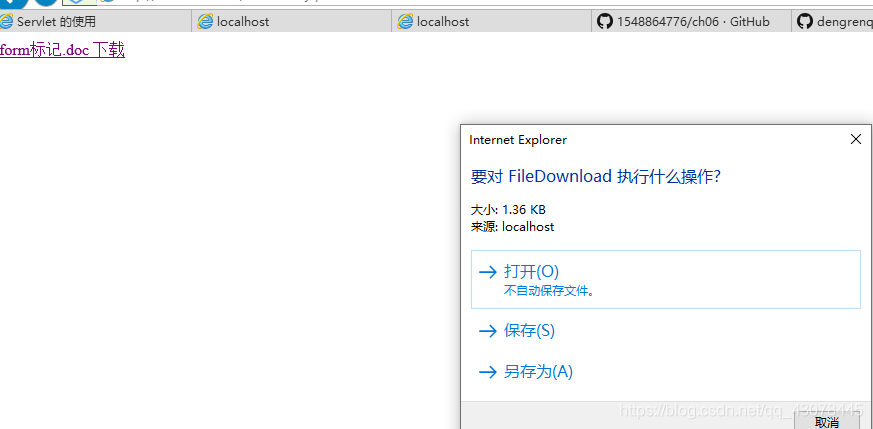
6.启动Tomcat服务器。在浏览器地址栏:
http://localhost:8081/download.jsp
点击保存
操作成功!
来源:CSDN
作者:码里安乐窝
链接:https://blog.csdn.net/qq_43078445/article/details/103999857