1、易出现问题的地方,Jar包缺少或冲突
XFire使得在JavaEE应用中发布Web服务变得轻而易举。和其他Web服务引擎相比,
XFire的配置非常简单,可以非常容易地和Spring集成。
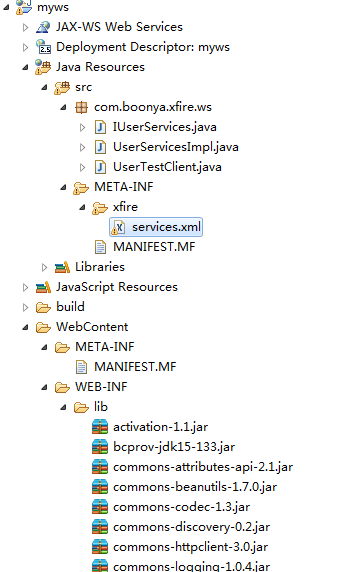
下载地址:http://xfire.codehaus.org/Download 但是jar很容易出错,我试了很久才成功网上虽然很多实例但是照着做也不容易成功主要是jar导致的失败让人很有挫败感,所以在此总结贴出比较多的Jar(有些jar未用到,但是建议保留)。
2、开发项目目录及Jars


3、创建webservice借口
package com.boonya.xfire.ws;

public interface IUserServices {

	public String sayHello(String message);

}package com.boonya.xfire.ws;
public class UserServicesImpl implements IUserServices {
public String sayHello(String message) {
System.out.println(message);
return message;
}
}package com.boonya.xfire.ws;
import java.net.MalformedURLException;
import org.codehaus.xfire.XFireFactory;
import org.codehaus.xfire.client.XFireProxyFactory;
import org.codehaus.xfire.service.Service;
import org.codehaus.xfire.service.binding.ObjectServiceFactory;
public class UserTestClient {
public static void main(String[] args) throws MalformedURLException {
Service service = new ObjectServiceFactory()
.create(IUserServices.class);
XFireProxyFactory factory = new XFireProxyFactory(XFireFactory
.newInstance().getXFire());
String url = "http://localhost:8080/myws/services/UserServices";
IUserServices userService = (IUserServices) factory.create(
service, url);
String res = userService.sayHello("Hello boonya ,you singned sucess!");
System.out.println(res);
}
}<?xml version="1.0" encoding="UTF-8"?>
<beans xmlns="http://xfire.codehaus.org/config/1.0">
<service>
<name>UserServices</name>
<namespace>http://ws.com</namespace>
<serviceClass>com.boonya.xfire.ws.IUserServices</serviceClass>
<implementationClass>com.boonya.xfire.ws.UserServicesImpl</implementationClass>
<style>wrapped</style>
<use>literal</use>
<scope>application</scope>
</service>
</beans><?xml version="1.0" encoding="UTF-8"?>
<web-app xmlns="http://java.sun.com/xml/ns/javaee" xmlns:xsi="http://www.w3.org/2001/XMLSchema-instance" version="2.5" xsi:schemaLocation="http://java.sun.com/xml/ns/javaee http://java.sun.com/xml/ns/javaee/web-app_2_5.xsd">
<servlet>
<servlet-name>XFireServlet</servlet-name>
<servlet-class>org.codehaus.xfire.transport.http.XFireConfigurableServlet</servlet-class>
<load-on-startup>0</load-on-startup>
</servlet>
<servlet-mapping>
<servlet-name>XFireServlet</servlet-name>
<url-pattern>/services/*</url-pattern>
</servlet-mapping>
<welcome-file-list>
<welcome-file>index.jsp</welcome-file>
</welcome-file-list>
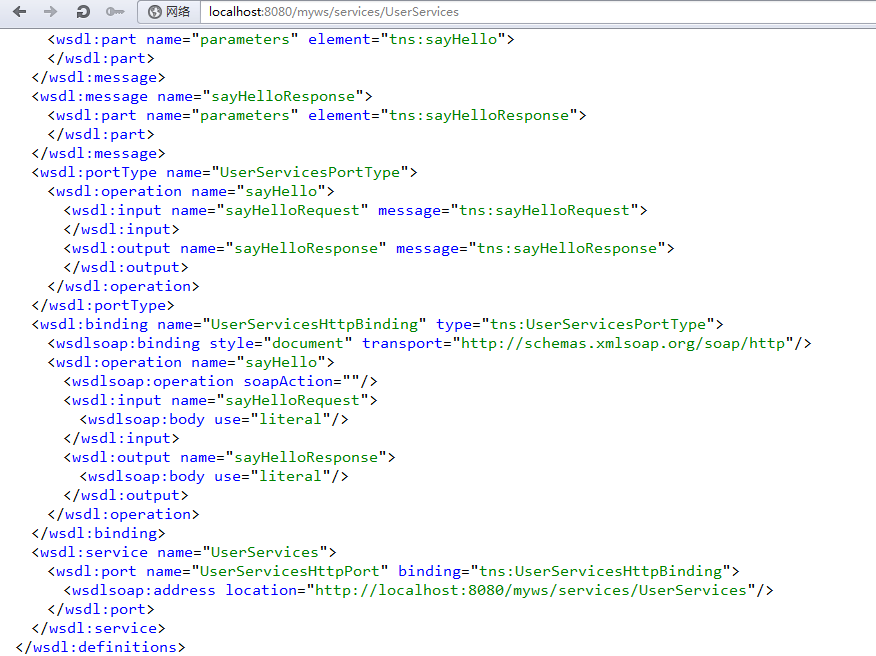
</web-app>在浏览器输入如下内容访问


客户端后台代理测试结果如下:

来源:oschina
链接:https://my.oschina.net/u/592236/blog/137421