安装准备
-
redis服务器:172.22.3.163:6379
-
prometheus主机已安装prometheus和grafnana : 参考:centos7.8安装prometheus和grafana实战
本实践基于prometheus对已存在redis服务进行监控。
-
相关安装文件
https://github.com/oliver006/redis_exporter/releases/download/v1.15.1/redis_exporter-v1.15.1.linux-amd64.tar.gz
安装redis_exporter
-
在redis服务器安装redis_exporter
# cd /opt/
# wget https://github.com/oliver006/redis_exporter/releases/download/v1.15.1/redis_exporter-v1.15.1.linux-amd64.tar.gz
# tar -zxf redis_exporter-v1.15.1.linux-amd64.tar.gz
# cp redis_exporter-v1.15.1.linux-amd64/redis_exporter /usr/local/bin
-
创建service并设置自动启动
## 创建service
# vi /usr/lib/systemd/system/redis_exporter.service
[Unit]
Description=redis_exporter
Documentation=https://prometheus.io/
After=network.target
[Service]
Type=simple
User=root
ExecStart=/usr/local/bin/redis_exporter \
  --redis.addr=127.0.0.1:6379 \
  --redis.password= redis1234
Restart=on-failure
[Install]
WantedBy=multi-user.target

# systemctl daemon-reload
## 设置自启动
# systemctl enable redis_exporter
Created symlink from /etc/systemd/system/multi-user.target.wants/redis_exporter.service to /usr/lib/systemd/system/redis_exporter.service.
## 启动服务
# systemctl start redis_exporter
配置redis_exporter监控
-
修改prometheus配置文件prometheus.yml,在scrape_configs下增加如下配置
- job_name: 'redis-host'
    file_sd_configs:
      - files: ['/opt/prometheus/sd_config/redis-hosts.yml']
        refresh_interval: 5s
-
新增/opt/prometheus/sd_config/redis-hosts.yml文件,内容如下
cat /opt/prometheus/sd_config/redis-hosts.yml
- targets:
  - 172.22.3.163:9121
-
重启prometheus
# systemctl restart prometheus
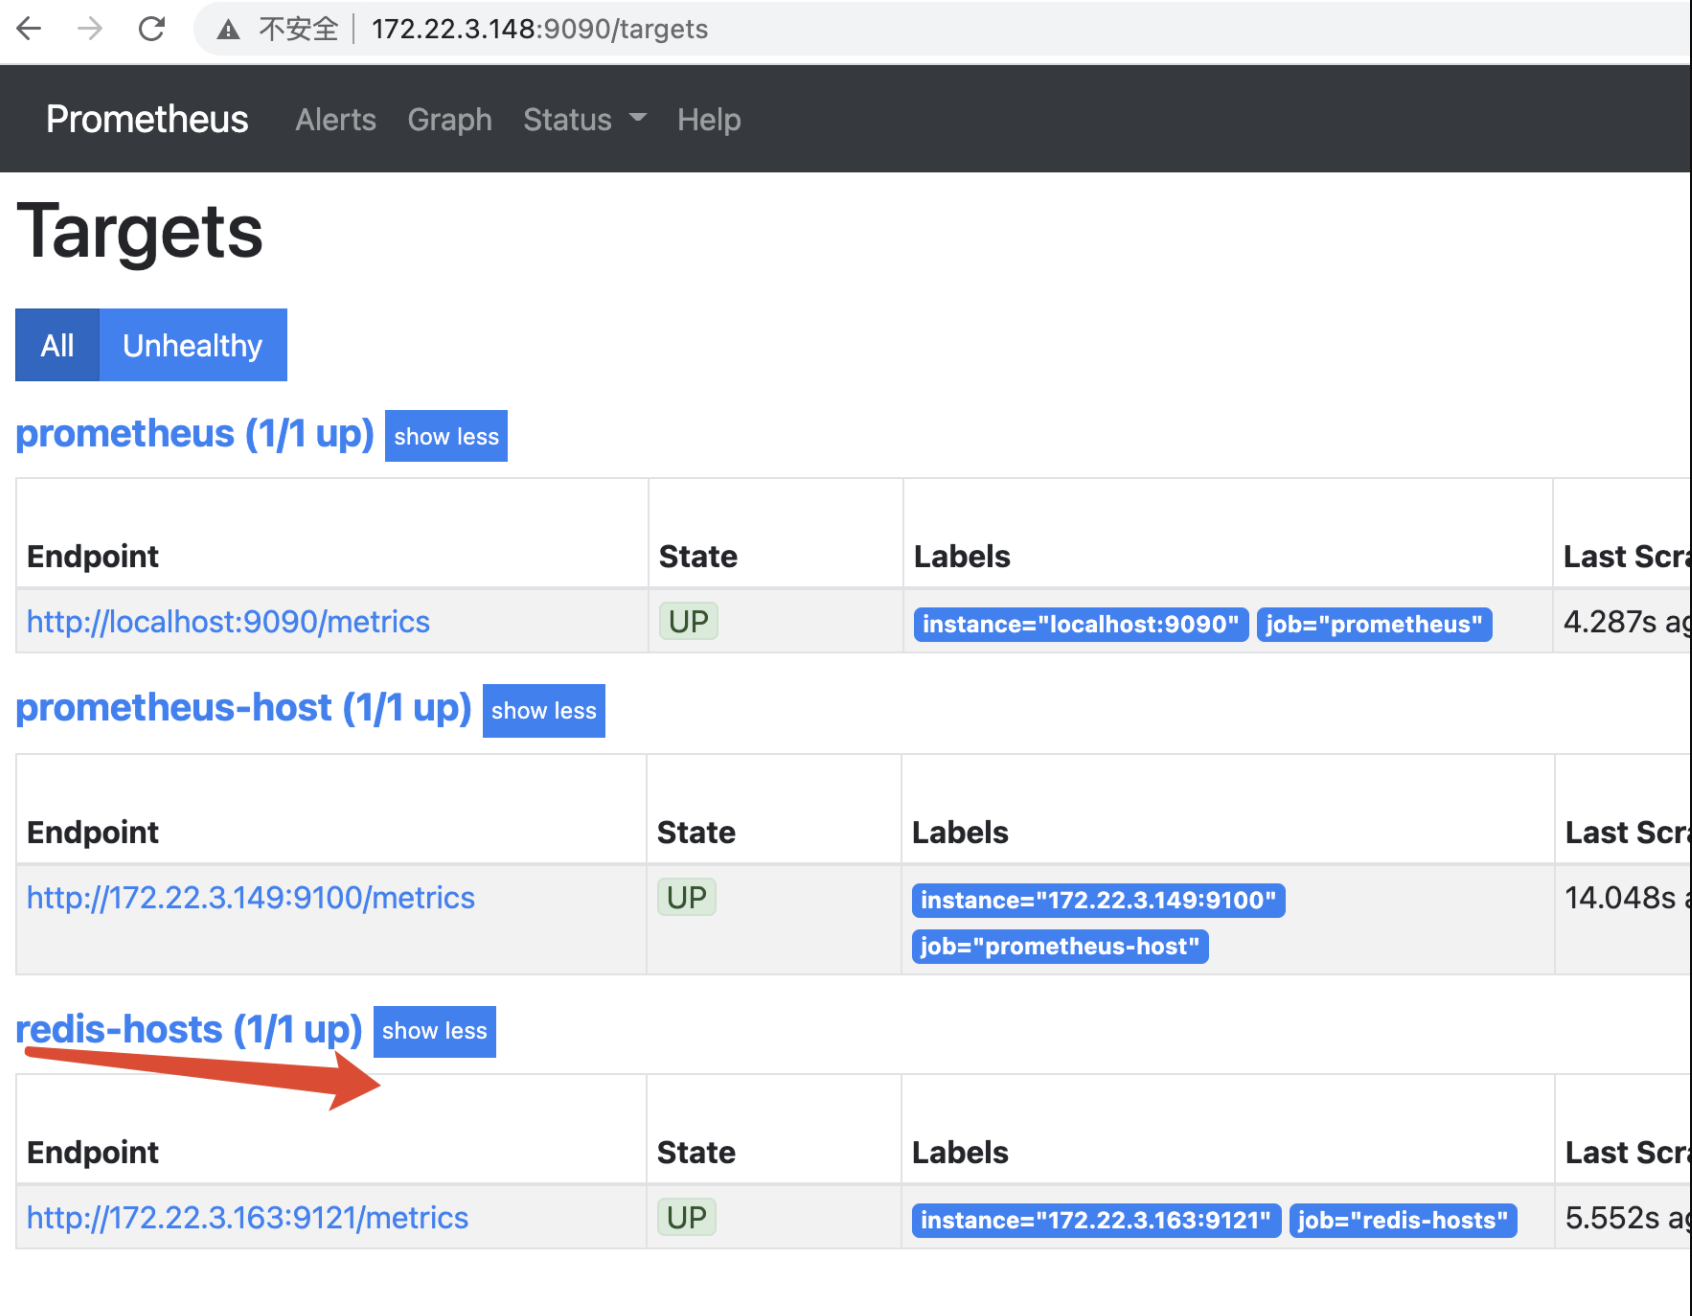
浏览器地址栏输入 http://172.22.3.148:9090/targets

可以看到targets已经增加了对服务redis-hosts的监控
-
在grafana中配置面板显示对主机redis-hosts监控内容

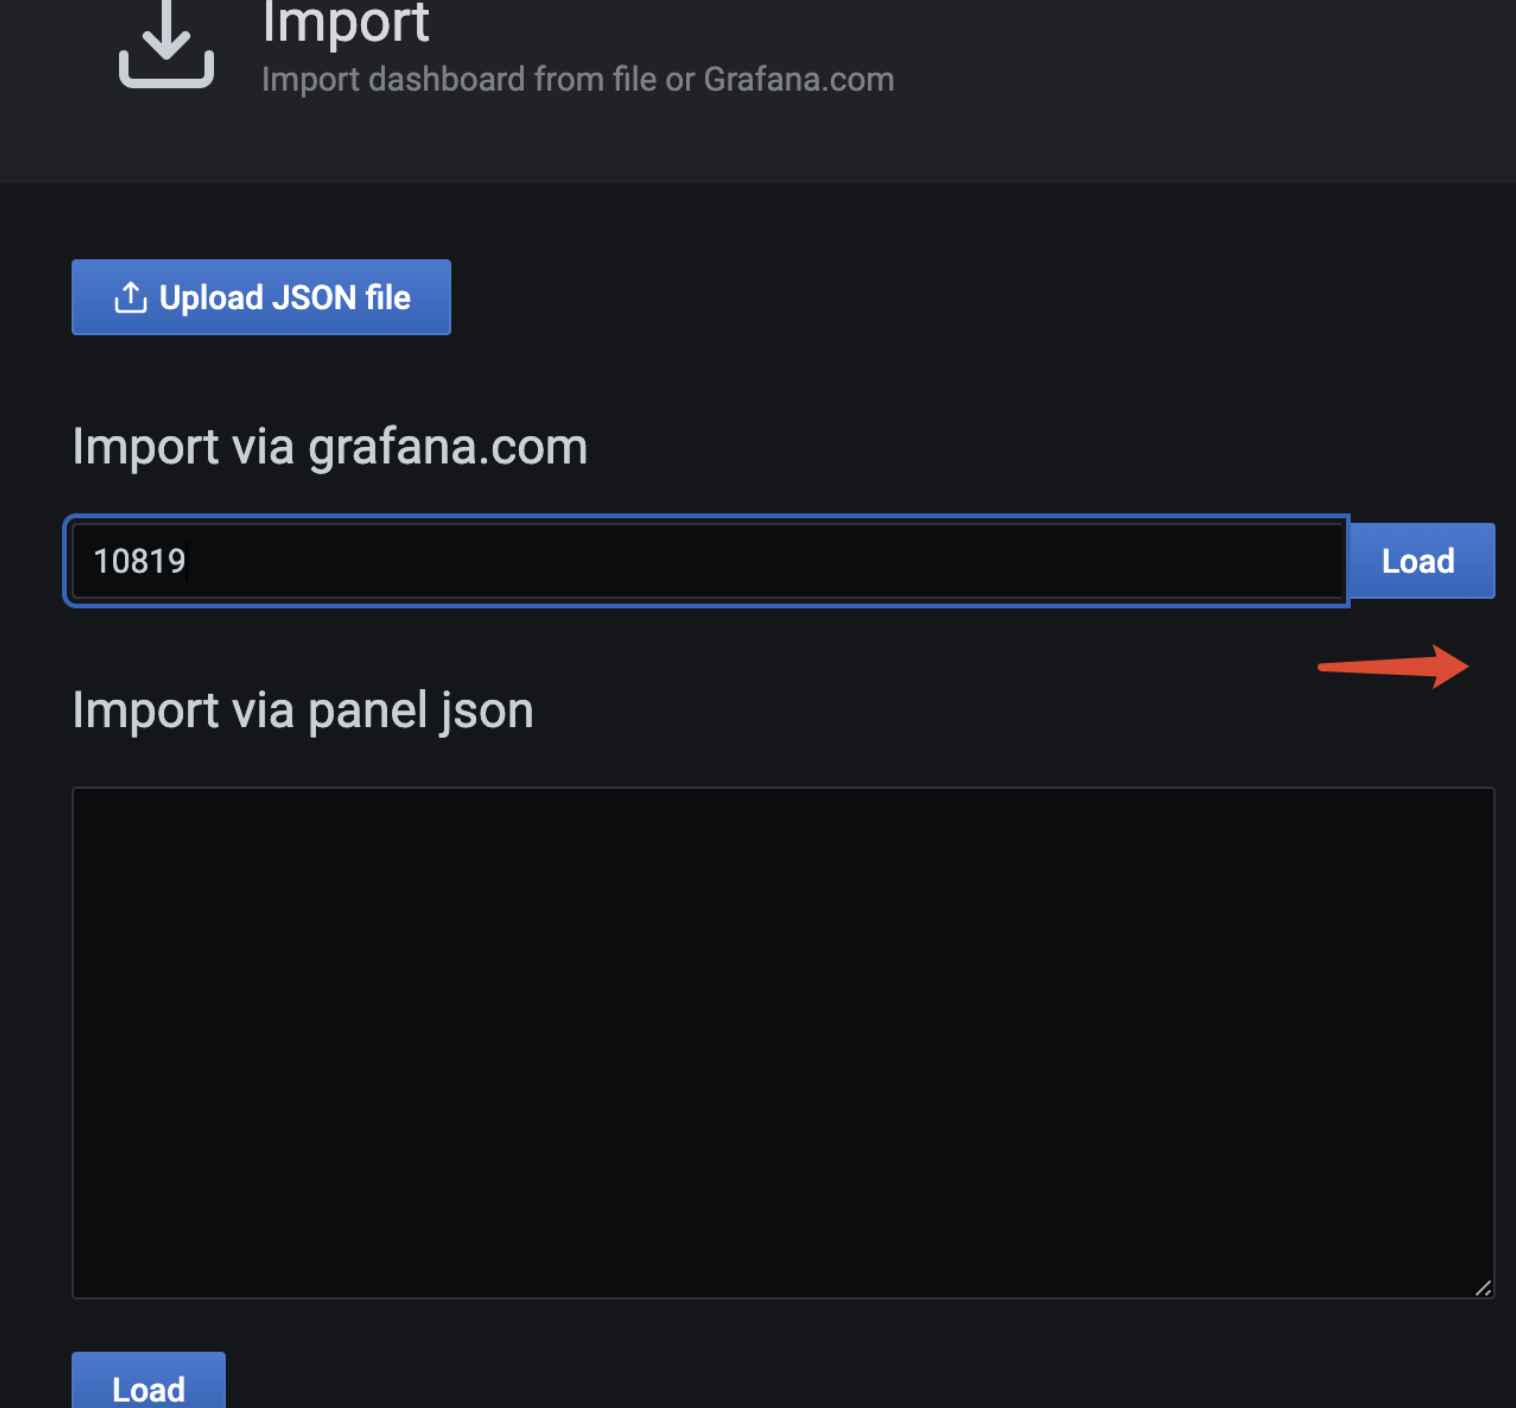
点“+”按钮,弹出导入面板窗口

如图输入10819,点Load,grafana会直接从官方网站导入编号为10819的面板如下

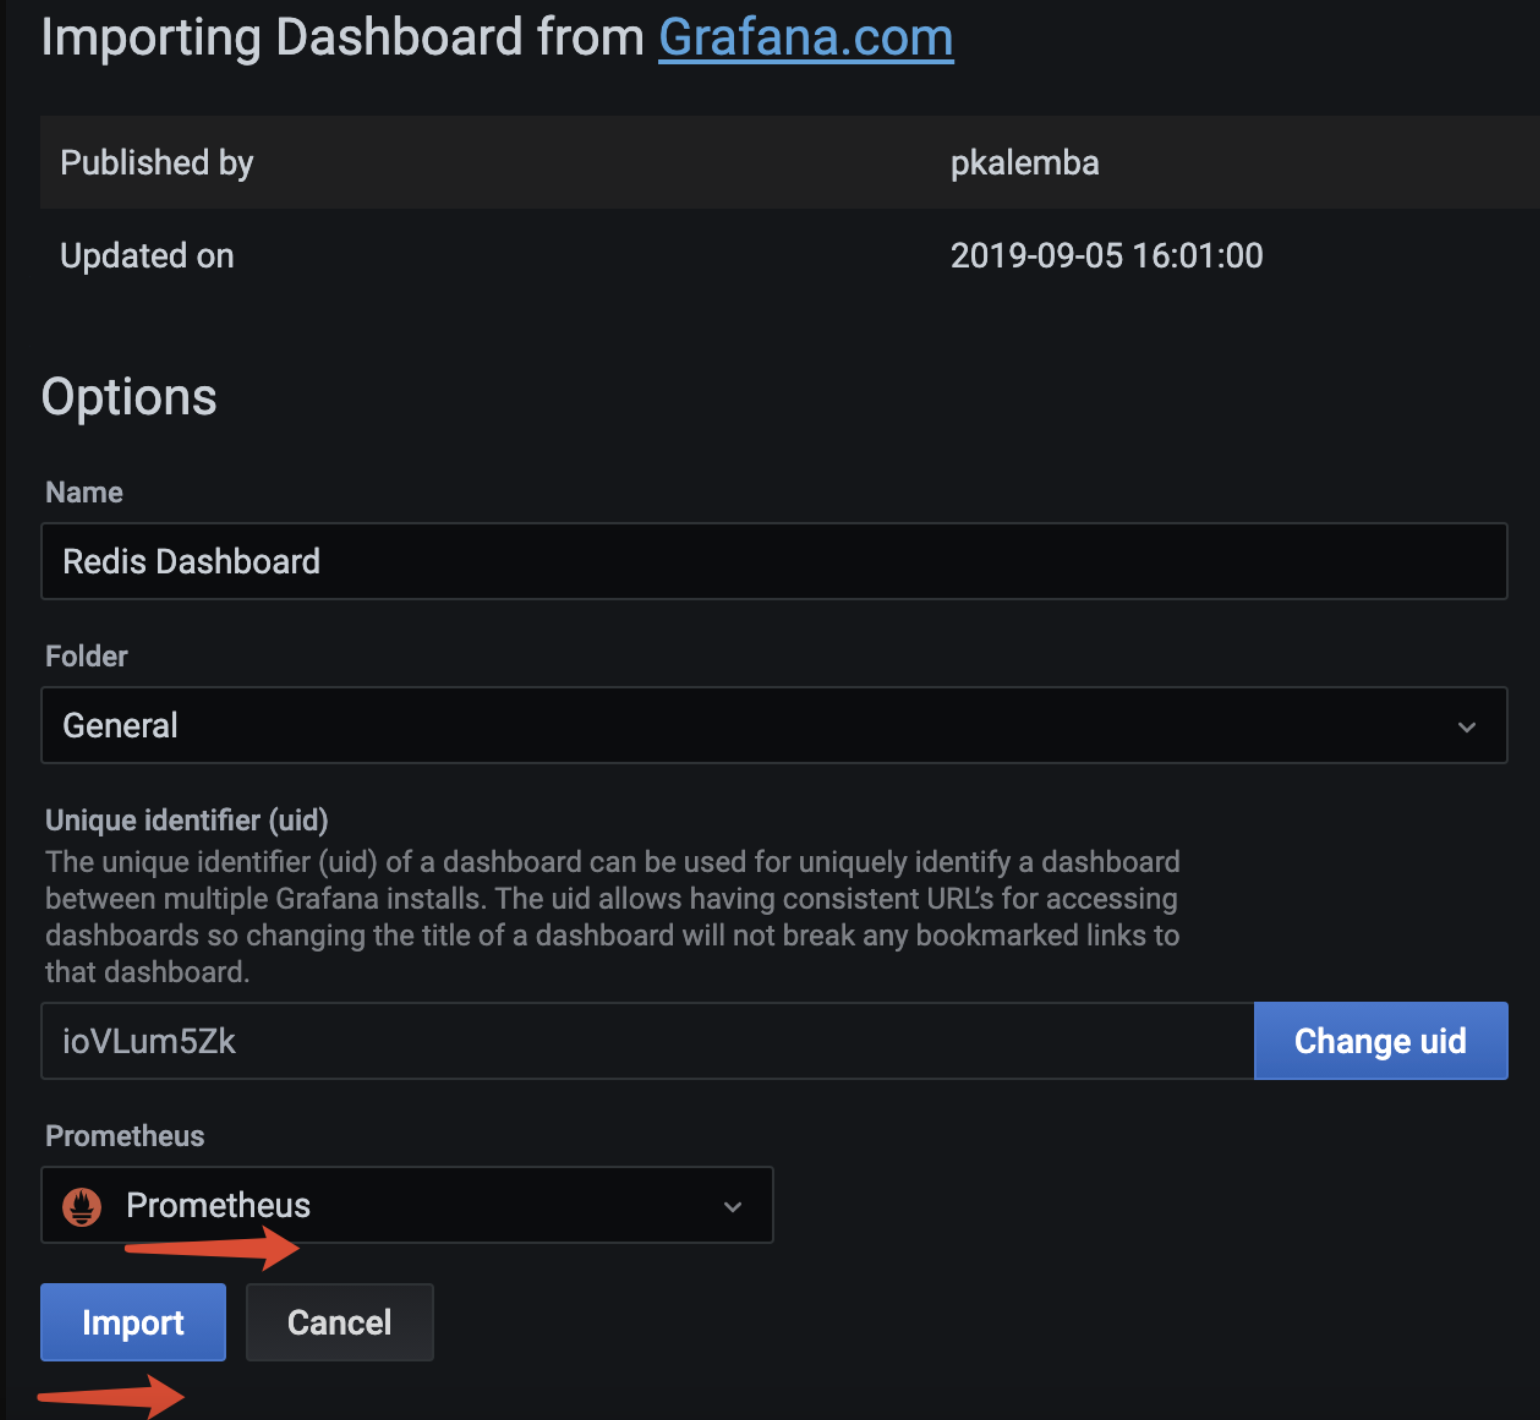
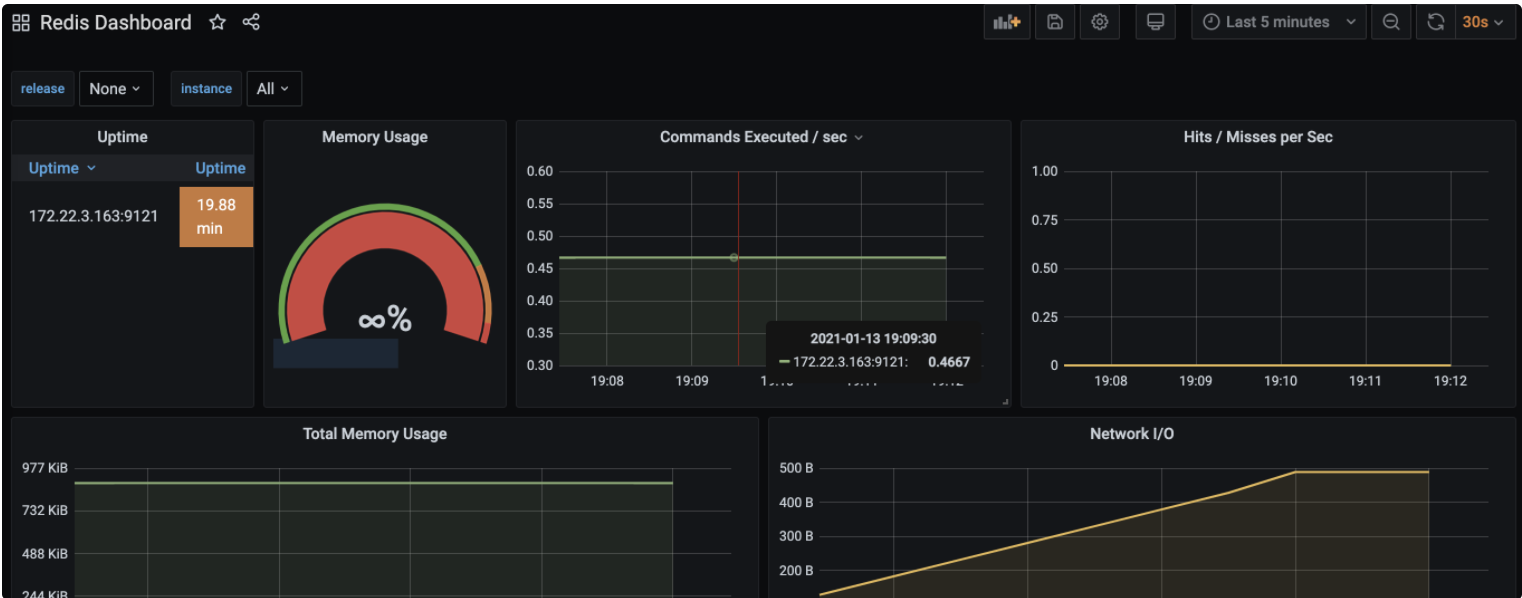
选择数据源Prometheus,继续“Import”,显示redis监控界面显示如下

来源:oschina
链接:https://my.oschina.net/u/2624181/blog/4897821