Keras是一个高层神经网络API,Keras由纯Python编写而成并基Tensorflow、Theano以及CNTK后端。Keras 为支持快速实验而生,能够把你的idea迅速转换为结果。
有多迅速?引用某乎的一句话
当别人还在搞懂怎么输入数据(tensorflow)的时候我都可以跑通模型调参优化了(Keras)
所以机器学习的新手们请不要犹豫,盘它!
点击此处,不用装环境,就可以直接线上运行👇
推荐新手教程:
其他x题系列:
- 50道练习带你玩转Pandas
- 这100道练习,带你玩转Numpy
- 35题初探scikit-learn库,get机器学习好帮手√
- 50题matplotlib从入门到精通
- 40题刷爆Keras,人生苦短我选Keras
- 60题PyTorch简易入门指南,做技术的弄潮儿
- 50题真 • 一文入门TensorFlow2.x
- 90题细品吴恩达《机器学习》,感受被刷题支配的恐惧
- 170题吴恩达《深度学习》面面观,一套更比三套强
- 【抗击新冠特别篇】33题数据可视化实战
目录
零、导入
1.导入 Keras 库,并打印版本信息
import keras
print(keras.__version__)
一、一个简单的例子
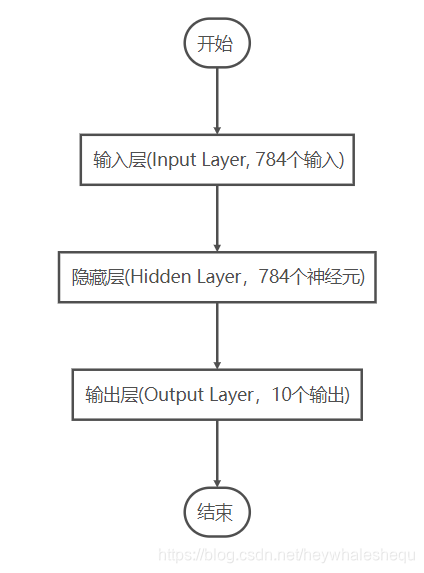
使用MLP模型实现手写数字图像MNIST的分类
1.1 选择模型
2.初始化一个顺序模型(Sequential)
model = Sequential()
1.2 构建网络
3.为model加入一个784输入,784个输出的隐藏层,激活函数使用relu
model.add(Dense(units=784, activation='relu', input_dim=784))
4.在之前的基础上为model加入10个输出的输出层,激活函数使用softmax
model.add(Dense(units=10, activation='softmax'))
5.通过.summary()查看模型参数情况
model.summary()
1.3 编译模型
6.使用.compile() 来配置学习过程,代价函数loss使用categorical_crossentropy,优化算法optimizer使用sgd,性能的指标使用accuracy
model.compile(loss='categorical_crossentropy',
              optimizer='sgd',
              metrics=['accuracy'])
1.4 训练
读入数据(略)
7.将y值进行one-hot编码
y_train = to_categorical(y_train)
y_test = to_categorical(y_test)
8.将数据送入模型训练
model.fit(x_train, y_train, epochs=5, batch_size=32)
9.评估模型性能
score = model.evaluate(x_test, y_test, batch_size=128)
print("loss:",score[0])
print("accu:",score[1])
1.5 预测
10.使用模型进行预测
model.predict_classes(x_test, batch_size=128)
二、稍微复杂的顺序模型
使用LeNet5实现CIFAR10数据集的分类
2.1 选择模型
11.新建一个顺序模型
model = Sequential()
2.2 构建网络
12.完成INPUT-C1:添加一个二维卷积层,输入为32x32x3,卷积核大小为5x5,核种类6个,并且假设我们不小心漏了relu
model.add(Conv2D(6, (5, 5), input_shape=(32, 32,3)))
13.刚刚不小心漏了relu,现在可以另外加上
model.add(Activation('relu'))
14.完成C1-S2:2x2下采样层
model.add(MaxPooling2D(pool_size=(2, 2)))
15.完成S2-C3:二维卷积,16个内核,5x5的大小,别忘记relu
model.add(Conv2D(16, (5, 5), activation='relu'))
16.完成C3-S4:2x2下采样层
model.add(MaxPooling2D(pool_size=(2, 2)))
17.完成S4-C5:先添加平坦层
model.add(Flatten())
18.再添加全连接层,输出120维,激活函数relu
model.add(Dense(120, activation='relu'))
19.完成C5-F6:添加全连接层,84个输出,激活函数relu
model.add(Dense(84, activation='relu'))
20.完成F6-OUTPUT:添加全连接层,10个输出,激活函数softmax
model.add(Dense(10, activation='softmax'))
2.3 编译
21.设置随机梯度下降SGD优化算法的参数,learning_rate=0.01,epoch=25,decay=learning_rate/epoch,momentum=0.9,nesterov=False
from keras.optimizers import SGD

lrate = 0.01
epoch = 10
decay = lrate/epoch
sgd = SGD(lr=lrate, momentum=0.9, decay=decay, nesterov=False)
23.编译模型,代价函数loss使用categorical_crossentropy,优化算法前面已经定义了,性能的指标使用accuracy
model.compile(loss='categorical_crossentropy', optimizer=sgd, metrics=['accuracy'])
2.4 训练
读入数据 & 预处理(略)
24.将数据送入模型,并且设置20%为验证集
history=model.fit(x=train_X, y=train_Y,validation_split=0.2, epochs=10, batch_size=32, verbose=1)
25.可视化历史训练的 训练集 及 验证集 的准确率值
可视化历史训练的 训练集 及 验证集 的损失值
plt.plot(history.history['accuracy'])
plt.plot(history.history['val_accuracy'])
plt.title('Model accuracy')
plt.ylabel('Accuracy')
plt.xlabel('Epoch')
plt.legend(['Train', 'val'], loc='upper left')
plt.show()

plt.plot(history.history['loss'])
plt.plot(history.history['val_loss'])
plt.title('Model loss')
plt.ylabel('Loss')
plt.xlabel('Epoch')
plt.legend(['Train', 'val'], loc='upper left')
plt.show()

26.模型评估
scores = model.evaluate(test_X, test_Y, verbose=0)
print(model.metrics_names)
print(scores)
2.5 预测
27.预测结果
prediction=model.predict_classes(test_X)
prediction[:10]
可视化预测结果
显示混淆矩阵
import pandas as pd
print(classes)
pd.crosstab(y_gt.reshape(-1),prediction,rownames=['label'],colnames=['predict'])
三、Model式模型
这部分会实现一个多输入多输出的模型
3.1 构建网络
这里我们选择函数式模型(model),所以不需要提前实例化,先将网络结构实现
28.定义①,主要输入层,接收新闻标题本身,即一个整数序列(每个整数编码一个词)。 这些整数在 1 到 10,000 之间(10,000 个词的词汇表),且序列长度为 100 个词。
命名main_input
main_input = Input(shape=(100,), dtype='int32', name='main_input')
29.定义②,将输入序列编码为一个稠密向量的序列,输出每个向量维度为 512。
x = Embedding(output_dim=512, input_dim=10000, input_length=100)(main_input)
30.定义③,LSTM 层把向量序列转换成单个向量,它包含整个序列的上下文信息,输出维度32
lstm_out = LSTM(32)(x)
31.定义⑩,其作为辅助损失,使得即使在模型主损失很高的情况下,LSTM 层和 Embedding 层都能被平稳地训练。输出维度1,激活函数sigmoid,命名aux_output
auxiliary_output = Dense(1, activation='sigmoid', name='aux_output')(lstm_out)
32.定义⑨,输入辅助数据,5维向量,命名aux_input
auxiliary_input = Input(shape=(5,), name='aux_input')
33.定义④,将辅助输入数据与 LSTM 层的输出连接起来,输入到模型中
x = keras.layers.concatenate([lstm_out, auxiliary_input])
34.定义⑤⑥⑦,堆叠多个全连接网络层,输出均为64维
x = Dense(64, activation='relu')(x)
x = Dense(64, activation='relu')(x)
x = Dense(64, activation='relu')(x)
35.定义⑧,输出层,激活函数sigmoid,命名main_output
main_output = Dense(1, activation='sigmoid', name='main_output')(x)
3.2 定义模型
36.定义一个具有两个输入和两个输出的模型
model = Model(inputs=[main_input, auxiliary_input], outputs=[main_output, auxiliary_output])
3.3 编译
37.编译模型,给辅助损失分配0.2的权重
model.compile(optimizer='rmsprop',
              loss={'main_output': 'binary_crossentropy', 'aux_output': 'binary_crossentropy'},
              loss_weights={'main_output': 1., 'aux_output': 0.2})
3.4 训练
读取数据(略)
38.把数据送入模型训练
model.fit({'main_input': headline_data, 'aux_input': additional_data},
          {'main_output': headline_labels, 'aux_output': additional_labels},
          epochs=50, batch_size=32,verbose=0)
3.5 预测
model.predict({'main_input': headline_data, 'aux_input': additional_data})
四、模型的保存与读取
39.保存模型及其权重
# 保存模型
model_json = model.to_json()
json_file = open("model.json", "w")
json_file.write(model_json)
json_file.close()
# 保存权重
model.save_weights("model.h5")
40.读取模型及其权重
from keras.models import model_from_json
# 读取模型
json_file = open('model.json', 'r')
loaded_model_json = json_file.read()
json_file.close()
loaded_model = model_from_json(loaded_model_json)
# 读取权重
loaded_model.load_weights("model.h5")
# 使用之前记得要编译一下
model.compile(optimizer='rmsprop',
              loss={'main_output': 'binary_crossentropy', 'aux_output': 'binary_crossentropy'},
              loss_weights={'main_output': 1., 'aux_output': 0.2})
点击此处,不用装环境,就可以直接线上运行👇
来源:CSDN
作者:heywhaleshequ
链接:https://blog.csdn.net/heywhaleshequ/article/details/104757914