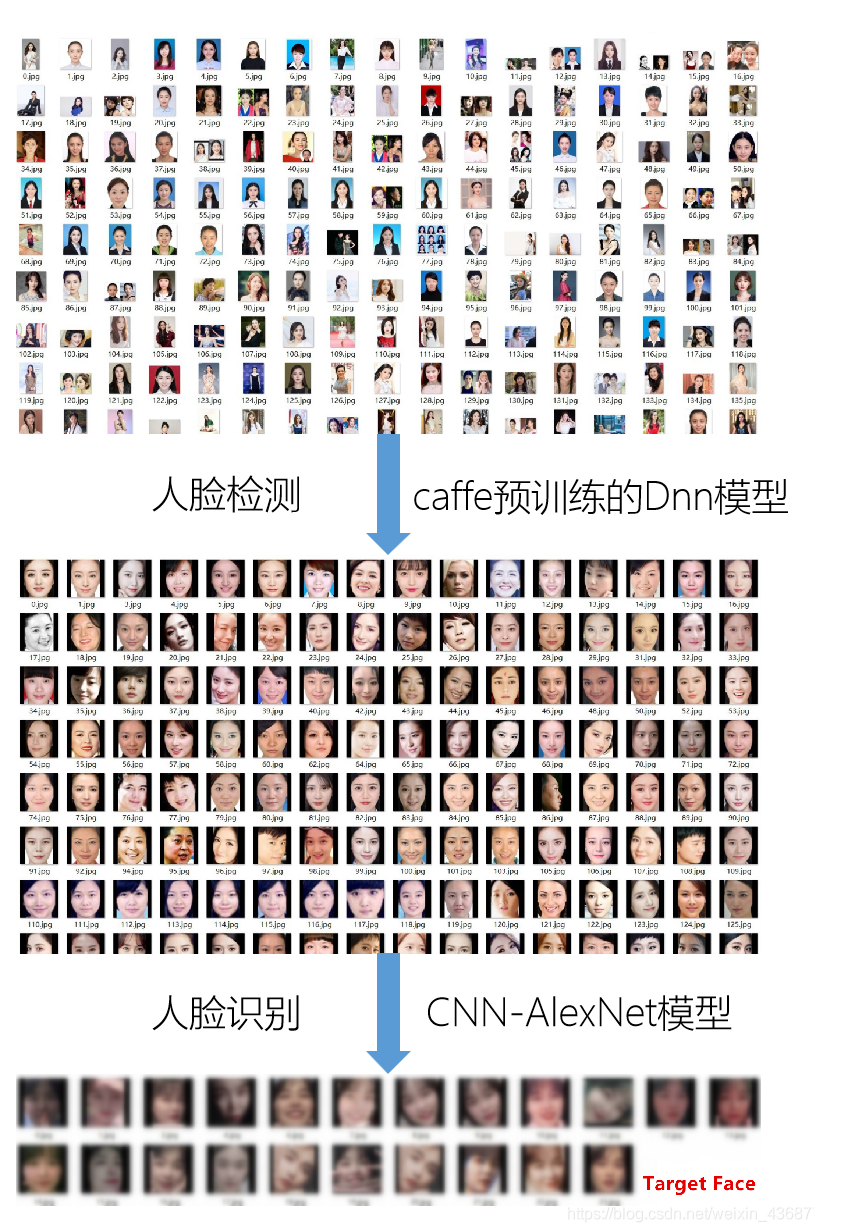
实现目标:在茫茫人海中一眼相中她(在数据库中找出目标人脸)
解决思路:Input > 人脸检测 > 人脸识别 > Output
Input:可上接 视频流 实现实时检测
Output:可下接 人脸检测框 可视化
所需工具:Python + OpenCV + Keras
Step1:人脸检测
现在有众多包含人脸的照片(数据来源于百度图片),我们要检测出图片中的人脸,并切出来保存。
包含目标人脸的照片
进行了两种人脸检测方案的测试,如下:
1·OpenCV_haarcascade特征分类器
优点:识别速度快、对于大图小脸的情况几乎都能够检测到
缺点:误识别情况较惨
Haar识别,输入_待检测图,返回_人脸图和人脸数量
import cv2

pho_add = 'F:/.jpg'
haar_path = 'F:/haarcascade_frontalface_default.xml'

def face_detector_haar(img):

    # 将测试图像转换为灰度图像,因为opencv人脸检测器需要灰度图像
    gray = cv2.cvtColor(img, cv2.COLOR_BGR2GRAY)

    # 加载OpenCV人脸检测分类器Haar
    face_cascade = cv2.CascadeClassifier(haar_path)

    # 检测多尺度图像,返回值是一张脸部区域信息的列表(x,y,宽,高)
    faces = face_cascade.detectMultiScale(gray, scaleFactor=1.2, minNeighbors=5)

    # 如果未检测到面部
    if (len(faces) == 0):
        return None, None
    # 假设有好几张脸,xy为左上角坐标,wh为矩形的宽高
    else:
        face_nums = len(faces)
        imgs = []
        for (x, y, w, h) in faces:
            imgs.append(img[y:y + w, x:x + h])
        # 返回图像的正面部分
        return imgs, face_nums

img = cv2.imread(pho_add)
pho, nums = face_detector_haar(img)

print('There are', nums, 'faces')
# 显示两个图像
for show in pho:
    cv2.imshow('Face', show)
    cv2.waitKey(0)
cv2.destroyAllWindows()
详细原理传送门:Haar人脸检测详细原理
下载传送门:下载 haarcascade_frontalface_default.xml 文件
在这里OpenCV还提供面部、眼睛、等分类器
2·基于caffe预训练的Dnn模型
优点:更准、误识别情况少(DL果然腻害)
Dnn预训练模型,输入_待检测图,返回_原图和人脸图
import numpy as np
import cv2
from copy import deepcopy

modelPath = "F:/deploy.prototxt.txt"
weightPath = "F:/res10_300x300_ssd_iter_140000.caffemodel"
confidence = 0.3 # 置信度参数,高于此数认为是人脸
def face_detector_dnn(image):

    image_1 = deepcopy(image)
    net = cv2.dnn.readNetFromCaffe(modelPath, weightPath)

    # 输入图片并重置大小符合模型的输入要求
    (h, w) = image.shape[:2]  #获取图像的高和宽,用于画图
    blob = cv2.dnn.blobFromImage(cv2.resize(image, (300, 300)), 1.0,
        (300, 300), (104.0, 177.0, 123.0))

    net.setInput(blob)
    detections = net.forward()  # 预测结果
    face_img = []
    # 可视化:在原图加上标签和框
    for i in range(0, detections.shape[2]):
        # 获得置信度
        res_confidence = detections[0, 0, i, 2]

        # 过滤掉低置信度的像素
        if res_confidence > confidence :
            # 获得框的位置
            box = detections[0, 0, i, 3:7] * np.array([w, h, w, h])
            (startX, startY, endX, endY) = box.astype("int")
            # 在图片上写上标签
            text = "{:.2f}%".format(res_confidence * 100)
            # 如果检测脸部在左上角,则把标签放在图片内,否则放在图片上面
            y = startY - 10 if startY - 10 > 10 else startY + 10
            cv2.rectangle(image, (startX, startY), (endX, endY),
                (0, 255, 0), 2)
            cv2.putText(image, text, (startX, y),
                cv2.FONT_HERSHEY_SIMPLEX, 0.45, (0, 0, 255), 2)

            if len(deepcopy(image_1)[startY:endY, startX:endX]) != 0:
                face_img.append(deepcopy(image_1)[startY:endY, startX:endX])

    if len(face_img) == 0:
        return None, None
    else:
        return image, face_img
使用OpenCV的DNN模块以及Caffe模型,必须要有
.prototxt 文件 它定义了模型的结构 点击这里下载
.caffemodel 文件 它保存了预训练后各层的权重数据 提取码:6axy
统一尺寸
检测出的人脸图片,现在统一尺寸(如:227X227像素),主要是保证所有数据都可以输入到后面的CNN进行训练。
统一尺寸时需要保证,图像不会被扭曲变形,在多余的空白处用纯黑色填充。
def resize_image(image, height=600, width=600):

    top, bottom, left, right = (0, 0, 0, 0)

    # 获取图像尺寸
    h, w, _ = image.shape
    # 对于长宽不相等的图片,找到最长的一边
    longest_edge = max(h, w)
    # 计算短边需要增加多上像素宽度使其与长边等长
    if h < longest_edge:
        dh = longest_edge - h
        top = dh // 2
        bottom = dh - top
    elif w < longest_edge:
        dw = longest_edge - w
        left = dw // 2
        right = dw - left
    else:
        pass
    # RGB颜色
    BLACK = [0, 0, 0]
    # 给图像增加边界,是图片长、宽等长,cv2.BORDER_CONSTANT指定边界颜色由value指定
    constant = cv2.copyMakeBorder(image, top, bottom, left, right, cv2.BORDER_CONSTANT, value=BLACK)

    # 调整图像大小并返回
    return cv2.resize(constant, (height, width))
Step2:人脸识别(AlexNet)
现在有了提取出的人脸数据,我们要进行识别,看看哪些是目标,哪些是Others
为了提高识别准确性,我们选用知名的CNN(卷积神经网络)AlexNet模型进行训练。
AlexNet是2012年ImageNet竞赛冠军获得者Hinton和他的学生Alex Krizhevsky设计的。
def AlexNet(num_classses=2):
    ##构建网络
    model = Sequential()
    model.add(ZeroPadding2D((2, 2), input_shape=(227, 227, 3)))
    model.add(Lambda(lambda x: x / 255.0))  # 归一化
    model.add(Convolution2D(64, (11, 11), strides=(4, 4), activation='relu'))
    model.add(MaxPooling2D((3, 3), strides=(2, 2)))

    model.add(ZeroPadding2D((2, 2)))
    model.add(Convolution2D(192, (5, 5), activation='relu'))
    model.add(MaxPooling2D((3, 3), strides=(2, 2)))

    model.add(ZeroPadding2D((1, 1)))
    model.add(Convolution2D(384, (3, 3), activation='relu'))
    model.add(ZeroPadding2D((1, 1)))
    model.add(Convolution2D(256, (3, 3), activation='relu'))
    model.add(ZeroPadding2D((1, 1)))
    model.add(Convolution2D(256, (3, 3), activation='relu'))
    model.add(MaxPooling2D((3, 3), strides=(2, 2)))

    model.add(Flatten())
    model.add(Dense(4096, activation='relu'))
    model.add(Dropout(0.5))
    model.add(Dense(4096, activation='relu'))
    model.add(Dropout(0.5))
    model.add(Dense(num_classses, activation='softmax'))

    return model
数据集准备:
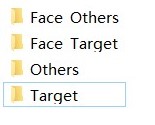
我按照这样放置训练数据,便于打标签。
对于目标文件作独热标签,目标脸[0.,1.],其他脸[1.,0.]
def load_data():
    data_x, data_y = [], []

    all_object_imgs = os.listdir(pho_object_add)
    for img in all_object_imgs:
        image = cv2.imread(pho_object_add+'/'+img)
        data_x.append(image)
        data_y.append([1])  # [0.,1.]

    all_others_imgs = os.listdir(pho_others_add)
    for img in all_others_imgs:
        image = cv2.imread(pho_others_add+'/'+img)
        data_x.append(image)
        data_y.append([0])  # [1.,0.]

    data_y = np_utils.to_categorical(data_y, 2)  # One-Hot encoding
    return np.array(data_x), np.array(data_y)
神经网络需要数值进行计算,需要对字符型类别标签进行编码,最容易想到的就是把他们编码成1、2、3…这种,但是这样也就出现了强行给它们定义了大小的问题,因为如果一个类别是2,一个是4,他们之间就会有两倍的关系,但是实际上他们之间并没有直接的倍数关系,所以这里使用one-hot编码规则,做到所有标签的平等化。
设置训练:
奈何我的电脑显存堪忧,一次性吞吐不了太多的数据,只好用generator的方式,一点一点的从数据池里拿小批量数据喂给网络
def generator(samples_X, samples_Y, batch_size=32):
    num_samples = len(samples_X)
    while 1:  # Loop forever so the generator never terminates
        for offset in range(0, num_samples, batch_size):
            batch_samples_X = samples_X[offset:offset+batch_size]
            batch_samples_Y = samples_Y[offset:offset+batch_size]

            yield sklearn.utils.shuffle(batch_samples_X, batch_samples_Y)
这里用SGD优化器,SGD(随机梯度下降),对于大量的图片数据库,SGD在执行梯度下降时,只需要抽取batch_size的样本放入神经网络计算。所以避免出现程序报错,出现电脑显存不足的情况。
用mse(均方差)来计算loss,计划训练300各回合,如果持续30个回合稳定便自动保存网络。(很实用!)
def train():
    model = AlexNet()
    # Load data
    X, Y = load_data()
    # split train and test data
    X_train, X_test, Y_train, Y_test = train_test_split(
        X, Y, test_size=0.3)
    # compile and train the model using the generator function
    train_generator = generator(X_train, Y_train, batch_size=batch_size)
    validation_generator = generator(X_test, Y_test, batch_size=batch_size)
    # 训练计划
    sgd = keras.optimizers.SGD(lr=0.01, decay=1e-6, momentum=0.7, nesterov=True)
    model.compile(loss='mse', optimizer=sgd)

    callbacks_list = [
        keras.callbacks.EarlyStopping(monitor='val_loss', patience=30),
        keras.callbacks.ModelCheckpoint(
            filepath=net_path + '/' + 'AlexNet_1.h5',
            monitor='val_loss', save_best_only=True)
    ]
    history = model.fit_generator(train_generator,
                                  steps_per_epoch=len(Y_train) / batch_size,
                                  validation_data=validation_generator,
                                  validation_steps=len(Y_test) / batch_size,
                                  epochs=300, verbose=2,
                                  callbacks=callbacks_list, shuffle=True)

    return history
起身离座,让显卡活动活动。
验证检测:
训练好后,我们的网络就保存成‘.h5’的文件,既包含网络的结构也包含训练好的weight值等等。
def one_hot_back(list):

    if list[0] > list[1]:
        return False   # [1., 0.]
    else:
        return True   # [0., 1.]

def display_error(imgs):
    for img in imgs:
        cv2.imshow('error', img)
        cv2.waitKey(0)

def validation():

    model = load_model(net_path + '/' + 'AlexNet_1.h5')
    # Load data
    X, Y = load_data()
    predict = model.predict(X)
    error = []
    for i in range(len(Y)):
        if one_hot_back(Y[i]) != one_hot_back(predict[i]):
            error.append(X[i])
    display_error(error)
    print('The total Face are {},There are {} face error!\n'
          'The Accuracy is {}'
          .format(len(Y), len(error), 1.-len(error)/len(Y)))
打印出错误的图像,并且计算准确率。
————————————————————————
实际测试中在训练了240个回合后,准确率能够达到98%,并且在数据集中加入新的照片也能正确识别。效果可期!
若有帮助,感谢点赞👍
来源:CSDN
作者:Double lee
链接:https://blog.csdn.net/weixin_43687753/article/details/104355678