以HttpServletRequest类型的使用为例,来演示默认数据类型绑定的使用
1.创建Web项目,并导入相关Jar包

2.在web.xml中配置Spring MVC的前端控制器等信息
<?xml version="1.0" encoding="UTF-8"?>
<web-app xmlns:xsi="http://www.w3.org/2001/XMLSchema-instance"
xmlns="http://java.sun.com/xml/ns/javaee"
xmlns:web="http://java.sun.com/xml/ns/javaee"
xsi:schemaLocation="http://java.sun.com/xml/ns/javaeehttp://java.sun.com/xml/ns/javaee/web-app_2_5.xsd"
 id="WebApp_ID" version="2.5">

    <servlet>
    <servlet-name>springmvc</servlet-name>
                 <servlet-class>org.springframework.web.servlet.DispatcherServlet</servlet-class>
    <init-param>
          <param-name>contextConfigLocation</param-name>
          <param-value>classpath:springmvc-config.xml</param-value>
    </init-param>
    <load-on-startup>1</load-on-startup>
         </servlet>
         <servlet-mapping>
    <servlet-name>springmvc</servlet-name>
    <url-pattern>/</url-pattern>
    </servlet-mapping>
 </web-app>
3.创建Spring MVC配置文件,并配置组件扫描器和视图解析器
<?xml version="1.0" encoding="UTF-8"?>
<beans xmlns="http://www.springframework.org/schema/beans"
 xmlns:aop="http://www.springframework.org/schema/aop" xmlns:tx="http://www.springframework.org/schema/tx"
 xmlns:xsi="http://www.w3.org/2001/XMLSchema-instance" xmlns:context="http://www.springframework.org/schema/context"
 xmlns:p="http://www.springframework.org/schema/p"
 xsi:schemaLocation="
          http://www.springframework.org/schema/beans
          http://www.springframework.org/schema/beans/spring-beans-4.3.xsd
          http://www.springframework.org/schema/tx
          http://www.springframework.org/schema/tx/spring-tx-4.3.xsd
          http://www.springframework.org/schema/context
          http://www.springframework.org/schema/context/spring-context-4.3.xsd
          http://www.springframework.org/schema/aop
          http://www.springframework.org/schema/aop/spring-aop-4.3.xsd"
 default-autowire="byName">
        <context:component-scan base-package = "com.itheima.controller"/>
        <bean id = "viewResolver" class = "org.springframework.web.servlet.view.InternalResourceViewResolver">
        <property name = "prefix" value = "/WEB-INF/jsp/"/>
        <property name = "suffix" value = ".jsp"/>

        </bean>
        </beans>
4.创建处理器类UserController
package com.itheima.controller;
import org.springframework.stereotype.Controller;
import org.springframework.ui.Model;
import org.springframework.web.bind.annotation.RequestMapping;
import javax.servlet.http.HttpServletRequest;
import javax.servlet.http.HttpServletResponse;
import org.springframework.web.servlet.ModelAndView;

@Controller

public class UserController {
	@RequestMapping("/selectUser")
	public String selectUser(HttpServletRequest request) {
		String id = request.getParameter("id");
		System.out.println("id="+id);
		return "success";
	}

}
5.创建访问成功后的相应页面success.jsp
     <html>
  <head>
  <meta http-equiv="Content-Type" content="text/html; charset=UTF-8">
  <title>Result page</title>
  </head>
  <body>
        ok
  </body>
     </html>
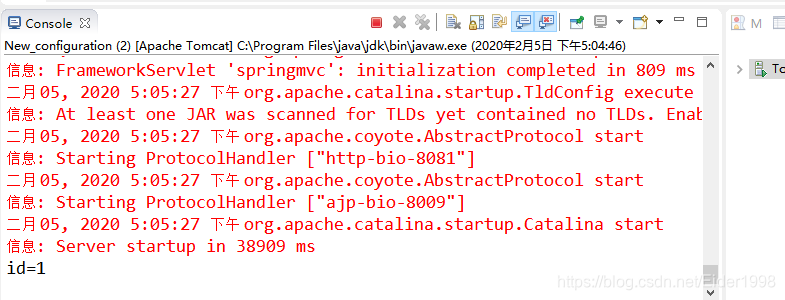
6.显示结果

启动Web项目,访问http://localhost:8080/chapter13/selectUser?id=1

来源:CSDN
作者:Eider1998
链接:https://blog.csdn.net/Eider1998/article/details/104186706