Springboot
一.SpringBoot简介:
Spring Boot可以让我们的spring应用变得更轻量化。例如:你可以紧靠一个java类来运行你的spring应用。你也可以把你的应用打包成jar,并通过java -jar来运行你的Spring Web应用。
Spring Boot的主要优点:
为Spring开发者更快入门;开箱即用,提供各种默认配置来简化项目配置;内嵌式容器简化Web项目;没有冗余代码生成和XML配置要求等。
二.写第一个SpringBoot项目“Hello World”
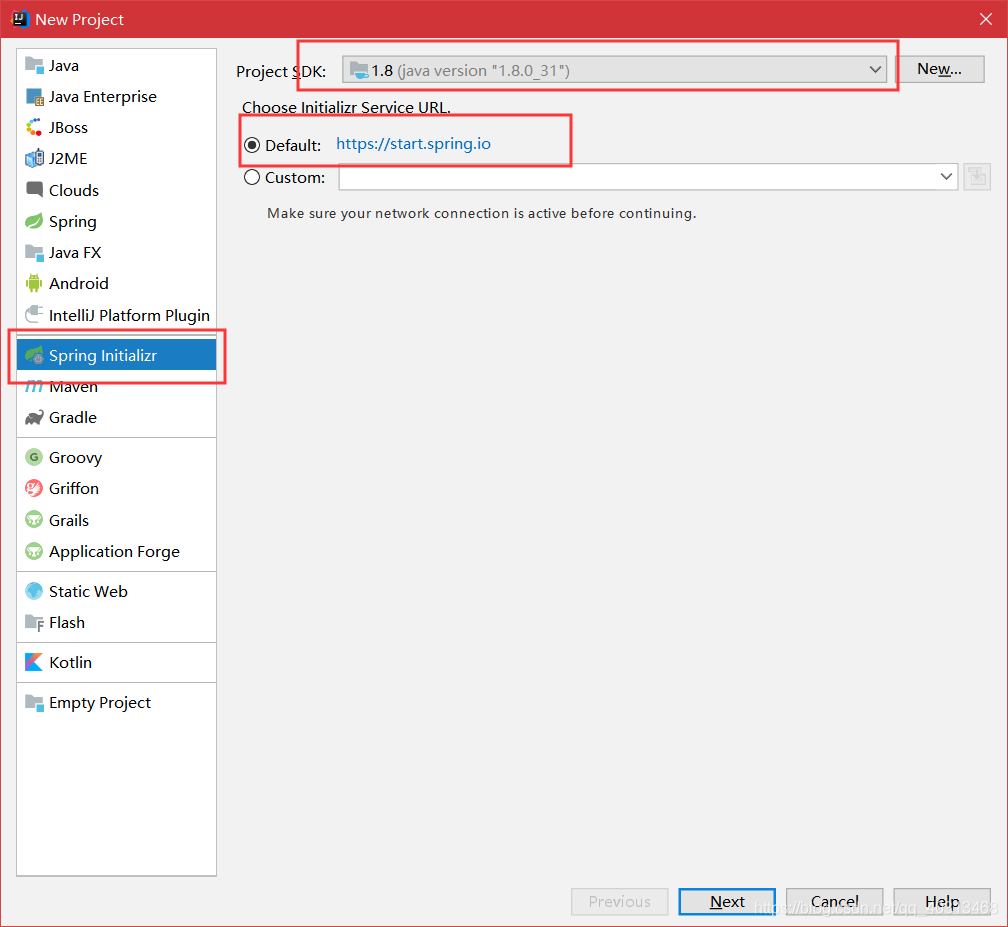
1.选择File---New---Project。

2.选择Spring初始化器-Spring Initializr,其他如果没有修改,选择默认即可,点击next。

3.这里我只修改了Group名称,其他根据实际情况修改,点击next。
 4.这里选择Web,勾选Spring Web,点击next。
 5.这里给项目命名,修改存储路径,点击Finish。

6.生成文件简介
pom.xml:
<?xml version="1.0" encoding="UTF-8"?>
<project xmlns="http://maven.apache.org/POM/4.0.0" xmlns:xsi="http://www.w3.org/2001/XMLSchema-instance"
         xsi:schemaLocation="http://maven.apache.org/POM/4.0.0 https://maven.apache.org/xsd/maven-4.0.0.xsd">
    <modelVersion>4.0.0</modelVersion>
    <parent>
        <!-- 这个特殊的依赖包含了应用运行需要的所有信息,它包含了Spring Boot应用所必须的类似于Spring FrameWork(spring-core)、
        Spring Test(spring-test)等基础依赖的依赖描述。你只需要使用这个parent pom就能完成所有的依赖描述添加工作。-->
        <groupId>org.springframework.boot</groupId>
        <artifactId>spring-boot-starter-parent</artifactId>
        <version>2.2.1.RELEASE</version>
        <relativePath/>
    </parent>
    <groupId>com.springboot</groupId>
    <artifactId>demo</artifactId>
    <version>0.0.1-SNAPSHOT</version>
    <name>demo</name>
    <description>Demo project for Spring Boot</description>

    <properties>
        <java.version>1.8</java.version>
    </properties>

    <dependencies>
        <!-- 添加这个依赖之后就可以创建一个web应用程序。starter poms部分可以引入所有需要在实际项目中使用的依赖。
         spring-boot-starter-web依赖包含所有的spring-core, spring-web, spring-webmvc,嵌入的Tomcat server和其他web应用相关的库。 -->
        <dependency>
            <groupId>org.springframework.boot</groupId>
            <artifactId>spring-boot-starter-web</artifactId>
        </dependency>
        <dependency>
            <groupId>org.springframework.boot</groupId>
            <artifactId>spring-boot-starter-test</artifactId>
            <scope>test</scope>
            <exclusions>
                <exclusion>
                    <groupId>org.junit.vintage</groupId>
                    <artifactId>junit-vintage-engine</artifactId>
                </exclusion>
            </exclusions>
        </dependency>
    </dependencies>

    <build>
        <plugins>
            <plugin>
                <groupId>org.springframework.boot</groupId>
                <artifactId>spring-boot-maven-plugin</artifactId>
            </plugin>
        </plugins>
    </build>

</project>
7.这里我将DemoApplication.java作了简单修改实现我想要的功能。
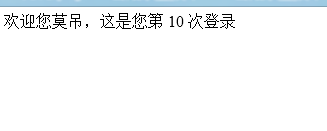
 运行结果如下:

从控制台可以看到Springboot有内嵌式Tomcat。
运行地址:http://localhost:8080/admin/home

注解说明:
@EnableAutoConfiguration:作用在于让 Spring Boot   根据应用所声明的依赖来对 Spring 框架进行自动配置
 这个注解告诉Spring Boot根据添加的jar依赖猜测你想如何配置Spring。由于spring-boot-starter-web添加了Tomcat和Spring MVC,所以auto-configuration将假定你正在开发一个web应用并相应地对Spring进行设置。
@RestController:在上加上RestController 表示修饰该Controller所有的方法返回JSON格式,直接可以编写Restful接口。@RequestMapping:此注解提供的是路由信息。它告诉Spring任何来自“/”路径的请求都会被映射到home方法。
至此,一个简单的Springboot就已经创建好了。
三.Web开发。
我们在开发Web应用时,需要引用大量的js、css、图片等静态资源。
默认配置:
Springboot默认静态资源放在classpath下,目录名符合以下规则:
/static
/public
/resources
/META-INF/resources
例:我们可以在src/main/resources/static目录下放一个图片文件。启动程序后访问:http://localhost:8080/A.jpg。如果能显示图片,则配置成功。
四.全局捕获异常。
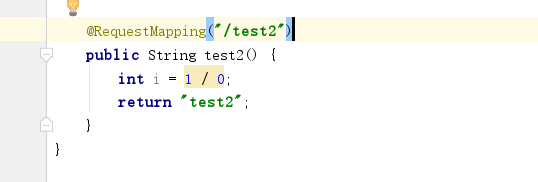
代码如下:
异常处理类:

注:@ControllerAdvice 定义全局异常处理类,
@ExceptionHandler 声明异常处理的方法。
Controller:

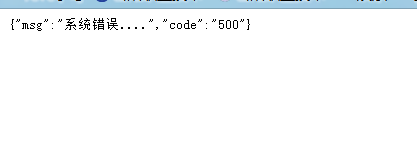
运行结果:

返回结果是json,没有报错,说明异常捕获成功。
五.渲染Web页面。
Springboot提供的默认配置的模板引擎有以下几种:
Thymeleaf、FreeMarker、Velocity、Groovy、Mustache。
避免使用JSP,因为无法实现SpringBoot多种特性,默认模板配置路径:src/main/resources/templates,也可以修改此路径。
使用FreeMarker模板引擎渲染web视图:
pom文件:
<!--引入freemarker依赖-->
<dependency>
    <groupId>org.springframework.boot</groupId>
    <artifactId>spring-boot-starter-freemarker</artifactId>
</dependency>
application.properties:
########################################################
###FREEMARKER (FreeMarkerAutoConfiguration)
########################################################
spring.freemarker.allow-request-override=false
spring.freemarker.cache=true
spring.freemarker.check-template-location=true
spring.freemarker.charset=UTF-8
spring.freemarker.content-type=text/html
spring.freemarker.expose-request-attributes=false
spring.freemarker.expose-session-attributes=false
spring.freemarker.expose-spring-macro-helpers=false
#spring.freemarker.prefix=
#spring.freemarker.request-context-attribute=
#spring.freemarker.settings.*=
spring.freemarker.suffix=.ftl
spring.freemarker.template-loader-path=classpath:/templates/
#comma-separated list
#spring.freemarker.view-names= # whitelist of view names that can be resolved
Controller:

index.ftl:


启动项目,运行结果如下:

使用JSP渲染Web页面。
pom:
<parent>
<groupId>org.springframework.boot</groupId>
<artifactId>spring-boot-starter-parent</artifactId>
<version>1.3.3.RELEASE</version>
</parent>
<dependencies>
<!-- SpringBoot 核心组件 -->
<dependency>
<groupId>org.springframework.boot</groupId>
<artifactId>spring-boot-starter-web</artifactId>
</dependency>
<dependency>
<groupId>org.springframework.boot</groupId>
<artifactId>spring-boot-starter-tomcat</artifactId>
</dependency>
<dependency>
<groupId>org.apache.tomcat.embed</groupId>
<artifactId>tomcat-embed-jasper</artifactId>
</dependency>
</dependencies>
application.properties:
spring.mvc.view.prefix=/WEB-INF/jsp/
spring.mvc.view.suffix=.jsp
六.数据访问。
SpringBoot整合mybatis:
引入依赖:

配置mysql:

这里使用注解实现简单的查询:
controller:

mapper:

启动类:

数据库:

查询显示结果:

七.Springboot整合jpa。
定义:JPA 即Java Persistence API。
JPA 是一个基于O/R映射的标准规范(目前最新版本是JPA 2.1 )。所谓规范即只定义标准规则(如注解、接口),不提供实现,软件提供商可以按照标准规范来实现,而使用者只需按照规范中定义的方式来使用,而不用和软件提供商的实现打交道。
JPA的出现有两个原因:
简化现有Java EE和Java SE应用的对象持久化的开发工作;
Sun希望整合对ORM技术,实现持久化领域的统一。
JPA 的主要实现有Hibernate、EclipseLink 和OpenJPA 等,这也意味着我们只要使用JPA 来开发,无论是哪一个开发方式都是一样的。
JPA通过JDK 5.0注解或XML描述对象-关系表的映射关系,并将运行期的实体对象持久化到数据库中。
引入依赖:

配置数据源文件:

代码:

注:jpa的版本高,使用findById(id).get(),不过这个如果值不存在会抛异常,所以要先做判断,值存在再get(),或者就是写在try-catch里。也可以用它的findById(id).orElse(null); 如果不存在会返回null不会抛异常 。

部分实体类:

启动类:

启动后运行结果:

来源:CSDN
作者:命硬的一批
链接:https://blog.csdn.net/qq_40313468/article/details/103358667