七、 Rabbit 交换器讲解

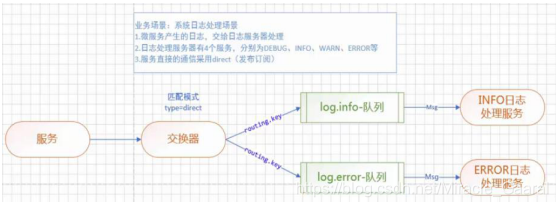
1 Direct 交换器(发布与订阅 完全匹配)
1.1需求

1.2搭建环境
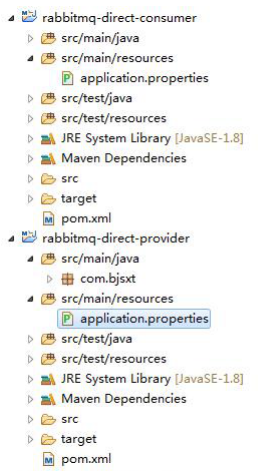
1.2.1创建项目

1.2.2修改全局配置文件
修改 Consumer 的配置文件
spring.application.name=springcloud-mq
spring.rabbitmq.host=192.168.70.131
spring.rabbitmq.port=5672
spring.rabbitmq.username=oldlu
spring.rabbitmq.password=123456
#设置交换器的名称
mq.config.exchange=log.direct
#info 队列名称
mq.config.queue.info=log.info
#info 路由键
mq.config.queue.info.routing.key=log.info.routing.key
#error 队列名称
mq.config.queue.error=log.error
#error 路由键
mq.config.queue.error.routing.key=log.error.routing.key
修改 Provider 的配置文件
spring.application.name=springcloud-mq
spring.rabbitmq.host=192.168.70.131
spring.rabbitmq.port=5672
spring.rabbitmq.username=oldlu
spring.rabbitmq.password=123456
#设置交换器的名称
mq.config.exchange=log.direct
#info 路由键
mq.config.queue.info.routing.key=log.info.routing.key
#error 路由键
mq.config.queue.error.routing.key=log.error.routing.key
1.3编写 Consumer
InfoReceiver
package com.bjsxt;

import org.springframework.amqp.core.ExchangeTypes;
import org.springframework.amqp.rabbit.annotation.Exchange;
import org.springframework.amqp.rabbit.annotation.Queue;
import org.springframework.amqp.rabbit.annotation.QueueBinding;
import org.springframework.amqp.rabbit.annotation.RabbitHandler;
import org.springframework.amqp.rabbit.annotation.RabbitListener;
import org.springframework.stereotype.Component;

/**
 * 消息接收者
 * @author Administrator
 * @RabbitListener bindings:绑定队列
 * @QueueBinding  value:绑定队列的名称
 *                exchange:配置交换器
 *
 * @Queue value:配置队列名称
 *        autoDelete:是否是一个可删除的临时队列
 *
 * @Exchange value:为交换器起个名称
 *           type:指定具体的交换器类型
 */
@Component
@RabbitListener(
			bindings=@QueueBinding(
					value=@Queue(value="${mq.config.queue.info}",autoDelete="true"),
					exchange=@Exchange(value="${mq.config.exchange}",type=ExchangeTypes.DIRECT),
					key="${mq.config.queue.info.routing.key}"
			)
		)
public class InfoReceiver {

	/**
	 * 接收消息的方法。采用消息队列监听机制
	 * @param msg
	 */
	@RabbitHandler
	public void process(String msg){
		System.out.println("Info........receiver: "+msg);
	}
}
ErrorReceiver
package com.bjsxt;

import org.springframework.amqp.core.ExchangeTypes;
import org.springframework.amqp.rabbit.annotation.Exchange;
import org.springframework.amqp.rabbit.annotation.Queue;
import org.springframework.amqp.rabbit.annotation.QueueBinding;
import org.springframework.amqp.rabbit.annotation.RabbitHandler;
import org.springframework.amqp.rabbit.annotation.RabbitListener;
import org.springframework.stereotype.Component;

/**
 * 消息接收者
 * @author Administrator
 * @RabbitListener bindings:绑定队列
 * @QueueBinding  value:绑定队列的名称
 *                exchange:配置交换器
 *
 * @Queue value:配置队列名称
 *        autoDelete:是否是一个可删除的临时队列
 *
 * @Exchange value:为交换器起个名称
 *           type:指定具体的交换器类型
 */
@Component
@RabbitListener(
			bindings=@QueueBinding(
					value=@Queue(value="${mq.config.queue.error}",autoDelete="true"),
					exchange=@Exchange(value="${mq.config.exchange}",type=ExchangeTypes.DIRECT),
					key="${mq.config.queue.error.routing.key}"
			)
		)
public class ErrorReceiver {

	/**
	 * 接收消息的方法。采用消息队列监听机制
	 * @param msg
	 */
	@RabbitHandler
	public void process(String msg){
		System.out.println("Error..........receiver: "+msg);
	}
}
1.4编写 Provider
package com.bjsxt;

import org.springframework.amqp.core.AmqpTemplate;
import org.springframework.beans.factory.annotation.Autowired;
import org.springframework.beans.factory.annotation.Value;
import org.springframework.stereotype.Component;

/**
 * 消息发送者
 * @author Administrator
 *
 */
@Component
public class Sender {

	@Autowired
	private AmqpTemplate rabbitAmqpTemplate;

	//exchange 交换器名称
	@Value("${mq.config.exchange}")
	private String exchange;

	//routingkey 路由键
	@Value("${mq.config.queue.error.routing.key}")
	private String routingkey;
	/*
	 * 发送消息的方法
	 */
	public void send(String msg){
		//向消息队列发送消息
		//参数一:交换器名称。
		//参数二:路由键
		//参数三:消息
		this.rabbitAmqpTemplate.convertAndSend(this.exchange, this.routingkey, msg);
	}
}
2 Topic 交换器(主题,规则匹配)
2.1需求

2.2搭建环境
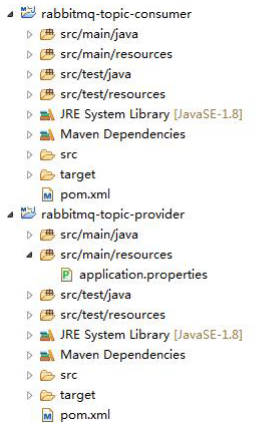
2.2.1创建项目

2.2.2修改配置文件
Provider
spring.application.name=springcloud-mq
spring.rabbitmq.host=192.168.70.131
spring.rabbitmq.port=5672
spring.rabbitmq.username=oldlu
spring.rabbitmq.password=123456
#设置交换器的名称
mq.config.exchange=log.topic
Consumer
spring.application.name=springcloud-mq
spring.rabbitmq.host=192.168.70.131
spring.rabbitmq.port=5672
spring.rabbitmq.username=oldlu
spring.rabbitmq.password=123456
#设置交换器的名称
mq.config.exchange=log.topic
#info 队列名称
mq.config.queue.info=log.info
#error 队列名称
mq.config.queue.error=log.error
#log 队列名称
mq.config.queue.logs=log.all
2.3编写 Provider
UserSender
/**
 * 消息发送者
 * @author Administrator
 *
 */
@Component
public class UserSender {

	@Autowired
	private AmqpTemplate rabbitAmqpTemplate;

	//exchange 交换器名称
	@Value("${mq.config.exchange}")
	private String exchange;

	/*
	 * 发送消息的方法
	 */
	public void send(String msg){
		//向消息队列发送消息
		//参数一:交换器名称。
		//参数二:路由键
		//参数三:消息
		this.rabbitAmqpTemplate.convertAndSend(this.exchange,"user.log.debug", "user.log.debug....."+msg);
		this.rabbitAmqpTemplate.convertAndSend(this.exchange,"user.log.info", "user.log.info....."+msg);
		this.rabbitAmqpTemplate.convertAndSend(this.exchange,"user.log.warn","user.log.warn....."+msg);
		this.rabbitAmqpTemplate.convertAndSend(this.exchange,"user.log.error", "user.log.error....."+msg);
	}
}
ProductSender
/**
 * 消息发送者
 * @author Administrator
 *
 */
@Component
public class ProductSender {

	@Autowired
	private AmqpTemplate rabbitAmqpTemplate;

	//exchange 交换器名称
	@Value("${mq.config.exchange}")
	private String exchange;

	/*
	 * 发送消息的方法
	 */
	public void send(String msg){
		//向消息队列发送消息
		//参数一:交换器名称。
		//参数二:路由键
		//参数三:消息
		this.rabbitAmqpTemplate.convertAndSend(this.exchange,"product.log.debug", "product.log.debug....."+msg);
		this.rabbitAmqpTemplate.convertAndSend(this.exchange,"product.log.info", "product.log.info....."+msg);
		this.rabbitAmqpTemplate.convertAndSend(this.exchange,"product.log.warn","product.log.warn....."+msg);
		this.rabbitAmqpTemplate.convertAndSend(this.exchange,"product.log.error", "product.log.error....."+msg);
	}
}
OrderSender
/**
 * 消息发送者
 * @author Administrator
 *
 */
@Component
public class OrderSender {

	@Autowired
	private AmqpTemplate rabbitAmqpTemplate;

	//exchange 交换器名称
	@Value("${mq.config.exchange}")
	private String exchange;

	/*
	 * 发送消息的方法
	 */
	public void send(String msg){
		//向消息队列发送消息
		//参数一:交换器名称。
		//参数二:路由键
		//参数三:消息
		this.rabbitAmqpTemplate.convertAndSend(this.exchange,"order.log.debug", "order.log.debug....."+msg);
		this.rabbitAmqpTemplate.convertAndSend(this.exchange,"order.log.info", "order.log.info....."+msg);
		this.rabbitAmqpTemplate.convertAndSend(this.exchange,"order.log.warn","order.log.warn....."+msg);
		this.rabbitAmqpTemplate.convertAndSend(this.exchange,"order.log.error", "order.log.error....."+msg);
	}
}
2.4编写 Consumer
InfoReceiver
/**
 * 消息接收者
 * @author Administrator
 * @RabbitListener bindings:绑定队列
 * @QueueBinding  value:绑定队列的名称
 *                exchange:配置交换器
 *
 * @Queue value:配置队列名称
 *        autoDelete:是否是一个可删除的临时队列
 *
 * @Exchange value:为交换器起个名称
 *           type:指定具体的交换器类型
 */
@Component
@RabbitListener(
			bindings=@QueueBinding(
					value=@Queue(value="${mq.config.queue.info}",autoDelete="true"),
					exchange=@Exchange(value="${mq.config.exchange}",type=ExchangeTypes.TOPIC),
					key="*.log.info"
			)
		)
public class InfoReceiver {

	/**
	 * 接收消息的方法。采用消息队列监听机制
	 * @param msg
	 */
	@RabbitHandler
	public void process(String msg){
		System.out.println("......Info........receiver: "+msg);
	}
}
ErrorReceiver
/**
 * 消息接收者
 * @author Administrator
 * @RabbitListener bindings:绑定队列
 * @QueueBinding  value:绑定队列的名称
 *                exchange:配置交换器
 *
 * @Queue value:配置队列名称
 *        autoDelete:是否是一个可删除的临时队列
 *
 * @Exchange value:为交换器起个名称
 *           type:指定具体的交换器类型
 */
@Component
@RabbitListener(
			bindings=@QueueBinding(
					value=@Queue(value="${mq.config.queue.error}",autoDelete="true"),
					exchange=@Exchange(value="${mq.config.exchange}",type=ExchangeTypes.TOPIC),
					key="*.log.error"
			)
		)
public class ErrorReceiver {

	/**
	 * 接收消息的方法。采用消息队列监听机制
	 * @param msg
	 */
	@RabbitHandler
	public void process(String msg){
		System.out.println("......Error........receiver: "+msg);
	}
}
LogsReceiver
/**
 * 消息接收者
 * @author Administrator
 * @RabbitListener bindings:绑定队列
 * @QueueBinding  value:绑定队列的名称
 *                exchange:配置交换器
 *
 * @Queue value:配置队列名称
 *        autoDelete:是否是一个可删除的临时队列
 *
 * @Exchange value:为交换器起个名称
 *           type:指定具体的交换器类型
 */
@Component
@RabbitListener(
			bindings=@QueueBinding(
					value=@Queue(value="${mq.config.queue.logs}",autoDelete="true"),
					exchange=@Exchange(value="${mq.config.exchange}",type=ExchangeTypes.TOPIC),
					key="*.log.*"
			)
		)
public class LogsReceiver {

	/**
	 * 接收消息的方法。采用消息队列监听机制
	 * @param msg
	 */
	@RabbitHandler
	public void process(String msg){
		System.out.println("......All........receiver: "+msg);
	}
}
测试代码
/**
 * 消息队列测试类
 * @author Administrator
 *
 */
@RunWith(SpringRunner.class)
@SpringBootTest(classes=SpringbootServerApplication.class)
public class QueueTest {

	@Autowired
	private UserSender usersender;

	@Autowired
	private ProductSender productsender;

	@Autowired
	private OrderSender ordersender;

	/*
	 * 测试消息队列
	 */
	@Test
	public void test1(){
		this.usersender.send("UserSender.....");
		this.productsender.send("ProductSender....");
		this.ordersender.send("OrderSender......");
	}
}
3 Fanout 交换器(广播)
3.1需求

3.2搭建环境
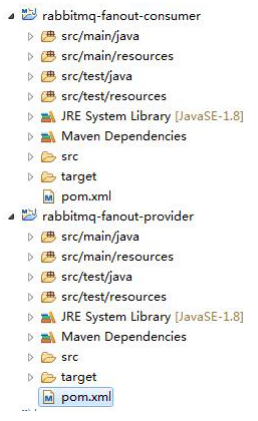
3.2.1创建项目

3.2.2修改配置文件
Consumer
spring.application.name=springcloud-mq
spring.rabbitmq.host=192.168.70.131
spring.rabbitmq.port=5672
spring.rabbitmq.username=oldlu
spring.rabbitmq.password=123456
#设置交换器的名称
mq.config.exchange=order.fanout
#短信服务队列名称
mq.config.queue.sms=order.sms
#push 服务队列名称
mq.config.queue.push=order.push
Provider
spring.application.name=springcloud-mq
spring.rabbitmq.host=192.168.70.131
spring.rabbitmq.port=5672
spring.rabbitmq.username=oldlu
spring.rabbitmq.password=123456
#设置交换器的名称
mq.config.exchange=order.fanout
3.3编写 Consumer
SmsReceiver
/**
 * 消息接收者
 * @author Administrator
 * @RabbitListener bindings:绑定队列
 * @QueueBinding  value:绑定队列的名称
 *                exchange:配置交换器
 *                key:路由键
 *
 * @Queue value:配置队列名称
 *        autoDelete:是否是一个可删除的临时队列
 *
 * @Exchange value:为交换器起个名称
 *           type:指定具体的交换器类型
 */
@Component
@RabbitListener(
			bindings=@QueueBinding(
					value=@Queue(value="${mq.config.queue.sms}",autoDelete="true"),
					exchange=@Exchange(value="${mq.config.exchange}",type=ExchangeTypes.FANOUT)
			)
		)
public class SmsReceiver {

	/**
	 * 接收消息的方法。采用消息队列监听机制
	 * @param msg
	 */
	@RabbitHandler
	public void process(String msg){
		System.out.println("Sms........receiver: "+msg);
	}
}
PushReceiver
/**
 * 消息接收者
 * @author Administrator
 * @RabbitListener bindings:绑定队列
 * @QueueBinding  value:绑定队列的名称
 *                exchange:配置交换器
 *
 * @Queue value:配置队列名称
 *        autoDelete:是否是一个可删除的临时队列
 *
 * @Exchange value:为交换器起个名称
 *           type:指定具体的交换器类型
 */
@Component
@RabbitListener(
			bindings=@QueueBinding(
					value=@Queue(value="${mq.config.queue.push}",autoDelete="true"),
					exchange=@Exchange(value="${mq.config.exchange}",type=ExchangeTypes.FANOUT)
			)
		)
public class PushReceiver {

	/**
	 * 接收消息的方法。采用消息队列监听机制
	 * @param msg
	 */
	@RabbitHandler
	public void process(String msg){
		System.out.println("Push..........receiver: "+msg);
	}
}
3.4编写 Provider
/**
 * 消息发送者
 * @author Administrator
 *
 */
@Component
public class Sender {

	@Autowired
	private AmqpTemplate rabbitAmqpTemplate;

	//exchange 交换器名称
	@Value("${mq.config.exchange}")
	private String exchange;

	/*
	 * 发送消息的方法
	 */
	public void send(String msg){
		//向消息队列发送消息
		//参数一:交换器名称。
		//参数二:路由键
		//参数三:消息
		this.rabbitAmqpTemplate.convertAndSend(this.exchange,"", msg);
	}
}
来源:CSDN
作者:Miracle_Gaaral
链接:https://blog.csdn.net/Miracle_Gaaral/article/details/103028098