原文:https://www.sunjianhua.cn/archives/centos-rabbitmq.html
一、RabbitMQ 单节点
1.1、Windows 版安装配置
1.1.1 安装Erlang环境
下载地址: http://www.erlang.org/downloads
文件: http://erlang.org/download/otp_win64_20.3.exe
安装: 一直下一步安装结束!
1.1.2 安装RabbitMQ
默认安装:https://www.rabbitmq.com/install-windows.html
文件:https://dl.bintray.com/rabbitmq/all/rabbitmq-server/3.7.5/rabbitmq-server-3.7.5.exe
安装:一直下一步安装结束!
1.1.3 配置管理插件
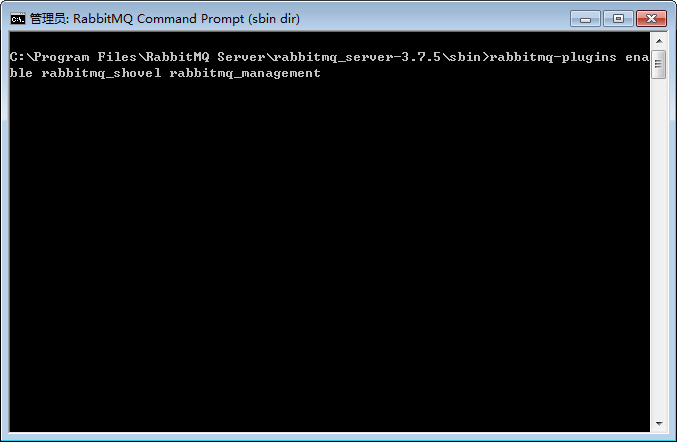
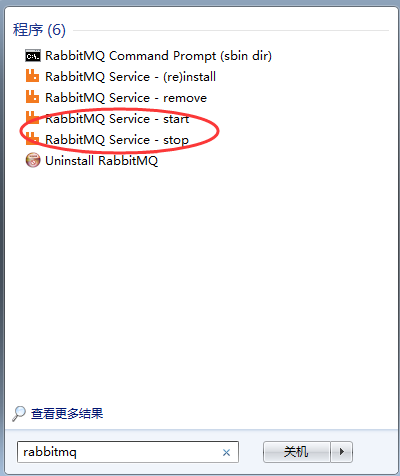
A.开始菜单出搜索rabbitmq,打开RabbitMQ Command Prompt命令行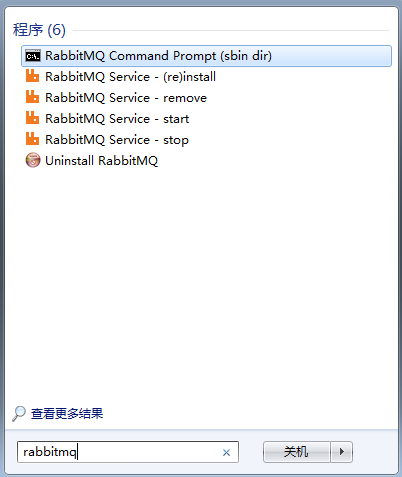
B.启动管理插件
https://www.rabbitmq.com/rabbitmq-plugins.8.html
C.访问RabbitMQ管理地址:http://127.0.0.1:15672,默认密码:guest/guest
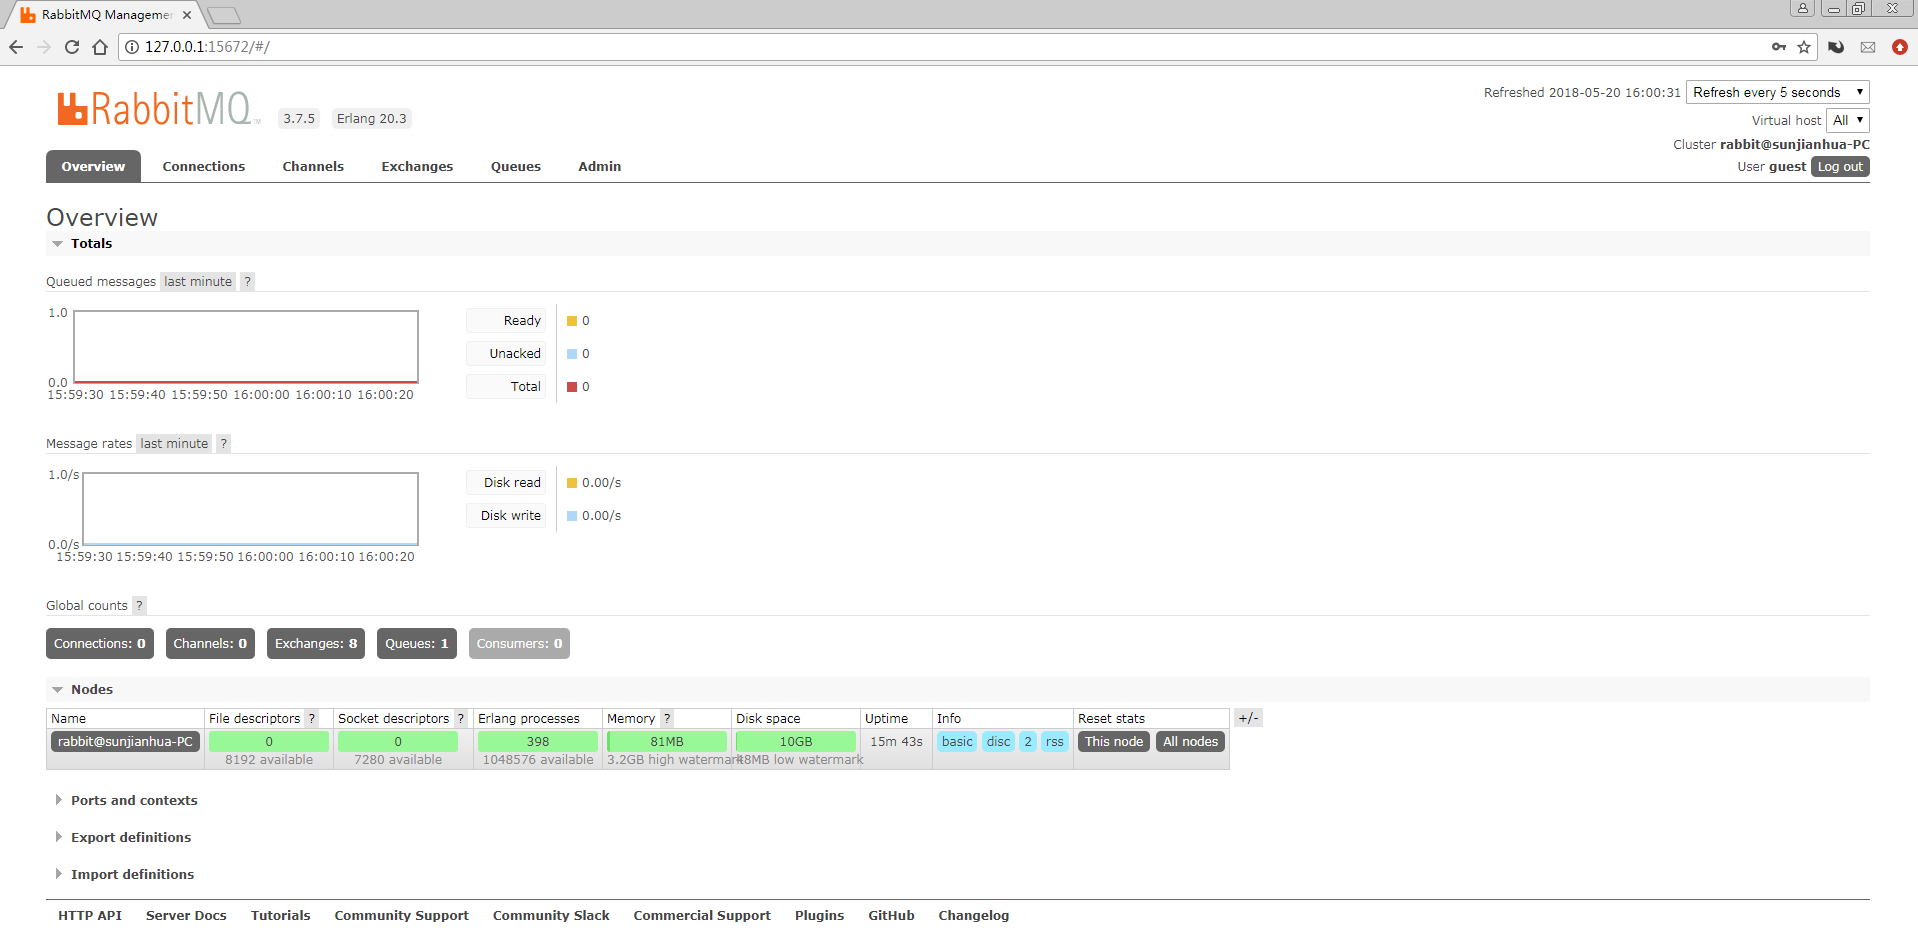
1.2、Linux CE 版 (centos7 )
系统:CentOS Linux release 7.4.1708
地址:192.168.2.113
1.2.1 安装Erlang环境
http://www.rabbitmq.com/install-rpm.html
https://www.erlang-solutions.com/resources/download.html
> wget https://packages.erlang-solutions.com/erlang-solutions-1.0-1.noarch.rpm
> rpm -Uvh erlang-solutions-1.0-1.noarch.rpm
> rpm --import https://packages.erlang-solutions.com/rpm/erlang_solutions.asc > yum install epel-release -y > sudo yum install erlang  #验证:终端输入 erl ,出现如下图,安装成功!
1.2.2 安装RabbitMQ
https://www.rabbitmq.com/install-rpm.html
#安装:
> wget https://dl.bintray.com/rabbitmq/all/rabbitmq-server/3.7.5/rabbitmq-server-3.7.5-1.el7.noarch.rpm
 > rpm --import https://www.rabbitmq.com/rabbitmq-release-signing-key.asc  > yum install rabbitmq-server-3.7.5-1.el7.noarch.rpm  #开机启动: > systemctl enable rabbitmq-server.service  #启动: > systemctl start rabbitmq-server.service  #停止: > systemctl stop rabbitmq-server.service  #查看状态: > systemctl status rabbitmq-server.service
1.2.3 配置管理插件
#A.开启插件
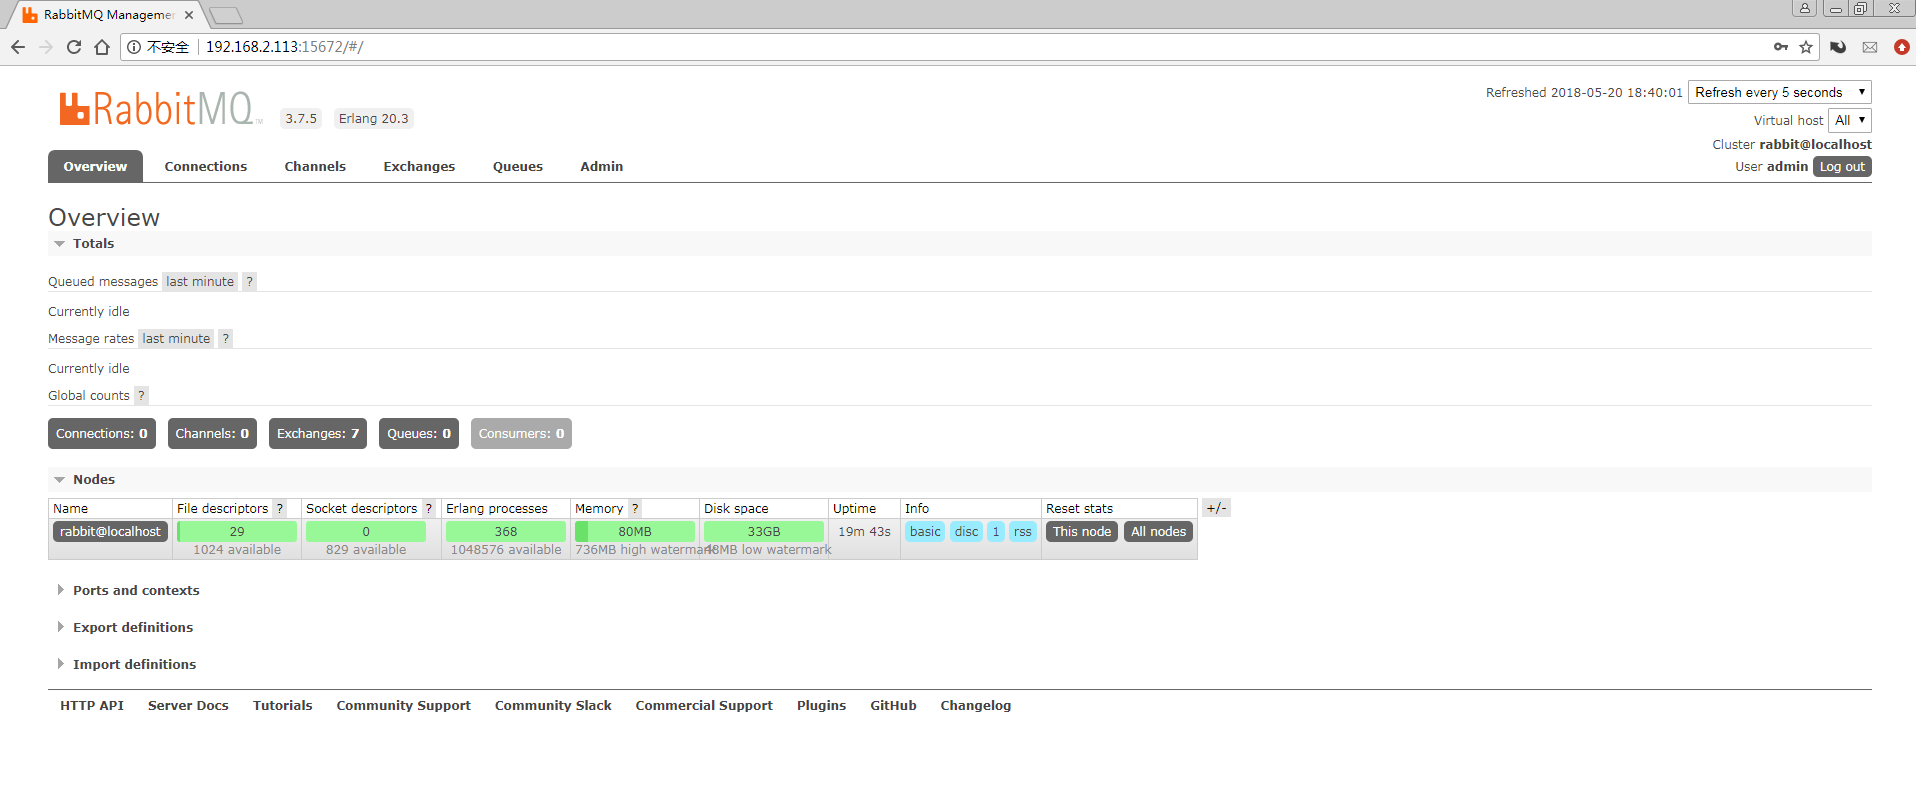
> rabbitmq-plugins enable rabbitmq_management  #B.添加用户  > sudo rabbitmqctl add_user admin 123456 > sudo rabbitmqctl set_user_tags admin administrator > sudo rabbitmqctl set_permissions -p / admin ".*" ".*" ".*"  #C.重启查看 > systemctl restart rabbitmq-server.service  #关闭防火墙: 管理地址: http://192.168.2.113:15672/
1.2.4 卸载
> yum erase rabbitmq-server -y
> rm -rf /var/lib/rabbitmq/
> rm -rf /etc/rabbitmq
二、RabbitMQ 集群
https://www.rabbitmq.com/clustering.html
系统:CentOS Linux release 7.4.1708
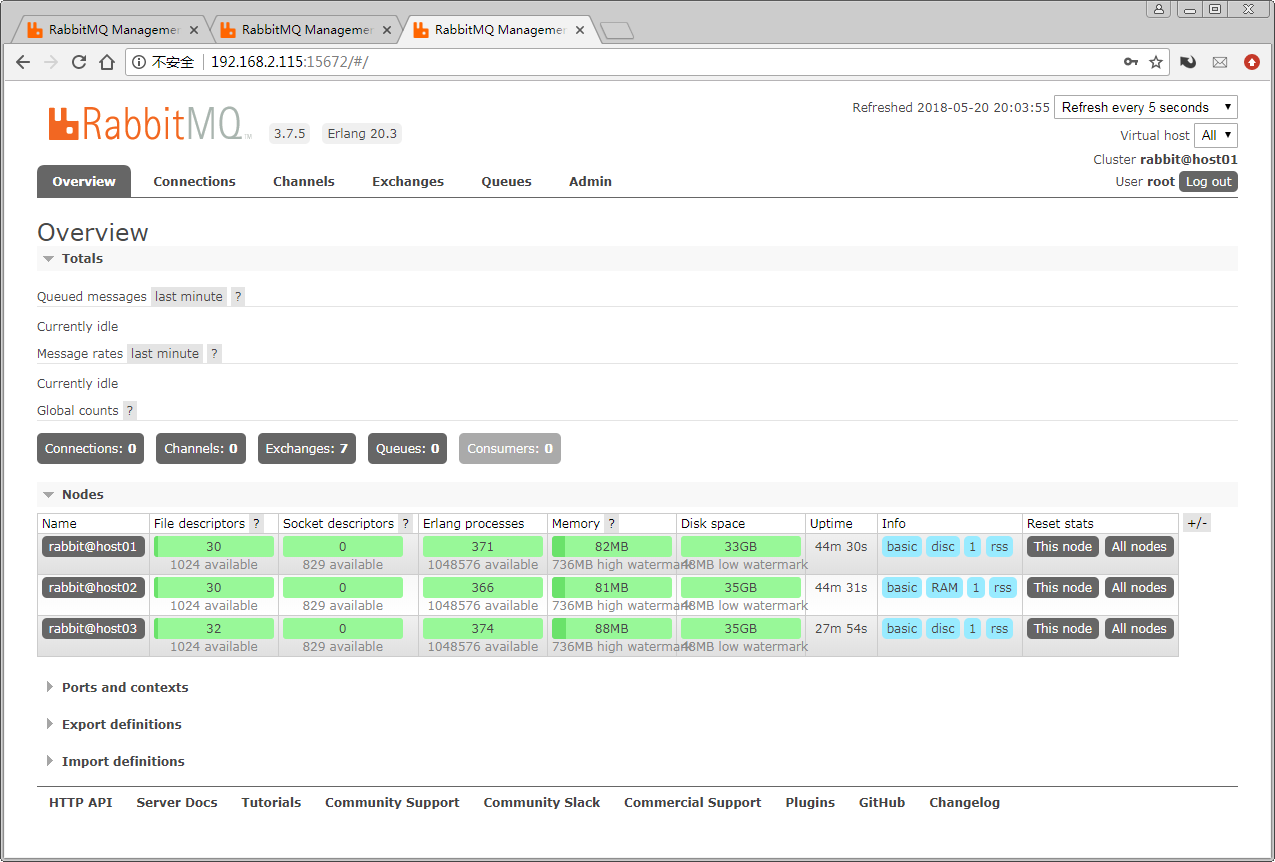
192.168.2.113 hostname host01 存储方式是Disk 硬盘
192.168.2.114 hostname host02 存储方式是RAM 内存
192.168.2.115 hostname host03 存储方式是Disk 硬盘
2.1、安装
三台服务器同时安装Linux CE版,同单机方式
2.2、配置
2.2.1 设置hosts
> vi /etc/hosts

192.168.2.113 host01
192.168.2.114 host02
192.168.2.115 host03
2.2.2 统一使用erlang.cookie
> scp -r /var/lib/rabbitmq/.erlang.cookie  rabbitmq02:/var/lib/rabbitmq/.erlang.cookie
> scp -r /var/lib/rabbitmq/.erlang.cookie  rabbitmq03:/var/lib/rabbitmq/.erlang.cookie
2.2.3 重启三个rabbitmq-server
> systemctl restart rabbitmq-server
查看日志:
2.2.4 创建集群
将rabbit@host02和rabbit@host03节点加入rabbit@host01
#在host02执行:
> rabbitmqctl stop_app
> rabbitmqctl join_cluster --ram rabbit@host01 > rabbitmqctl start app#在host03执行:
> rabbitmqctl stop_app
> rabbitmqctl join_cluster --ram rabbit@host01 > rabbitmqctl start app#然后在host01上查看集群:
> rabbitmqctl cluster_status#设置镜像策略:
> rabbitmqctl set_policy ha-all "^" '{"ha-mode":"all"}' 2.2.4 设置管理员
# 在host01上面设置管理员:
> sudo rabbitmqctl add_user root 123456
> sudo rabbitmqctl set_user_tags root administrator > sudo rabbitmqctl set_permissions -p / root ".*" ".*" ".*"
打开一下任意地址:
http://192.168.2.113:15672
http://192.168.2.114:15672
http://192.168.2.115:15672
2.3、常见命令
2.3.1 服务启动关闭
启动:systemctl start rabbitmq-server
重启:systemctl restart rabbitmq-server
关闭:systemctl stop rabbitmq-server 2.3.2 集群配置相关命令 停止节点:rabbitmqctl stop_app  重置节点:rabbitmqctl reset  将当前节点加入集群:rabbitmqctl join_cluster {rabbit_node_name} 集群状态:rabbitmqctl cluster_status  从当前节点剔除节点:rabbitmqctl forget_cluster_node {rabbit_node_name} 2.3.3 插件管理 查看插件列表: rabbitmq-plugins list 开启某个插件: rabbitmq-plugins enable {插件名}  关闭某个插件: rabbitmq-plugins disable {插件名} 2.3.4 用户管理 添加用户:rabbitmqctl add_user {username} {password}  删除用户:rabbitmqctl delete_user {username}  修改密码:rabbitmqctl change_password {username} {newpassword}  设置用户角色:rabbitmqctl set_user_tags {username} {tag}  tag可以为administrator, monitoring, management  举例:  rabbitmqctl add_user root 123456 rabbitmqctl set_user_tags root administrator  rabbitmqctl list_users 2.3.5 权限管理 权限设置:rabbitmqctl set_permissions [-p vhostpath] {user} {conf} {write} {read}      conf:一个正则表达式match哪些配置资源能够被该用户访问。      write:一个正则表达式match哪些配置资源能够被该用户读。      read:一个正则表达式match哪些配置资源能够被该用户访问。 查看(指定vhost)所有用户的权限信息:rabbitmqctl list_permissions [-p vhostPath]  查看指定用户的权限信息:rabbitmqctl list_user_permissions {username}  清除用户的权限信息: rabbitmqctl clear_permissions [-p vhostPath] {username} 举例:  rabbitmqctl set_permissions -p / root “.*” “.*” “.*” 2.3.6 获取服务器状态信息 服务器状态:rabbitmqctl status  队列信息: rabbitmqctl list_queues [-p vhostpath] [queueinfoitem …]  queueinfoitem可以为: name, durable, auto_delete, arguments, messages_ready, messages_unacknowled, messages, consumers, memory. Exchange信息: rabbitmqctl list_exchanges [-p vhostpath] [exchangeinfoitem …]  exchangeinfoitem有:name, type, durable, auto_delete, internal, arguments. Binding信息:rabbitmqctl list_bindings [-p vhostpath] [bindinginfoitem …]  bindinginfoitem有:source_name, source_kind, destination_name, destination_kind, routing_key, arguments.等 connection信息:rabbitmqctl list_connections [connectioninfoitem …]  connectioninfoitem有:recv_oct,recv_cnt,send_oct,send_cnt,send_pend等。 channel信息:rabbitmqctl list_channels [channelinfoitem …]  channelinfoitem有:consumer_count,messages_unacknowledged,messages_uncommitted,acks_uncommitted,messages_unconfirmed,prefetch_count,client_flow_blocked 举例:  rabbitmqctl list_queues name messages_ready pid slave_pids 2.3.7 更改节点类型 rabbitmqctl stop_app  rabbitmqctl change_cluster_node_type disc  或  rabbitmqctl change_cluster_node_type ram  rabbitmqctl start_app 2.3.8 vhost管理 添加vhost: rabbitmqctl add vhost {name}  删除vhost: rabbitmqctl delete vhost {name} 2.3.9 镜像队列的设置 镜像队列的配置通过添加policy完成,policy添加的命令为:  rabbitmqctl set_policy [-p Vhost] Name Pattern Definition [Priority]  -p Vhost: 可选参数,针对指定vhost下的queue进行设置  Name: policy的名称  Pattern: queue的匹配模式(正则表达式)  Definition: 镜像定义,包括三个部分 ha-mode,ha-params,ha-sync-mode      ha-mode: 指明镜像队列的模式,有效值为 all/exactly/nodes          all表示在集群所有的节点上进行镜像          exactly表示在指定个数的节点上进行镜像,节点的个数由ha-params指定          nodes表示在指定的节点上进行镜像,节点名称通过ha-params指定      ha-params: ha-mode模式需要用到的参数      ha-sync-mode: 镜像队列中消息的同步方式,有效值为automatic,manually  Priority: 可选参数, policy的优先级 例如,对队列名称以hello开头的所有队列进行镜像,并在集群的两个节点上完成镜像,policy的设置命令为:  rabbitmqctl set_policy hello-ha “^hello” ‘{“ha-mode”:”exactly”,”ha-params”:2,”ha-sync-mode”:”automatic”}’
三、RabbitMQ 附录
3.1 参考文档
http://www.rabbitmq.com/getstarted.html
https://github.com/rabbitmq/rabbitmq-server
http://www.rabbitmq.com/install-rpm.html
https://www.rabbitmq.com/clustering.html
https://blog.csdn.net/jackliu16/article/details/79972121
https://blog.csdn.net/jinyidong/article/details/80003362
http://www.cnblogs.com/lylife/p/5584019.html
https://github.com/rabbitmq/erlang-rpm
https://www.erlang-solutions.com/resources/download.html
http://www.rabbitmq.com/which-erlang.html
http://www.dahouduan.com/2017/11/22/centos6-yum-install-rabbitmq/
https://blog.csdn.net/happyzwh/article/details/53008803
来源:oschina
链接:https://my.oschina.net/u/4293665/blog/4061932
