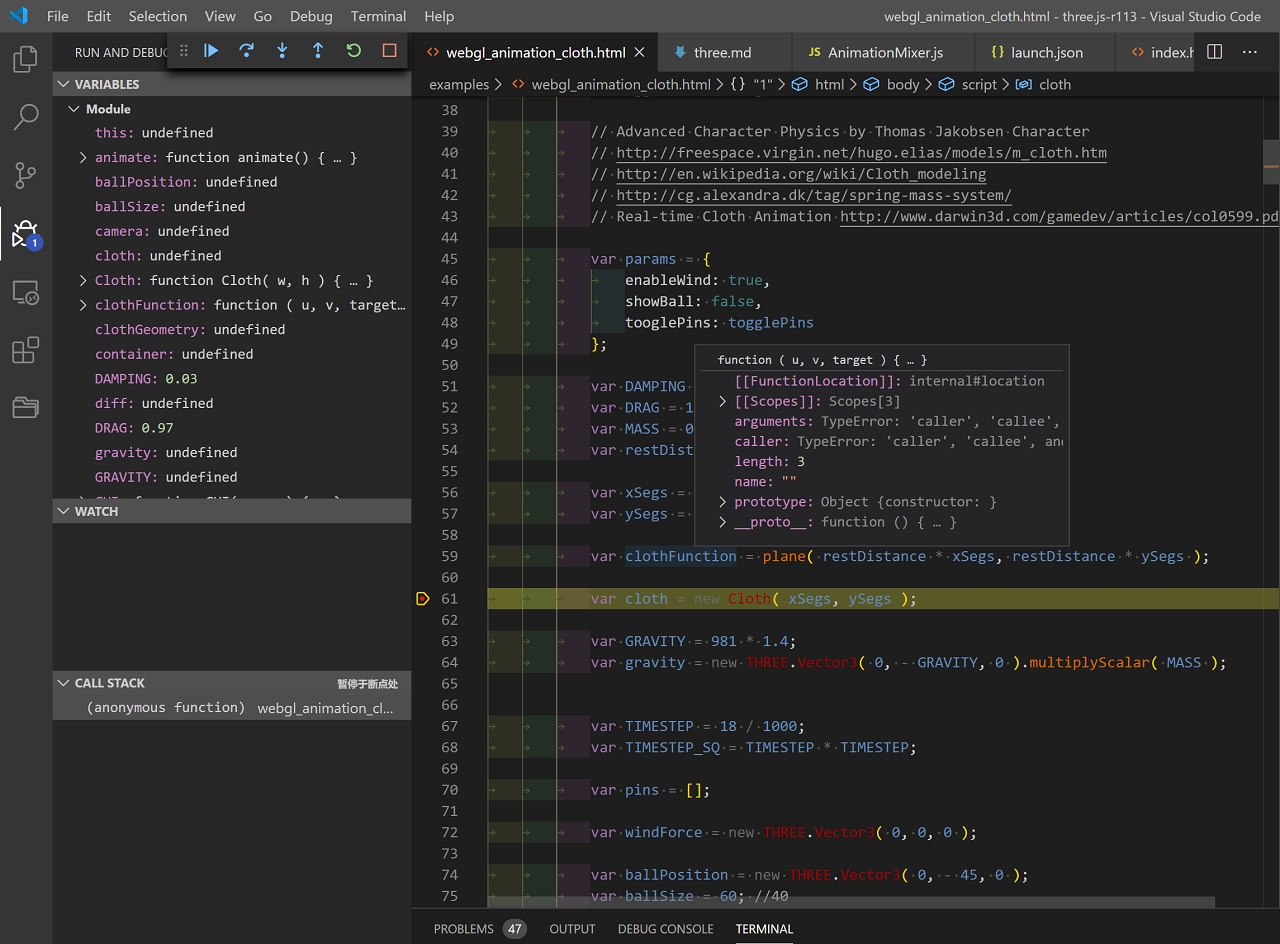
始终坚信阅读和调试结合的方式,才是学习开源的高效方法
一、老版本调试
遥想当年的threejs(使用版本为r75)还没有CommonJS,对于我这个小白可以拿起大刀大杀四方......(咳。咳。 就是拿来简单画个方块啥的。。。),使用vscode简单配置一下就可以老老实实的拜倒在我的淫威之下。这种小秘籍已经遍地都是,说出来也不怕大家偷学去。
1 准备
vscode + debugger for chrome
2 设置
打开html所在目录后,F5开始调试,选择chrome调试器

生成launch.json
{
    "version": "0.2.0",
    "configurations": [
        {
            "name": "Launch",
            "type": "chrome",
            "request": "launch",
            "webRoot": "${workspaceFolder}",
            "runtimeExecutable": "C:/Program Files (x86)/Google/Chrome/Application/chrome.exe",
            "file": "${workspaceFolder}/examples/canvas_geometry_birds.html",
            "runtimeArgs":["--allow-file-access-from-files"]
        }
    ]
}
主要设置的内容为runtimeExecutable,该参数为当前系统chrome浏览器的地址,file为要调试的网页地址;设置完成以后保存,找到要调试的网页,并在javascript段打上断点,然后F5启动调试,小功告成,欲要神功大成,先需。。,你懂的

二、新版本调试
由于今年开始使用导入导出功能,所以就需要进行版本的升级(r113),一跑代码,我去,开不了了,原来新版本已经引入CommonJs的理念,需要在服务端运行。好吧,继续捣鼓吧。
1 准备
vscode + debugger for chrome + nodejs
2 设置
我选择的是使用nodejs作为服务器,nodejs+npm的安装我就不多介绍了,小伙伴们自己找秘籍吧。如果想使用其他方法,建议参考Testing with NPM一文。
在vscode的terminal窗口进行npm的安装操作,建议国内的还是使用cnpm,不然要等到天荒地老。
cnpm install
然后
npm run dev
然后在命令窗口中看到
[HTTP] Starting up http-server, serving ./
[HTTP] Available on:
[HTTP]   http://192.168.1.144:8080
[HTTP]   http://127.0.0.1:8080
[HTTP] Hit CTRL-C to stop the server
ok,现在你的本地服务已经运行起了,可以记载网页进行调试了。
跟老版本的调试差不多,生成launch.json,配置参数略微调试
{
    "version": "0.2.0",
    "configurations": [
        {
            "type": "chrome",
            "request": "launch",
            "name": "Launch Chrome",
            "url": "http://localhost:8080/examples/#webgl_animation_cloth",
            "webRoot": "${workspaceFolder}"
        }
    ]
}
将url改成你要访问的文件路径,这里面使用的是路由的方式,注意没有.html。到你要调试的页面断点开始调试吧,祝你好运。

来源:https://www.cnblogs.com/chencarl/p/12367718.html