1.绑定事件指令 v-on
<button v-on:click="num++">+1</button>
<button @click="num++">+1</button>
<button @click="countSum()">+1</button>
<button @click="countSum">+1</button>

<button @click="say('傻逼')">快点我</button>

<script>
    new Vue({
        el:"#app",
        data:{
            num:0
        },
        methods:{
            countSum(){
                this.num = this.num + 1
            },
            say(msg){
                console.log(msg);
            }
        }
    })
</script>
2 计算属性
作用:可以代替的复杂的表达式
<!DOCTYPE html>
<html lang="en" xmlns:v-on="http://www.w3.org/1999/xhtml">
<head>
    <meta charset="UTF-8">
    <title>Title</title>
    <script type="text/javascript" src="node_modules/vue/dist/vue.js"></script>
</head>
<body>
    <div id="av">
        {{new Date(birthday).getFullYear()+"年"+new Date(birthday).getMonth()+"月"+new Date(birthday).getDate()+"日"}}
        {{birthday1}}
        {{getBirthday()}}
    </div>
    <script>
        new Vue({
            el:"#av",
            data:{
                num:0,
                birthday:1546272000
            },
            methods:{
                getBirthday(){
                    return new Date(this.birthday).getFullYear()+"年"+new Date(this.birthday).getMonth()+"月"+new Date(this.birthday).getDate()+"日";
                }
            },
            computed:{
                birthday1(){
                    return new Date(this.birthday).getFullYear()+"年"+new Date(this.birthday).getMonth()+"月"+new Date(this.birthday).getDate()+"日";
                }
            }
        })
    </script>
</body>
</html>
3 watch
<body>
<div id="app">
    <input type="text" v-model="msg"/>
</div>
<script>
    new Vue({
        el:"#app",
        data:{
           msg:''
        },
        methods:{

        },
        watch:{
            msg(newVal,oldVal){
                //可以获取上次改变的值-- 记录日志
                console.log(newVal,oldVal);

            }
        }
    })
</script>
</body>
4 Vue 组件
(1)以前组件: Component --easyui 组件 datagrid tabs menu…panel,dialog
Vue组件: 自定义的代码块或者自定义标签
(2)组件有什么用:
(1)可以反复使用
(2)完成一些功能
(3)vue里面组件分类
全局组件:任意地方都可以使用,任意挂载的标签都使用
局部组件:只能在当前的挂载的标签里面的使用
vue组件是vue里面比较重要知识点
(1) 全局组件
<body>
<div id="app1">
    <mycomponet1></mycomponet1>
    <mycomponet2></mycomponet2>
</div>
<div id="app2">
    <mycomponet1></mycomponet1>
    <mycomponet2></mycomponet2>
</div>
<script>
    //全局组件
    Vue.component("mycomponet1",{
        template:"<h1>1111111</h1>"
    });

    var mycomponet2={
        template:"<h1>22222222</h1>"
    }
    Vue.component("mycomponet2",mycomponet2);


    new Vue({
        el:"#app1"
    });

    new Vue({
        el:"#app2"
    });
</script>
</body>
(2)局部组件
<body>
<div id="app1">
    <mycomponet1></mycomponet1>
    <mycomponet2></mycomponet2>
</div>
<div id="app2">
    <mycomponet1></mycomponet1>
</div>
<script>


    new Vue({
        el:"#app1",
        components:{
            "mycomponet1":{
                template:"<h2>这是一个局部的组件1</h2>"
            },
            "mycomponet2":{
                template:"<h2>这是一个局部的组件2</h2>"
            }
        }
    });

    new Vue({
        el:"#app2"
    });
</script>
</body>
(3)组件里面模板写法
<body>
<div id="app1">
    <mycomponet1></mycomponet1>

</div>
<!--<template id="mytemplate">
    <h3>这是一个template写法1</h3>
</template>-->
<script type="text/template" id="mytemplate">
    <h1>template标签中的html</h1>
</script>
<script>


    // 写法一:直接template写字符串
  /*  new Vue({
        el:"#app1",
        components:{
            "mycomponet1":{
                template:"<h2>这是一个局部的组件</h2>"
            }
        }
    });*/
    //写法二:
    new Vue({
        el:"#app1",
        components:{
            "mycomponet1":{
                template:"#mytemplate"
            }
        }
    });


</script>
(4) 模板里面的数据必须函数
<div id="app1">
    <mycomponet1></mycomponet1>
    {{name}}

</div>
<template id="mytemplate">
    <form>
        {{name}}<input type="text" />
    </form>
</template>


<script>

    new Vue({
        el:"#app1",
        data:{
          "name":"用户名1111"
        },
        components:{
            "mycomponet1":{
                template:"#mytemplate",
                data:function(){
                    return {
                        "name":"用户名"
                    }
                }
            }
        }
    });


</script>
</body>
</html>
5 路由
路由器: 很多接口,通过接口 找到一台电脑
(1)路由使用
(1)安装 路由
npm install vue-router
npm uninstall vue-router
(2)在页面引用vue-router.js文件
<script type="text/javascript" src="node_modules/vue-router/dist/vue-router.js"></script>
(3)使用
<!DOCTYPE html>
<html lang="en" xmlns:v-on="http://www.w3.org/1999/xhtml">
<head>
<meta charset="UTF-8">
<title>Title</title>
<script type="text/javascript" src="node_modules/vue/dist/vue.js"></script>
<script type="text/javascript" src="node_modules/vue-router/dist/vue-router.js"></script>
</head>
<body>
<div id="av">
<!--相当于a标签 long 龙哥的组件-->
<router-link to="/">首页</router-link>
<router-link to="/leng">冷场</router-link>
<router-link to="/xiao">笑场</router-link>
<router-link to="/zhinan">宇宙超度指南</router-link>
<!-- 路由出口-->
<router-view></router-view>
</div>
<script>
//定义组件
var index = Vue.component("index",{
template:"<h1>李0</h1>"
});
var xiaoC = Vue.component("leng",{
template:"<h2>再错的事情人都能为自己找到借口,我们靠此苟活。</h2>"
});
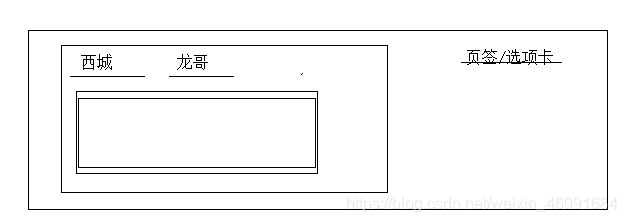
var lengC = Vue.component("xiao",{
template:"<h2>小北,他们有好多关于爱的道理。我有你。</h2>"
});
var zhinan = Vue.component("jinbo",{
template:"<h2>他们的飞船,叫奈何船,他们的顾客,称他们为度魂僧。这是一本宇宙超度指南。</h2>"
})
//创建一个路由
var routes1 = new VueRouter({
routes:[{
path:"/",
component:index
},{
path:"/leng",
component:lengC
},{
path:"/xiao",
component:xiaoC
},{
path:"/zhinan",
component:zhinan
}]
});
//把路由挂载到vue对象上面去
new Vue({
el:"#av",
data:{
"name":"用户名"
},
router:routes1
});
</script>
</body>
</html>
6 webpack 打包
把项目里面内容(js,css,img等)这些资料进行打包
(1) 为什么需要打包 -->项目开发完之后
(1)减少单页面内的衍生请求次数,提高网站效率
(2) 将ES6的高级语法进行转换编译,以兼容老版本的浏览器。
导入 导出
(3)可以进行代码混淆 提高安全性
(2) webpack
Webpack 是一个前端资源加载/打包工具。它将根据模块的依赖关系进行静态分
析,然后将这些模块按照指定的规则生成对应的静态资源。
(3) 使用webpack --打包js文件
(1)下载安装
npm install -g webpack
npm install -g webpack-cli
(2)创建两个js文件
a.js
var a = "a模块";
var b = require('./b.js');

console.log(a);
console.log(b);
b.js
define(function () {
    var b = "b模块";
    return b;
});
执行命令:
webpack src/a.js -o dist/bundle.js
(4) css打包
步骤一:
npm install style-loader --save-dev
npm install css-loader --save-dev
步骤二:
a. js引入:
*var* a = “a模块”;
*var* b = require(’./b.js’);
console.log(b);
require(’…/css/index.css’)
步骤三:在webpack.config.js文件引入下面代码
*var* path = require(“path”);
module.exports = {
entry: ‘./web/js/a.js’,
output: {
path: path.resolve(__dirname, ‘./dist’),
filename: ‘bundle.js’
},
module: {
rules: [
{
test: /.css$/, //匹配文件规则
use: [‘style-loader’, ‘css-loader’] //匹配后使用什么加载器进行模块加载
// webpack use的配置,是从右到左进行加载的
},
]
}
}
步骤四:打包:webpack
(5) 部署
把前端内容放入服务里面运行
(1)安装
npm install webpack-dev-server --save-dev
(2)package.json配置
"scripts": {
    "test": "echo \"Error: no test specified\" && exit 1",
    "dev": "webpack-dev-server --inline --progress --config ./webpack.config.js"
  }
 版本兼容性:
 	 "webpack": "^3.10.0",
    "webpack-dev-server": "^2.9.7"
(3)运行 npm run dev命令 启动服务
ctrl+c —>y 停止服务
7 Vue的脚手架
Vue脚手架 --就是前端项目的模板(已经就有一些内容)
使用脚手架
(1) 安装脚手架
npm install -g vue-cli
(2)创建一个项目
(3)执行 vue init webpack
询问创建项目 yes
询问vue-router yes
… no
(4)运行命令
npm run dev
来源:CSDN
作者:早春一去又如何
链接:https://blog.csdn.net/weixin_46091684/article/details/103767820