问题
I'm trying to make a custom gridview in WPF but I just realized that as this link says:
The GridViewHeaderRowPresenter class performs layout for the column headers in a GridView and places an additional column header at the end to add space
and because of the additional column header at the end, there's an extra column to the right of the last column. so I was wondering if I can modify it, please refer to this image below
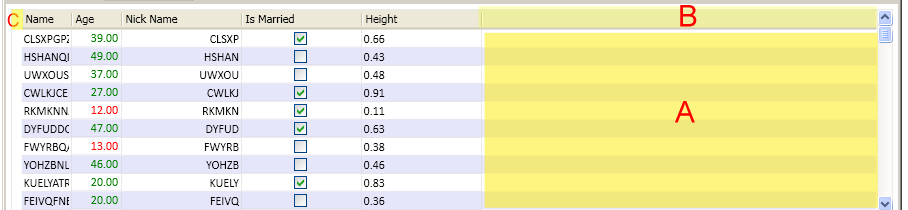
My questions are:
- Is there anyway I can remove the 'A' part from the grid?
- Is there anyway I can add the same effect of 'B' part (the role = padding header) to the 'C' Part (before the first column)?
Thanks
回答1:
Sorry , I think u might have solved problem but still, http://msdn.microsoft.com/en-us/library/system.windows.controls.gridviewcolumnheader.aspx
Check out ClipToBound Property ....
来源:https://stackoverflow.com/questions/4553073/how-to-remove-the-auto-added-column-headerrole-padding-in-wpf-gridview