-
在生活中很多地方都会用到插槽,比如最常见的就是电脑预留的USB插槽,给我们留了更多可扩展性的空间,比如我们可以外接鼠标,键盘,硬盘等等
-
组件的插槽:让我们封装的组件也更加具有扩展性,可以让使用者决定组件内部展示什么东西
就像下面京东的几个页面的头部,我们封装了一个组件用于展示他们,我们
不能把组件写死,要能展示不同东西
我们不能决定组件里面写什么东西,所以
要预留位置(插槽),让业务决定插槽里面的内容
插槽内容
-
定义模板
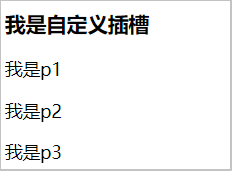
<template id="my-cpn"> <div> <h3>我是自定义插槽</h3> <slot></slot> <!-- 定义了一个插槽,也就是预留了一个空间,name为default插槽 --> </div> <!-- 上面这行代码其实也可以写成 <slot name="default"></slot> --> </template> -
使用插槽
<!-- 1.使用情况一 -->
<div id="app">
    <my-cpn>我是插槽内容</my-cpn>		<!-- 这里的内容会传入到我们组件定义的插槽里面 -->
</div>

<!-- 2.使用情况二 -->
<div id="app">
    <my-cpn>
        <p>我是p1</p>
        <p>我是p2</p>			<!-- 这里的三个p标签都会传入我们定义的default默认插槽中 -->
        <p>我是p3</p>
    </my-cpn>
</div>
注意!:如果
<my-cpn>模板里没有包含一个<slot>元素,则该组件起始标签和结束标签之间的任何内容都会被抛弃。 -
插槽默认值
<!-- 定义模板 -->
<template id="my-cpn">
    <div>
        <h3>我是自定义插槽</h3>
        <slot><button>button</button></slot>	<!-- 默认显示一个按钮 -->
    </div>
</template>

<!-- 插槽不传值 -->
<div id="app">
    <my-cpn> </my-cpn>
</div>
具名插槽
具名插槽就是给插槽 起一个名字,替换插槽的时候必须是用 <template v-slot:插槽名> 才能替换具名插槽
-
编写具名插槽
<template id="my-cpn"> <div> <slot name="left">左边</slot> <slot name="center">中间</slot> <slot name="right">右边</slot> <slot name="default"><div>我是默认插槽</div></slot> </div> </template>①:写了一个模板,里面有4个插槽,三个具名插槽,一个默认插槽(等同于)
②:不带
name的<slot>默认会带有隐含的名字“default”。 -
使用插槽
<div id="app">
    <my-cpn>
        <template v-slot:left>			<!-- template + v-slot -->
            <button>左边</button>
        </template>

        <template v-slot:right>			<!-- template + v-slot -->
            <button>左边</button>
        </template>

        <my-cpn v-slot:default></div>	 <!-- 组件 + v-slot -->
    </my-cpn>
</div>>
①:我们可以在一个
<template>元素上使用v-slot指令,并以v-slot的参数的形式插入对应插槽:②:任何没有被包裹在带有
v-slot的<template>中的内容都会被视为默认插槽的内容。③:也可以在自定义组件上使用
v-slot命令,作为一个插槽的内容进行替换
v-slot语法糖
跟 v-on 和 v-bind 一样,v-slot 也有缩写,即把参数之前的所有内容 (v-slot:) 替换为字符 #。例如 v-slot:header 可以被重写为 #header:
<!-- 定义组件 -->
<template id="cp1">
    <div>
        <slot name="aaa"></slot>
    </div>
</template>

<!-- 使用组件 -->
<cp1>
    <template #aaa>template</template>		<!-- #aaa 实际上是 v-slot:aaa的缩写 -->
</cp1>

<!-- 结合插槽的使用 -->
<!-- 错误写法: <current-user #="{ user  -->
<current-user #default="{ user }">	 <!-- #default不能省略成 #所有的v-指令都不能省略参数 -->
    {{ user.id }}
</current-user>
编译作用域
每一个组件都有自己的作用域,他的模板在查找属性的时候指会在自己的组件作用域里查找,找不到报错
-
例如:
<div id="app">
    <h2>{{message}}</h2>
    <cp1 :data-index="index"></cp1>		<!-- 这里使用的所有的变量都是在Vue跟实例的属性 -->
</div>
这里的 message 只能去挂载 app 的 Vue 实例里面找
<template id="cp1">
    <div>
        {{message}}
    </div>
</template>
这里的 message 只能去挂载组件的实例里面找
-
两个作用域的对比
<div id="app">
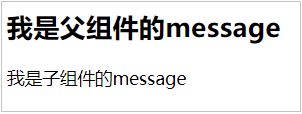
    <h2>{{message}}</h2>	<!-- 只能去 app 这个根组件实例里面找 message 属性 -->
    <cp1></cp1>
</div>

<template id="cp1">
    <div>
        {{message}}			<!-- 只能去 cp1 这个组件实例里面找 message 属性 -->
    </div>
</template>

<script src="VueJs/vue.js"></script>
<script>
    const cp1 = {
        template: '#cp1',
        data() {
            return {
                message: '我是子组件的message'
            }
        }
    }

    var app = new Vue({
        el: '#app',
        data: {
            message: '我是父组件的message'
        },
        components: {
            cp1
        }
    })
</script>
[外链图片转存失败,源站可能有防盗链机制,建议将图片保存下来直接上传

作用域插槽
如果我们向要在父组件的作用域里面访问子组件里面的数据,我们可以用作用域插槽来操作
-
比如我们要展示一组数据,子组件在插槽内默认展示的方式是一列展示,我们想用插槽改变展示方式
默认显示方式
<template id="cp1">
    <div>
        <slot>
            <ul>
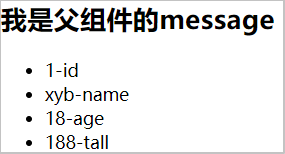
                <li v-for="(item, key) in user">{{item}}-{{key}}</li>
            </ul>
        </slot>
    </div>
</template>				<!-- ① -->

<div id="app">
    <h2>{{message}}</h2>
    <cp1></cp1>			<!-- 使用组件cp1 -->
</div>

<script>
    const cp1 = {
        template: '#cp1',
        data() {
            return {
                user: {
                    id: '1',
                    name: 'xyb',
                    age: '18',
                    tall: '188'
                }
            }
        }
    }

    var app = new Vue({
        el: '#app',
        data: {
            message: '我是父组件的message',
            index: 20
        },
        components: {
            cp1
        }
    })
</script>
创建一个组件,有一个默认插槽,并且用
v-for展示数据
-
如果不用插槽默认准备的方案,在使用组件的时候可以修改插槽内容,那怎么访问子组件数据?
<div id="app">
    <h2>{{message}}</h2>
    <cp1>
        <span v-for="(item, key) in user">{{item}}*{{key}}</span>
    </cp1>
</div>
**错误!**因为只有
<cp1>组件可以访问到user而我们提供的内容是在父级(根组件)渲染的。 -
为了让
user在父级的插槽内容中可用,我们可以将user作为<slot>元素的一个特性绑定上去:
<template id="cp1">
    <div>
        <slot v-bind="user">	<!-- 插槽 prop -->
            <ul>
                <li v-for="(item, key) in user">{{item}}-{{key}}</li>
            </ul>
        </slot>
    </div>
</template>
- 绑定在 元素上的特性被称为插槽 prop。现在在父级作用域中,我们可以给 v-slot 带一个值来定义我们提供的插槽 prop 的名字:
<div id="app">
    <h2>{{message}}</h2>
    <cp1>
       <!-- 用hahaha来接收我们定义默认插槽prop,这样我们就能在父级组件作用域下使用子组件的属性 -->
        <template v-slot:default="hahaha">
            <span v-for="item in hahaha">{{item}} * </span>
        </template>
    </cp1>
</div>
默认插槽语法糖
如果只有一个默认插槽,可以使用语法糖写法,更简洁
<template id="cp1">
    <div>
        <slot v-bind="user">	<!-- 插槽 prop -->
            <ul>
                <li v-for="(item, key) in user">{{item}}-{{key}}</li>
            </ul>
        </slot>
    </div>
</template>

<div id="app">
    <cp1>
        <template v-slot="hahaha">	<!-- 直接用v-slit=""这样的写法, -->
            <span v-for="item in hahaha">{{item}} * </span>
        </template>
    </cp1>
</div>
注意,默认插槽的缩写语法不能和具名插槽混用,因为它会导致作用域不明确:
<div id="app">
    <cp1>
        <template v-slot="hahaha">
            <span v-for="item in hahaha">{{item}} * </span>
        </template>

        <template v-slot:other="hehehe">	<!-- 不能和默认插槽混用 -->
            <span v-for="item in hahaha">{{item}} * </span>
        </template>
    </cp1>
</div>
如果具名插槽和默认插槽同时出现,要使用基于
template的完整的写法
<cp1>
  <template v-slot:default="hehehe">
    {{ hehehe }}
  </template>

  <template v-slot:other="hahaha">
    ...
  </template>
</cp1>
解构插槽prop
如果插槽里面定义了多个插槽prop,我们在调用组件的时候可以解构插槽的prop值
-
定义了多个插槽值
<template id="cp1"> <div> <slot v-bind="{user, movices, songs}"> </slot> </div> </template> -
使用 {} 来解构
<div id="app"> <h2>{{message}}</h2> <cp1> <template v-slot:default="{user, movices, songs}"> </template> </cp1> </div> -
甚至我们可以定义插槽的自定义值
<div id="app">
    <h2>{{message}}</h2>
    <cp1>
        <template v-slot:default="{user = {id: 1, name: 'xyb', age: 3}, movices, songs}">
        </template>
    </cp1>
</div>
动态插槽名
2.6.0 新增
动态指令参数也可以用在 v-slot 上,用来定义动态的插槽名
<div id="app">
    <cp1>
        <template v-slot:[prop]="{user, movices}">
        </template>
    </cp1>
</div>
来源:CSDN
作者:满怀心
链接:https://blog.csdn.net/weixin_44038881/article/details/103531221


