Centos6.5集群安装64位hadoop2.2.0:
- 网络环境,整3台虚拟机或者物理机,配置好相应网络,编辑/etc/hosts, 如:

- ssh无密码登录,很简单,每台机器都生成公钥,密钥(事先建立一个统一的hadoop用户)
注意, Centos默认没有启动ssh无密登录,去掉/etc/ssh/sshd_config其中3行的注释:// 生成key, 都不输入密码 ssh-keygen -t rsa // 于是在用户主目录下会有.ssh/文件夹生成, 文件有: id_rsa id_rsa.pub 将三台机器的id_rsa.pub的内容合并到一个authorized_keys文件,并复制到三台机器用户主目录/.ssh/下。

完成后就可以无密ssh了,如:

- 安装hadoop:
- 解压,并做配置$HADOOP_HOME/etc/hadoop下:
- 详细配置可见:http://hadoop.apache.org/docs/current/hadoop-project-dist/hadoop-common/ClusterSetup.html
//1. hadoop-env.sh中添加JAVA_HOME, 如:
# The java implementation to use.
export JAVA_HOME=/usr/java/jdk1.7.0_45

//2. core-site.xml(tmp目录需手动创建):
<configuration>
        <property>
                <name>hadoop.tmp.dir</name>
                <value>/home/hadoop/tmp/hadoop-${user.name}</value>
        </property>
         <property>
                <name>fs.default.name</name>
                <value>hdfs://hadoopmaster:9000</value>
         </property>
</configuration>

//3. mapred-site.xml
<configuration>
        <property>
                <name>mapred.job.tracker</name>
                <value>hadoopmaster:9001</value>
        </property>
</configuration>

//4. hdfs-site.xml
<configuration>
        <property>
                <name>dfs.replication</name>
                <value>2</value>
        </property>
</configuration>

//5. slaves
hadoopslave1
hadoopslave2
// 配置yarn-site.xml
<configuration>
<property>
<name>yarn.resourcemanager.address</name>
<value>hadoopmaster:8080</value>
</property>
<property>
<name>yarn.resourcemanager.scheduler.address</name>
<value>hadoopmaster:8081</value>
</property>
<property>
<name>yarn.resourcemanager.resource-tracker.address</name>
<value>hadoopmaster:8082</value>
</property>
<property>
<name>yarn.nodemanager.resource.memory-mb</name>
<value>10240</value>
</property>
<property>
<name>yarn.nodemanager.remote-app-log-dir</name>
<value>${hadoop.tmp.dir}/nodemanager/remote</value>
</property>
<property>
<name>yarn.nodemanager.log-dirs</name>
<value>${hadoop.tmp.dir}/nodemanager/logs</value>
</property>
<property>
<name>yarn.nodemanager.aux-services</name>
<value>mapreduce_shuffle</value>
</property>
</configuration>- 将整个hadoop目录复制到其他两台机器:
scp -r hadoop-2.2.0 hadoop@hadoopslave1:/home/hadoop
scp -r hadoop-2.2.0 hadoop@hadoopslave2:/home/hadoop- 格式化hadoop文件系统:
hdfs namenode -format- 启动hadoop集群:
start-dfs.sh
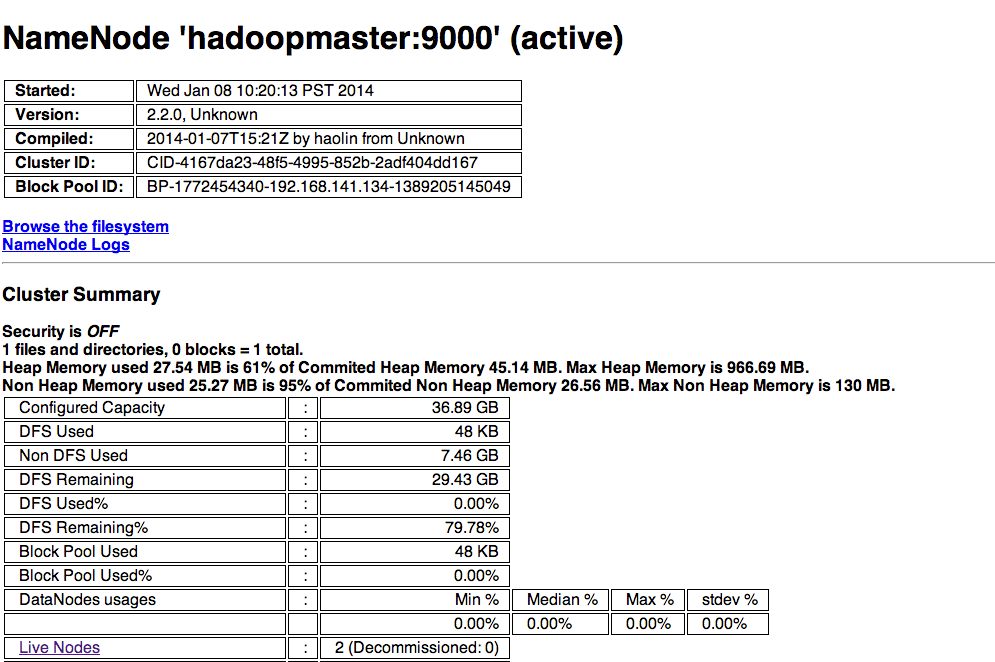
start-yarn.sh- 视觉图:

- 收工。
来源:oschina
链接:https://my.oschina.net/u/222173/blog/191537