hexo 相关文档
Hexo 是一个快速、简洁且高效的博客框架,其使用 Markdown(或其他渲染引擎)解析文章,短短几秒内,即可利用靓丽的主题生成静态网页。
安装hexo$ npm install -g hexo
构建项目
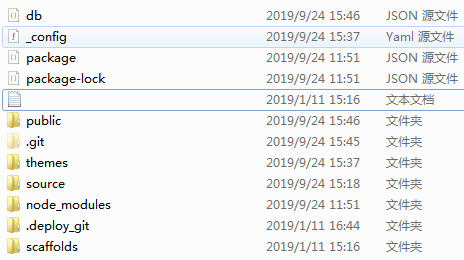
在相应的目录文件下初始化hexo init 文件自动生成相关默认文件
执行相关命令:
$ hexo generate #生成静态页面至public目录下 (简写: hexo g)
$ hexo server #开启预览访问端口(默认端口是4000,“ctrl + c”关闭服务)  (简写: hexo s)
访问http://localhost:4000/
写文章$ hexo new [layout] <title>
布局layout有三种方式: post、page和draft 。而您自定义的其他布局和 post 相同,都将储存到 source/_posts 文件夹
| 布局 | 路径 | 作用 |
|---|---|---|
| post | source/_posts | 新建的文章 |
| page | source | 新建的页面 |
| draft | source/_drafts | 新建的草稿(相当于博客中的“私密文章”功能) |
注:草稿要变成文章或者页面,使用$ hexo publish [layout] <filename>
- 文章举例
$ hexo new "post-first"
系统将默认在source/_posts中创建post-first.md
---
title: post-first
date: 2019-09-24 15:45:01
tags:
---
就可在下使用markdown方式添加文章内容
默认文件的创建由scaffolds/post.md 模板构建,可修改为
title: {{ title }}     #文章标题
date:{{ date}}    #文章生成时间
categories: 必须写   #文章分类目录 可以省略
tags: 必须写  #文章标签 可以省略
description: 问题描述必须写 #你对本页的描述 可以省略
这样每次新建都不用手动添加属性了
- 其他常用命令
hexo new "postName" #新建文章
hexo new page "pageName" #新建页面
hexo generate #生成静态页面至public目录
hexo server #开启预览访问端口(默认端口4000,'ctrl + c'关闭server)
hexo deploy #部署到GitHub
hexo help  # 查看帮助
hexo version  #查看Hexo的版本
$ hexo clean #清空已有的数据库和已有的生成静态页面
$ hexo deploy #将.deploy目录部署到GitHub (简写: hexo d)
修改默认的主题样式
喜欢的主题可自行下载$ git clone https://github.com/litten/hexo-theme-yilia.git themes/yilia
在将全局的_config.yml中的theme: landscape改为theme: yilia ;然后重新执行hexo g重新生成静态文件
主题文件中也有_config.yml可自定义进行配置
全局配置_config.yml
配置文档