前提:
1、安装Testlink
2、安装Jenkins
3、安装python
获取testlink个人密钥
Testlink相关配置与用例管理
为了批量设置接口ip,端口(主要是这两个),协议信息(仅用于展示),需要对项目,计划,套件等必要的配置,以及客户端环境变量配置
a)API相关配置
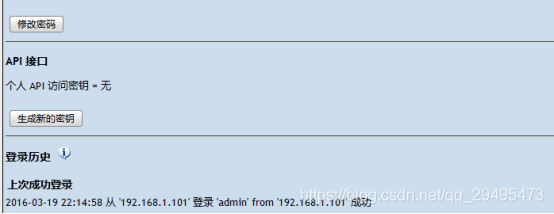
如下,登陆Testlink,进入用户管理-查看用户,如下
点击目标用户(例中为admin),打开如下界面
点击生成新的密钥,如下
或者是点击“编辑用户按钮”按钮进入界面
在运行python脚本端进行环境变量的配置,如下:
1、新建系统环境变量“TESTLINK_API_PYTHON_DEVKEY”,变量值为上述秘钥
2、新建“TESTLINK_API_PYTHON_SERVER_URL”系统环境变量,变量值为“
http://{host}/testlink/lib/api/xmlrpc/v1/xmlrpc.php”,其中host为testlink的访问地址
测试是否生效:
C:\Users\laiyu>python
Python 3.3.2 (v3.3.2:d047928ae3f6, May 16 2013, 00:03:43) [MSC v.1600 32
tel)] on win32
Type "help", "copyright", "credits" or "license" for more information.
>>> import testlink
>>> tls = testlink.TestLinkHelper().connect(testlink.TestlinkAPIClient)
>>> tls.testLinkVersion()
'1.9.14'
注意:如果还不行,提示404错误,则还需要配置testlinkhelper.py 中的DEFAULT_SERVER_URL,将其设置为http://{host}/testlink/lib/api/xmlrpc/v1/xmlrpc.php
python_installation_home\Lib\site-packages\TestLink-API-Python-client-master\build\lib\testlink\testlinkhelper.py
打开pycharm,新建test.py
安装TestLink-API-Python-client
import testlink

url = 'http://{host}/testlink/lib/api/xmlrpc/v1/xmlrpc.php'
key = '刚刚生成的API密钥'

tlc = testlink.TestlinkAPIClient(url, key)
# 获取testlink上的信息
def get_information_test_project():
    print("Number of Projects      in TestLink: %s " % tlc.countProjects())
    print("Number of Platforms  (in TestPlans): %s " % tlc.countPlatforms())
    print("Number of Builds                   : %s " % tlc.countBuilds())
    print("Number of TestPlans                : %s " % tlc.countTestPlans())
    print("Number of TestSuites               : %s " % tlc.countTestSuites())
    print("Number of TestCases (in TestSuites): %s " % tlc.countTestCasesTS())
    print("Number of TestCases (in TestPlans) : %s " % tlc.countTestCasesTP())
    tlc.listProjects()

get_information_test_project()
来源:https://blog.csdn.net/qq_29495473/article/details/95333009