今天学长讲了一些控件,比较强的那种控件。
刚开始讲了图片,但是图片我前面写过了就跳过。
滚动条牛牛们应该很熟悉,也常用哈。
这是垂直的滚动条视图哈
一起来用吧!
<ScrollView
    android:layout_width="match_parent"
    android:layout_height="wrap_content"
    android:id="@+id/scrollView"
    android:fillViewport="true">
 <TextView
 android:id="@+id/text"
 android:layout_width="70dp"
 android:layout_height="wrap_content"
 android:background="@color/colorPrimary"
 android:gravity="top"
 android:layout_marginBottom="100dp"
 android:text="text">
 </TextView>

</ScrollView>

主活动:
final TextView t=findViewById(R.id.text);

for (int i = 0; i <30; i++) {
    t.append("\n分"+i);
}
效果: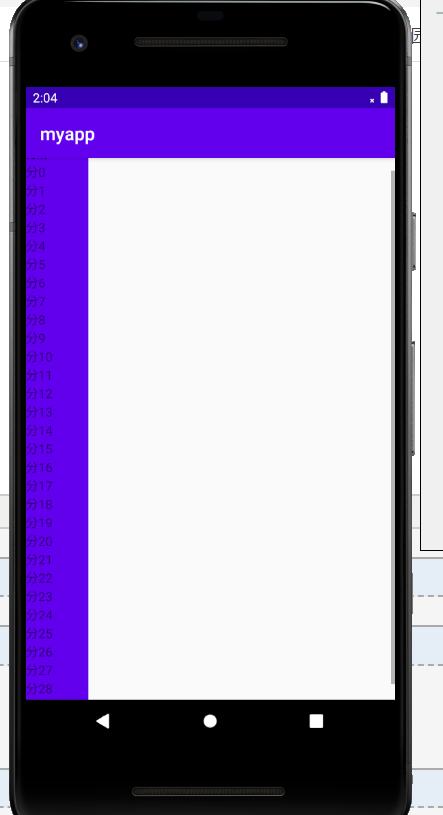
注意右边的那个灰色的,就是滚动条啦!
注意:ScrollView的子元素只能有一个,可以是一个View(如ImageView、TextView等) 也可以是一个ViewGroup(如LinearLayout、RelativeLayout等),其子元素内部则不再限制,否则会报异常。
本牛崽就犯了这类错误,想着嵌套垂直和水平滚动条来着,谁知道搞半天没用,因为我是直接嵌套进去的,
应该在写了垂直滚动后添加一种布局,然后在布局里水平滚动就好。
这边是完全嵌套的滚动条布局:
<?xml version="1.0" encoding="utf-8"?>
<ScrollView xmlns:android="http://schemas.android.com/apk/res/android"
    android:layout_width="match_parent" android:layout_height="match_parent">
        <LinearLayout
            android:layout_width="match_parent"
 android:layout_height="match_parent"
 android:orientation="vertical">

 <HorizontalScrollView
 android:layout_width="match_parent"
 android:layout_height="200dp"
 android:layout_marginTop="20dp">

 <LinearLayout
 android:layout_width="match_parent"
 android:layout_height="match_parent"
 android:gravity="center_vertical"
 android:orientation="horizontal">

 <ImageView
 android:layout_width="120dp"
 android:layout_height="120dp"
 android:layout_margin="20dp"
 android:src="@mipmap/ic_launcher" />

 <ImageView
 android:layout_width="120dp"
 android:layout_height="120dp"
 android:layout_margin="20dp"
 android:src="@mipmap/ic_launcher" />

 <ImageView
 android:layout_width="120dp"
 android:layout_height="120dp"
 android:layout_margin="20dp"
 android:src="@mipmap/ic_launcher" />

 <ImageView
 android:layout_width="120dp"
 android:layout_height="120dp"
 android:layout_margin="20dp"
 android:src="@mipmap/ic_launcher" />

 </LinearLayout>
 </HorizontalScrollView>

 <Button
 android:layout_width="match_parent"
 android:layout_height="100dp"
 android:layout_marginTop="20dp"
 android:gravity="center"
 android:text="内容一"
 android:textColor="#03A9F4"
 android:textSize="24sp" />

 <Button
 android:layout_width="match_parent"
 android:layout_height="100dp"
 android:layout_marginTop="80dp"
 android:gravity="center"
 android:text="内容二"
 android:textColor="#03A9F4"
 android:textSize="24sp" />

 <Button
 android:layout_width="match_parent"
 android:layout_height="100dp"
 android:layout_marginTop="80dp"
 android:gravity="center"
 android:text="内容三"
 android:textColor="#03A9F4"
 android:textSize="24sp" />

 <Button
 android:layout_width="match_parent"
 android:layout_height="100dp"
 android:layout_marginTop="80dp"
 android:layout_marginBottom="80dp"
 android:gravity="center"
 android:text="内容四"
 android:textColor="#03A9F4"
 android:textSize="24sp" />
 </LinearLayout>
</ScrollView>
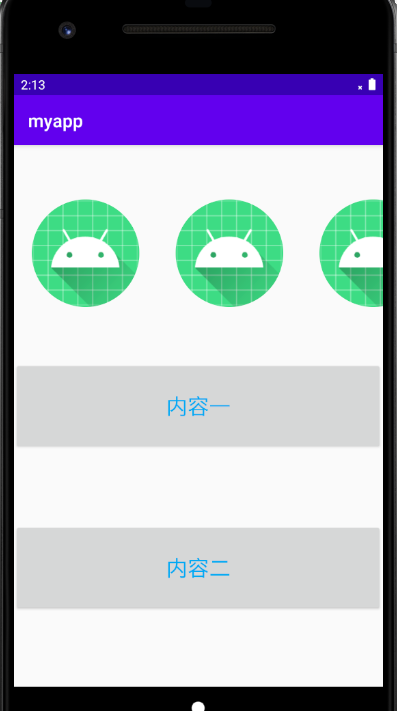
然后机器人可以向右边拖
内容可以向下拖。
接下来的是日期,就把图贴上了,注意操作在主活动。
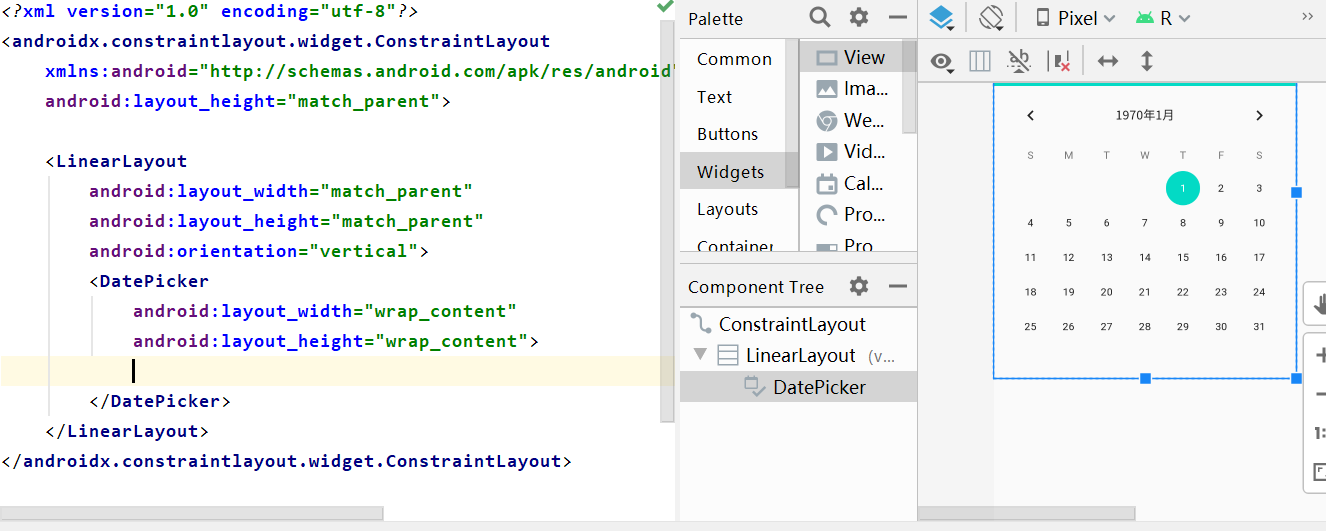
主活动主要是获得当前的日期。并且监听。
那我就再做个按钮输出当前日期到running中。
主活动代码:
final DatePicker datePicker = findViewById(R.id.date);
findViewById(R.id.button).setOnClickListener(new View.OnClickListener() {
@Override
public void onClick(View v) {
int year = datePicker.getYear();
int month = datePicker.getMonth();
int day = datePicker.getDayOfMonth();
System.out.println("year:" + year + ",month:" + (month + 1) + ",day:" + day);
}
});
应该不难理解,上面的刚开始就是找到布局中的日历,
然后直接给按钮创建监听器。按钮我当时就没在布局写了,因为截图截早了。
然后就是把他们的年月日找出来呗,这里注意月份0-11,所以month要+1
// 设置选择日期时的监听
datePicker.setOnDateChangedListener(new DatePicker.OnDateChangedListener() {
@Override
public void onDateChanged(DatePicker view, int year, int monthOfYear, int dayOfMonth) {
System.out.println("year:" + year + ",month:" + (monthOfYear + 1) + ",day:" + dayOfMonth);
}
});
监听事件就这样呗,这是日期专属的监听事件方法,重写下就看得出和一般监听器大同小异。
监听事件的方法应该不用多说吧,日期对象,年,当前年份的月,当前月份的天。
我们就是在日历上点哪个,就输出当前的信息(年月日)
还有一种比较热门的日期:
<CalendarView
    android:id="@+id/calenderView"
    android:layout_width="match_parent"
    android:layout_height="wrap_content"
    android:firstDayOfWeek="3"
 android:shownWeekCount="4"
 android:selectedWeekBackgroundColor="#aff"
 android:focusedMonthDateColor="#f00"
 android:weekSeparatorLineColor="#ff0"
 android:unfocusedMonthDateColor="#f9f">
</CalendarView>

<Button
 android:id="@+id/button2"
 android:layout_width="match_parent"
 android:layout_height="50dp"
 android:layout_weight="1"
 android:text="获取当前日期" />
这个日期它比较特
final CalendarView calendarView=findViewById(R.id.calenderView);
findViewById(R.id.button2).setOnClickListener(new View.OnClickListener() {
    @Override
    public void onClick(View v) {
        long y=calendarView.getDate();
 System.out.println(y);
 }
});
殊吧,比如他不能获取当前的年月日,但是能获取到1970.1.1的0点到当前时间的毫秒I/System.out: 1589554516099
这是按钮监听器拿到的,
因为长整型范围也有限,大概只能算到2038年。
然后他也可以使用监听事件,和上面那个监听事件一样。
final CalendarView calendarView=findViewById(R.id.calenderView);
findViewById(R.id.button2).setOnClickListener(new View.OnClickListener() {
    @Override
    public void onClick(View v) {

 long date=calendarView.getDate();
 String s=new SimpleDateFormat("yyyy-MM-dd HH:mm:ss").format(date);
 System.out.println(s);
 }
});
calendarView.setOnDateChangeListener(new CalendarView.OnDateChangeListener() {
 @Override
 public void onSelectedDayChange(@NonNull CalendarView view, int year, int month, int dayOfMonth) {
System.out.println(year+" "+(month+1)+" "+dayOfMonth);}
});
改了下,并搭上了它的监听事件,毕竟都是日期,前面的监听类型应该是一样,后面的内容就不一样了。
刚刚那个长整型的毫秒,用那段话就能转换成时间,有点奇怪的是时不对,我能想到的是时区的问题,
因为我们是东时区,我们的起始时间其实是1970.1.1的早上八点,
而计算出来的就比当前时间少了八个小时,所以现在系统统计的是外国人的时间,哈哈。
都讲了日期了,时间是肯定不能少的了,所以把惹人爱的时钟搬出来了。
不懒了,这我还是写个按钮吧!
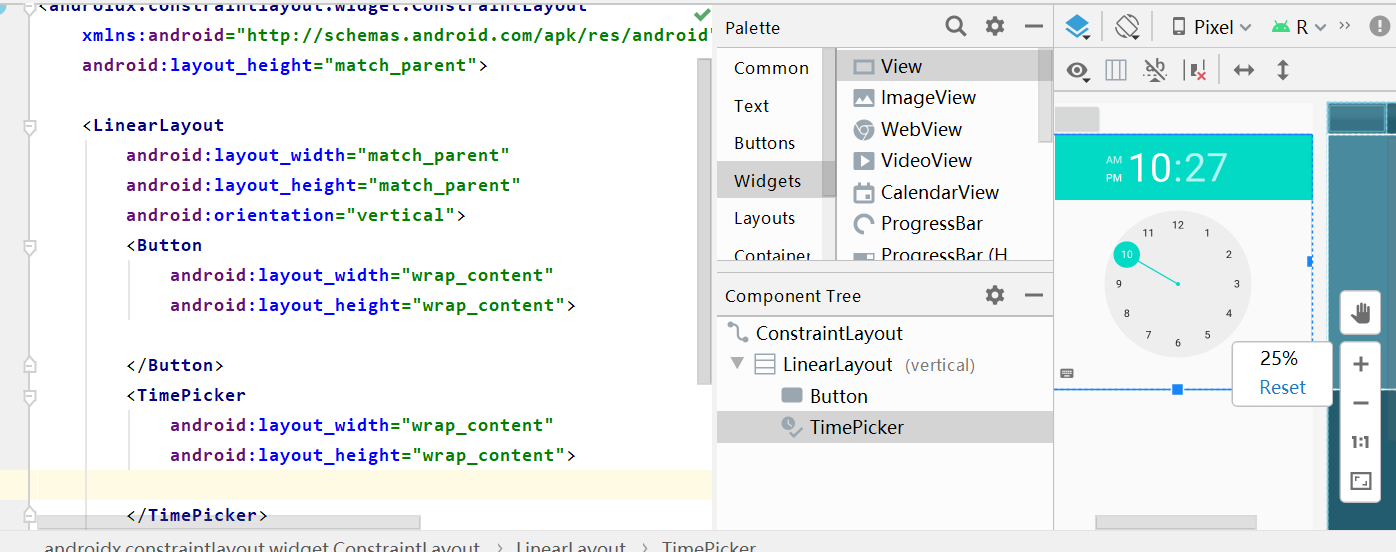
这种不是数字钟表哈,文化人才看的懂滴。
这边没有24小时制,只有上下午夜;但如果是获取数据就可以24小时制。
日期有他专属的监听事件,时间也有;
final TimePicker picker = findViewById(R.id.time);
findViewById(R.id.button).setOnClickListener(new View.OnClickListener() {
@Override
public void onClick(View v) {//二话不说,先搞个按钮监听下,把时分都安排上。
int hour = picker.getHour();
int minute = picker.getMinute();//获取分钟
System.out.println(hour + ":" + minute);//输出当前时分,挺遗憾没有秒这个单位
}
});
// 添加时间选择的监听事件
picker.setOnTimeChangedListener(new TimePicker.OnTimeChangedListener() {
@Override
public void onTimeChanged(TimePicker view, int hourOfDay, int minute) {//和日期的都差不多,
System.out.println(hourOfDay + ":" + minute);//这边监听也是获得当前的时分咯!
}
});

可以看出监听的效果了吧,可以比较准确获得当前系统时间。
今天的内容就这些,又冒出来几个监听事件,感觉监听事件好像很多啊,所以我去搜了下,
监听事件有这么多,我蒙了
https://blog.csdn.net/weixin_41101173/article/details/81270133
来源:oschina
链接:https://my.oschina.net/u/4311438/blog/4280277