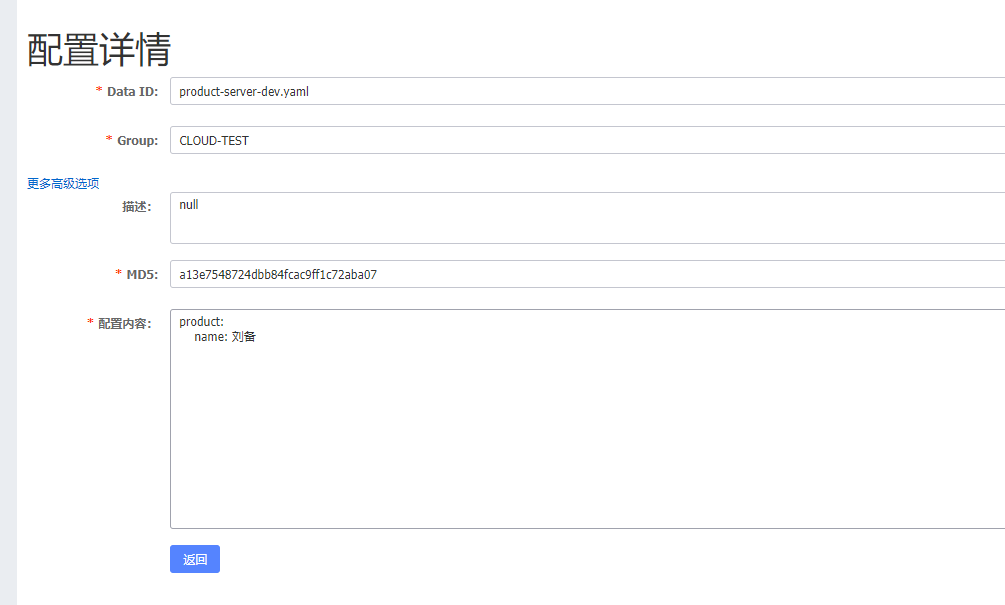
pom配置:
<!--   nacos配置中心     -->
        <dependency>
            <groupId>org.springframework.cloud</groupId>
            <artifactId>spring-cloud-starter-alibaba-nacos-config</artifactId>
        </dependency>

        <!--Spring Cloud Alibaba-->
        <dependency>
            <groupId>org.springframework.cloud</groupId>
            <artifactId>spring-cloud-starter-alibaba-nacos-discovery</artifactId>
        </dependency>
yml配置:
server:
  port: 8021
spring:
  application:
    name: product-server
  cloud:
    nacos:
      discovery:
        server-addr: 127.0.0.1:8848/
      config:
        server-addr: localhost:8848 #配置中心地址
        file-extension: yaml #指定yaml格式的配置
        group: CLOUD-TEST
  profiles:
    active: dev
其中 nacos配置规则如下:
${prefix}-${spring.profile.active}.${file-extentsion}

prefix:
	默认值为:spring.application.name,也可以通过spring.cloud.nacos.config.prefix来配置

spring.profile.active:
	spring.profile.active不存在时,对应的连接符也将不存在。
	对应的data id拼接格式为:
	${prefix}.${file-extension}

file-extension:
	为配置内容的数据格式,可以通过spring.cloud.nacos.config.file-extension来配置。
	目前只支持properties和yaml类型
应用demo:( @RefreshScope //实现配置的自动更新 )
@RefreshScope
@RestController
public class ProductController {

    @Value("${product.name:tom}")
    private String name;

    @GetMapping("/product")
    public User get(HttpServletRequest request) throws InterruptedException {
        Enumeration<String> headerNames = request.getHeaderNames();
        String header = request.getHeader("Authorization");
        User user = new User();
        user.setAge(18);
        user.setUsername(name);
        return user;
    }
}

启动类:
@EnableDiscoveryClient
@SpringBootApplication
public class ProductApplication {

    public static void main(String[] args) {
        SpringApplication.run(ProductApplication.class, args);
    }

}
来源:oschina
链接:https://my.oschina.net/u/3534977/blog/4433144