一、SPI是什么
SPI机制(Service Provider Interface),是一种将服务接口与服务实现分离以达到解耦、大大提升了程序可扩展性的机制。引入服务提供者就是引入了spi接口的实现者,通过本地的注册发现获取到具体的实现类,轻松可插拔。
场景:比较典型的一个场景就是JDBC中加载驱动的过程。
二、使用demo
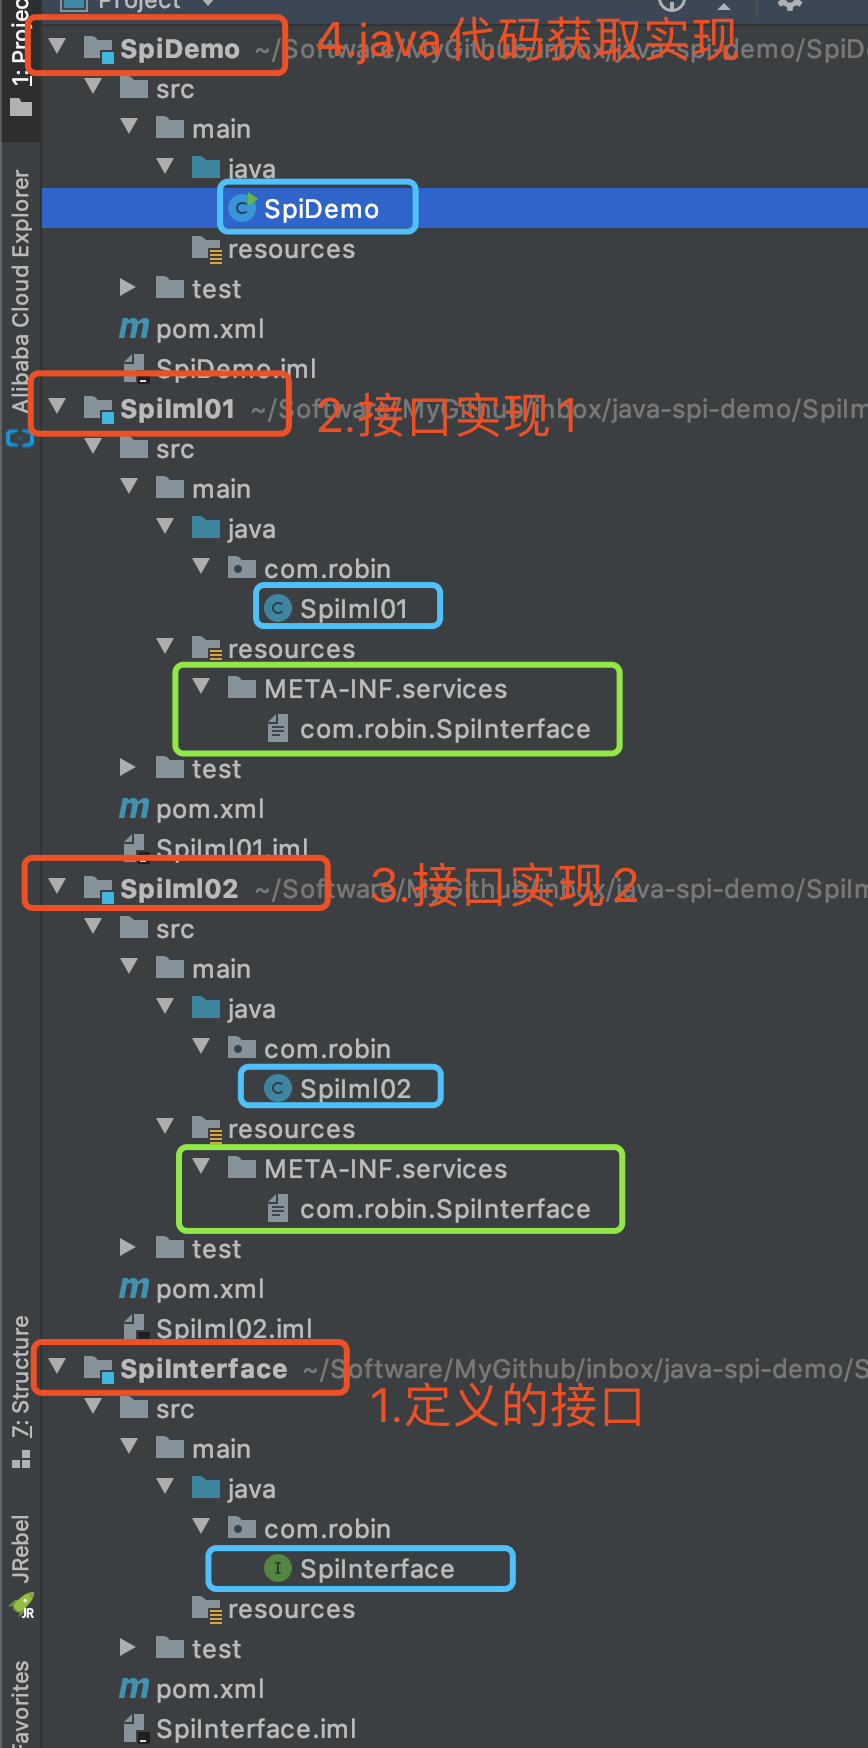
demo工程结构:

1)首先我们定义一个提供接口的三方包SpiInterface
public interface SpiInterface {

    public void method();
}
2)然后我们分别定义两个实现SpiInterface接口的三方实现SpiIml01、SpiIml02;
1、SpiIml01
public class SpiIml01 implements SpiInterface {

    public void method() {
        System.out.println("print SpiIml01");
    }
}
pom:引入三方接口包SpiInterface
<dependencies>
        <dependency>
            <groupId>com.robin</groupId>
            <artifactId>SpiInterface</artifactId>
            <version>1.0-SNAPSHOT</version>
            <optional>true</optional>
        </dependency>
    </dependencies>
2、SpiIml02
public class SpiIml02 implements SpiInterface {

    public void method() {
        System.out.println("print SpiIml02");
    }
}
pom:引入三方接口包SpiInterface
<dependencies>
        <dependency>
            <groupId>com.robin</groupId>
            <artifactId>SpiInterface</artifactId>
            <version>1.0-SNAPSHOT</version>
            <optional>true</optional>
        </dependency>
    </dependencies>
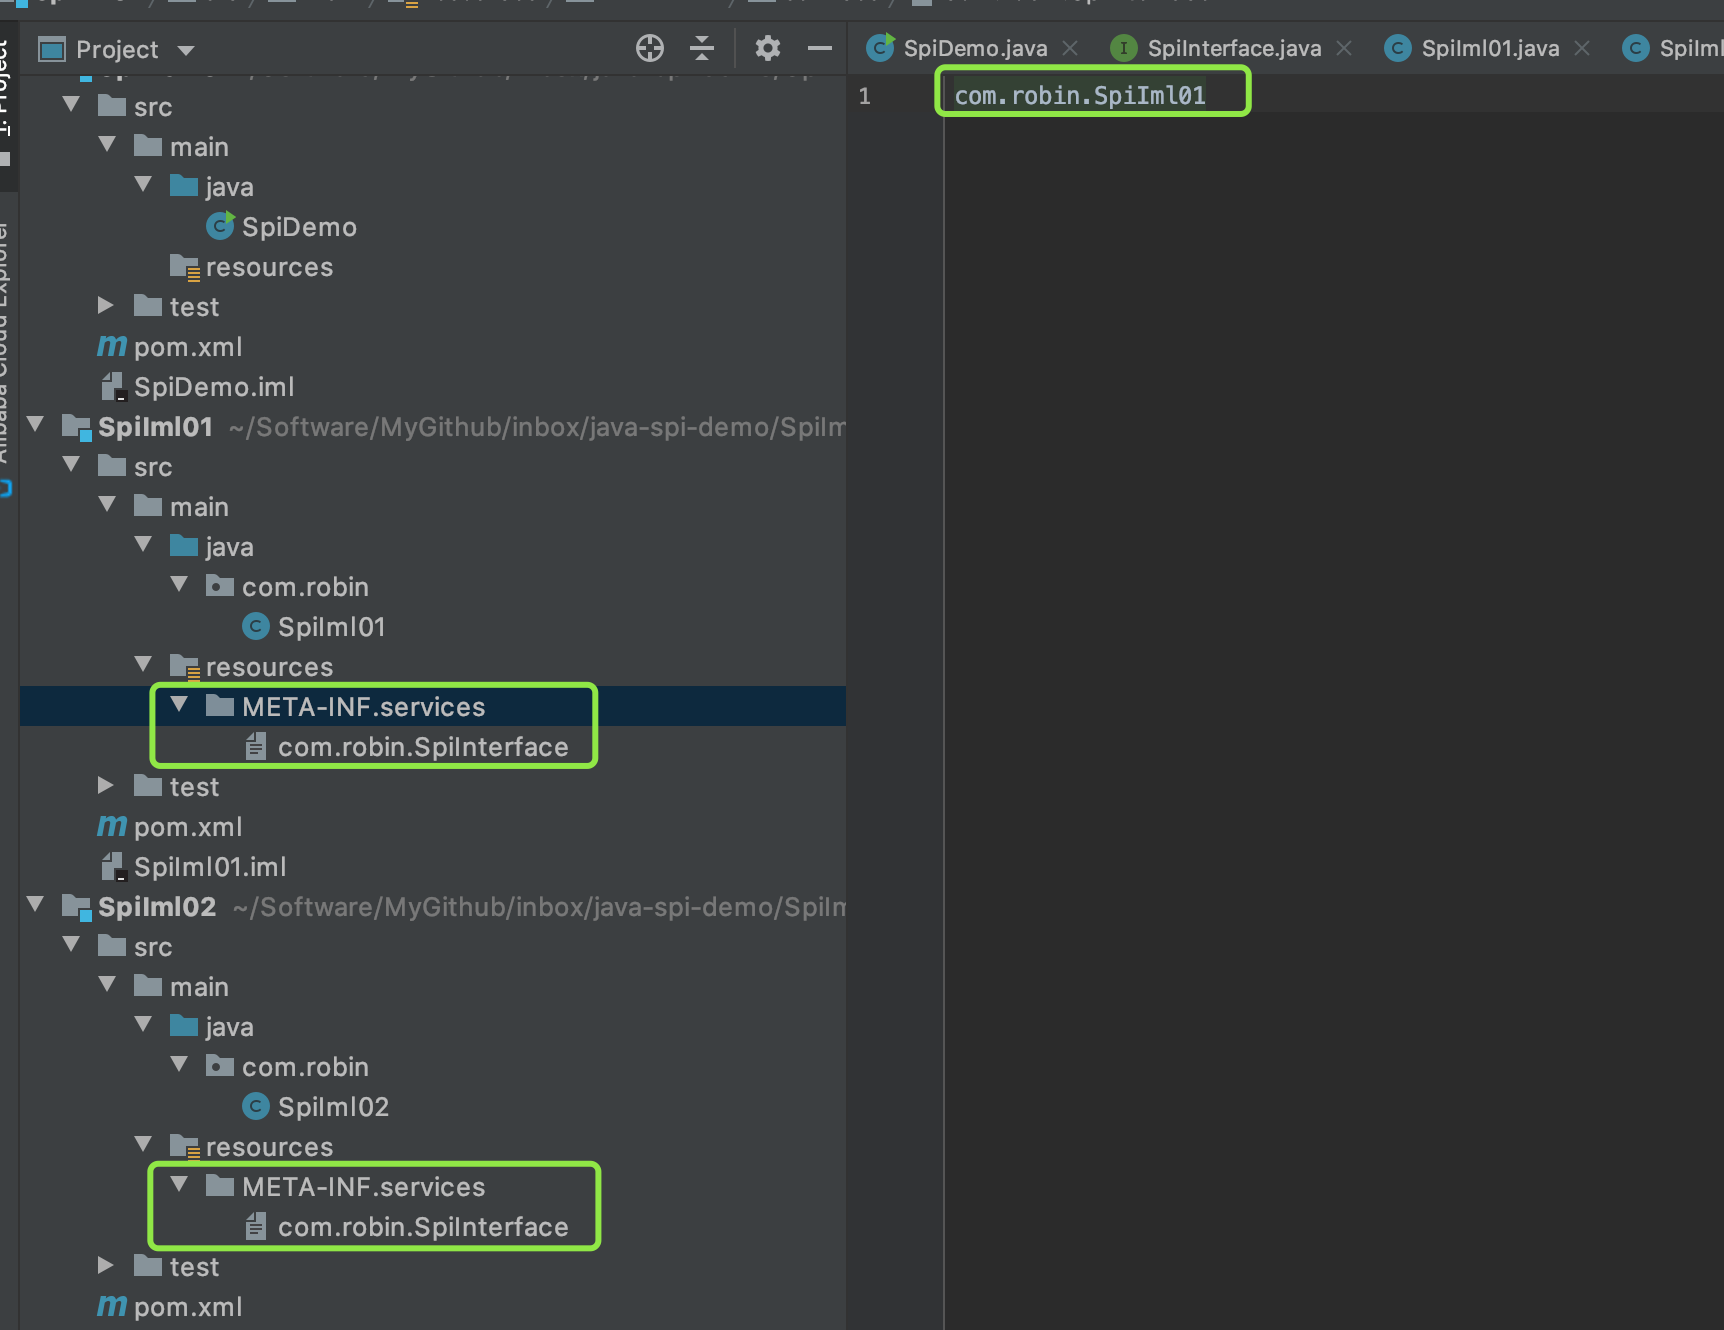
3)并且对于实现类项目,在各项目META-INF/services目录下创建一个以“接口全限定名”为命名的文件,内容为实现类的全限定名;

4)定义测试项目SpiDemo
SpiDemo
public class SpiDemo {


    public static void main(String[] args) {
        ServiceLoader<SpiInterface> load = ServiceLoader.load(SpiInterface.class);
        Iterator<SpiInterface> iterator = load.iterator();
        while (iterator.hasNext()) {
            SpiInterface next = iterator.next();
            next.method();
        }
    }
}
pom:引入三方接口包、以及连个实现包
<dependencies>
        <dependency>
            <groupId>com.robin</groupId>
            <artifactId>SpiIml02</artifactId>
            <version>1.0-SNAPSHOT</version>
        </dependency>
        <dependency>
            <groupId>com.robin</groupId>
            <artifactId>SpiInterface</artifactId>
            <version>1.0-SNAPSHOT</version>
        </dependency>
        <dependency>
            <groupId>com.robin</groupId>
            <artifactId>SpiIml01</artifactId>
            <version>1.0-SNAPSHOT</version>
        </dependency>
    </dependencies>
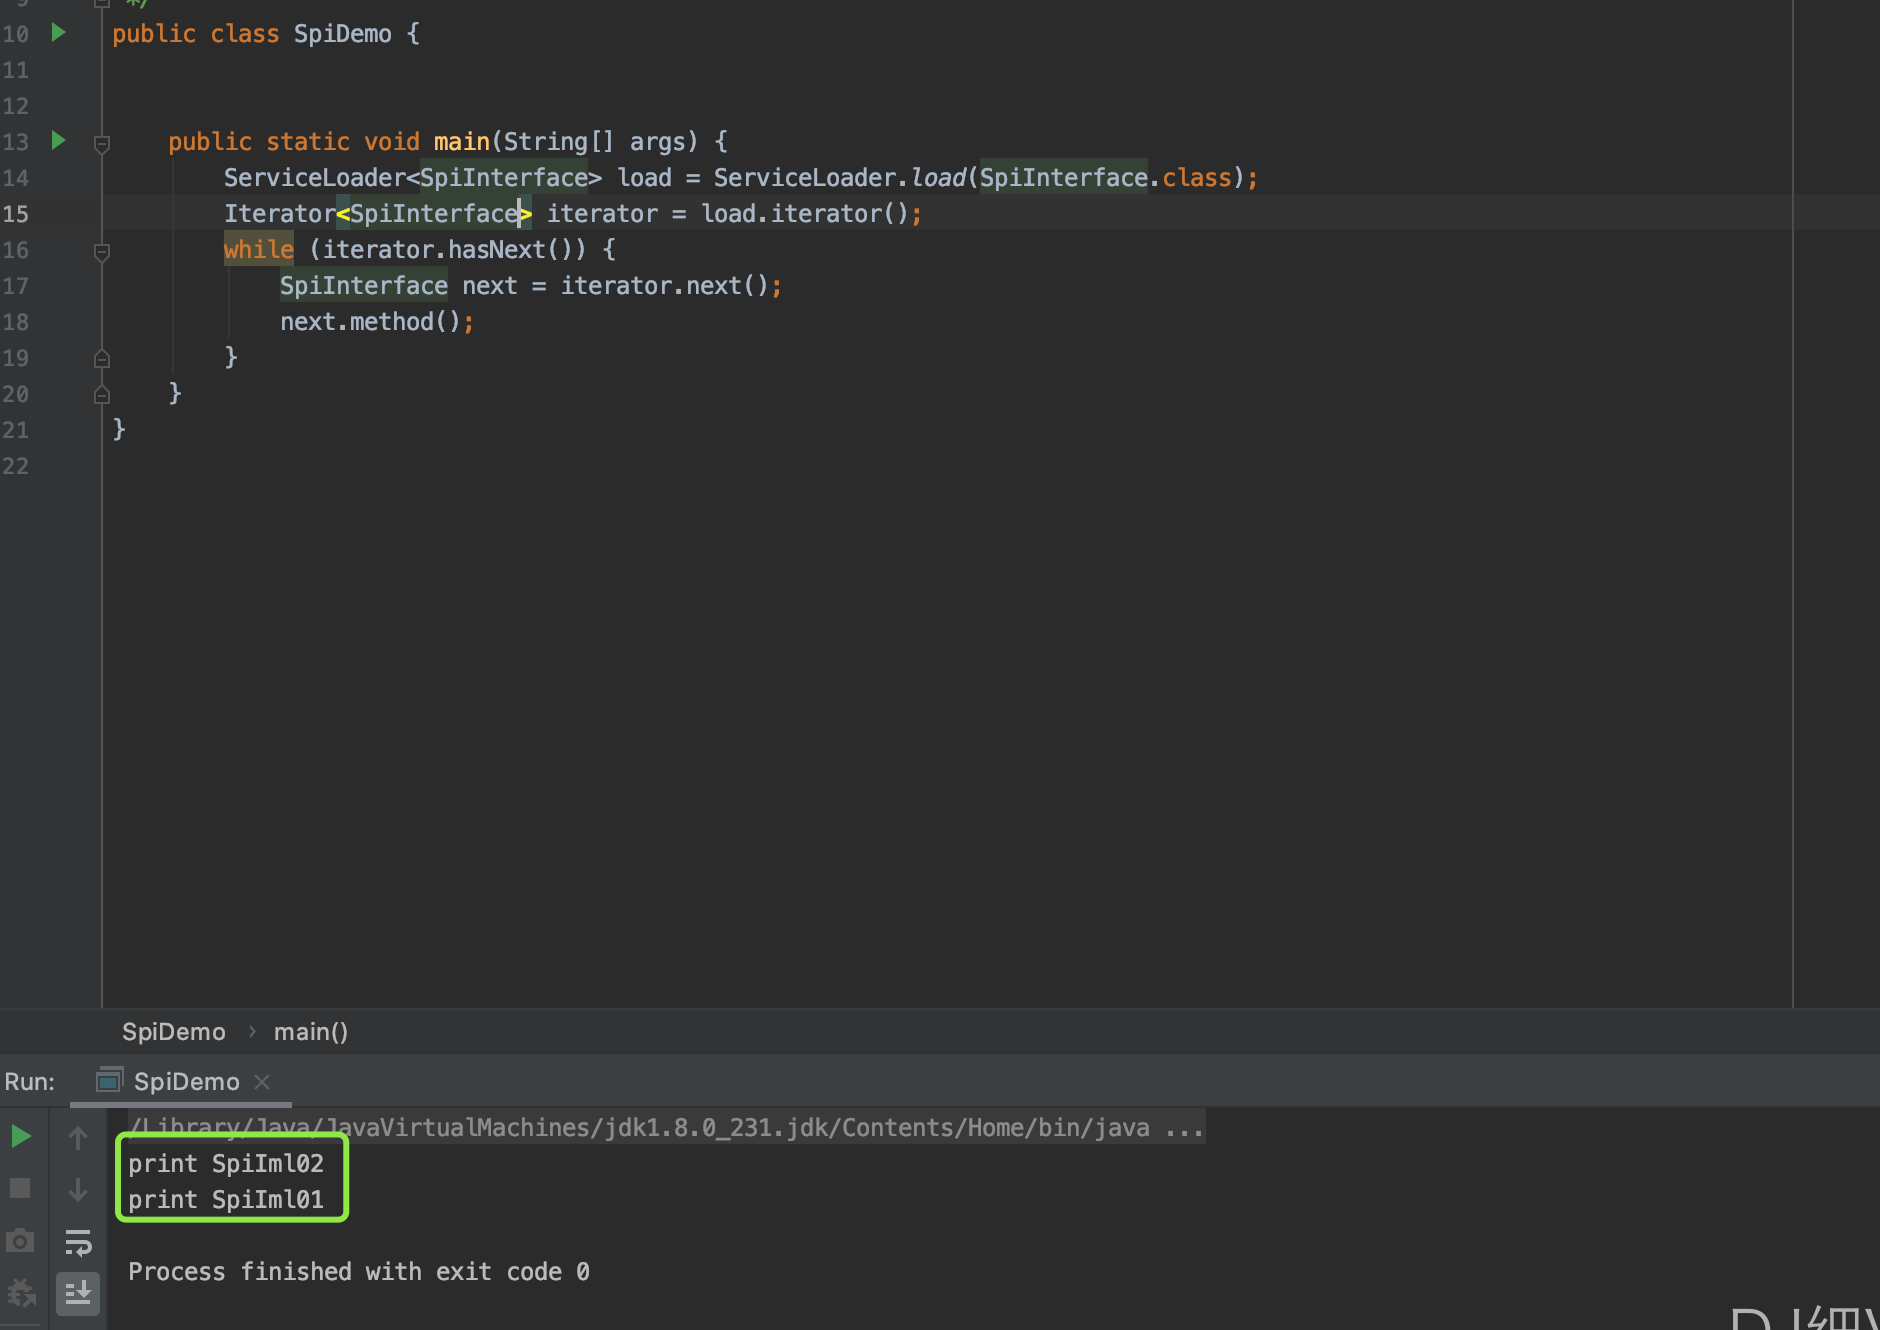
运行main方法:通过结果可知两个实现类都有获取到;获取的先后顺序,取决于你maven引入的顺序,谁在前谁先获取

来源:oschina
链接:https://my.oschina.net/u/4360870/blog/4268244