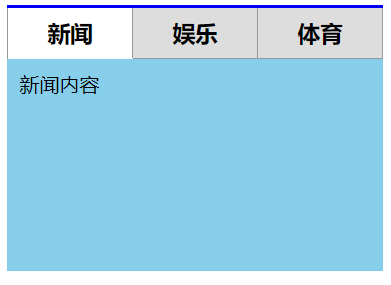
做一个这个效果↓

代码↓

<!DOCTYPE html PUBLIC "-//W3C//DTD XHTML 1.0 Transitional//EN" "http://www.w3.org/TR/xhtml1/DTD/xhtml1-transitional.dtd">
<html xmlns="http://www.w3.org/1999/xhtml" xml:lang="en">
<head>
    <meta http-equiv="Content-Type" content="text/html;charset=UTF-8">
    <title>Document</title>
    <style type="text/css">
        *{
            margin: 0;
            padding: 0;
        }
        div{
            width: 500px;
            height: 100px;
            border-top: 10px solid blue;
            border-left: 5px solid #999;
            border-right: 5px solid #999;
            margin: 100px auto;
        }
    </style>
</head>
<body>
    <div>
    </div>
</body>
</html>
效果图↓
 可以看到这是一个梯形的效果。
修改后代码↓

<!DOCTYPE html PUBLIC "-//W3C//DTD XHTML 1.0 Transitional//EN" "http://www.w3.org/TR/xhtml1/DTD/xhtml1-transitional.dtd">
<html xmlns="http://www.w3.org/1999/xhtml" xml:lang="en">
<head>
    <meta http-equiv="Content-Type" content="text/html;charset=UTF-8">
    <title>Document</title>
    <style type="text/css">
        *{
            margin: 0;
            padding: 0;
        }
        div{
            width: 500px;
            height: 100px;
            border-top: 10px solid blue;
            margin: 100px auto;
        }
        p{
            height: 100px;
            border-left: 5px solid #999;
            border-right: 5px solid #999;
        }
    </style>
</head>
<body>
    <div>
        <p></p>
    </div>
</body>
</html>
效果图↓
 这回可以看到是直角矩形的效果。
小技巧:制作这种矩形变色的边框方法就是用两个盒子来做!蓝色区域给父盒子设置,灰色区域用子盒子设置。
制作一个tab栏(选项卡)
作一个这个tab栏↓

首先设置宽度,写出头部的上边线代码↓

        .box{
            width: 301px;
            border-top: 2px solid blue;
            margin: 100px auto;
        }
效果图↓
![]()
然后写出新闻、娱乐、体育这个头部,(包括设置宽高,浮动,文字效果)还有当选中新闻这个标题后新闻这块所对应的的效果,代码↓

<!DOCTYPE html PUBLIC "-//W3C//DTD XHTML 1.0 Transitional//EN" "http://www.w3.org/TR/xhtml1/DTD/xhtml1-transitional.dtd">
<html xmlns="http://www.w3.org/1999/xhtml" xml:lang="en">
<head>
    <meta http-equiv="Content-Type" content="text/html;charset=UTF-8">
    <title>Document</title>
    <style type="text/css">
        *{
            margin: 0;
            padding: 0;
        }
        .box{
            width: 301px;
            border-top: 2px solid blue;
            margin: 100px auto;
        }
        .box .top{
            border-left: 1px solid #999;
            overflow: hidden;
        }
        .box .top h3{
            float: left;
            width: 99px;
            height: 40px;
            border-right: 1px solid #999;
            border-bottom: 1px solid #999;
            background:#ddd;
            font-size: 18px;
            font-family: "微软雅黑";
            line-height: 40px;
            text-align: center;
        }
        .box .top h3.new{
            border-bottom: none;
            background: none;
        }
    </style>
</head>
<body>
    <div class="box">
        <div class="top">
            <h3 class="new">新闻</h3>
            <h3>娱乐</h3>
            <h3>体育</h3>
        </div>
        <div class="bottom">
            <div class="now">新闻内容</div>
            <div>娱乐内容</div>
            <div>体育内容</div>
        </div>
    </div>
</body>
</html>
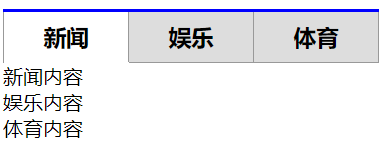
效果图↓
 可以看到选中新闻版块后,新闻后面变白,没有下边线。
制作tab栏,也叫选项卡:
没有被选中的主题部分,需要隐藏,选中显示。
给所有元素加一个显示模式隐藏,给要显示的元素加一个显示模式块级。
display: none;隐藏我们的元素。
display: block显示我们的元素。
所以标题下面所对应的内容代码如↓

        .box .bottom div{
            padding: 10px;
            height: 150px;
            background: skyblue;
            display: none;
        }
        .box .bottom div.now{
            display: block;
................................................................................................................
    <div class="box">
        <div class="top">
            <h3 class="new">新闻</h3>
            <h3>娱乐</h3>
            <h3>体育</h3>
        </div>
        <div class="bottom">
            <div class="now">新闻内容</div>
            <div>娱乐内容</div>
            <div>体育内容</div>
        </div>
    </div>
注意:在添加显示模式时,一定不要忘记添加类名。
整体代码↓

<!DOCTYPE html PUBLIC "-//W3C//DTD XHTML 1.0 Transitional//EN" "http://www.w3.org/TR/xhtml1/DTD/xhtml1-transitional.dtd">
<html xmlns="http://www.w3.org/1999/xhtml" xml:lang="en">
<head>
    <meta http-equiv="Content-Type" content="text/html;charset=UTF-8">
    <title>Document</title>
    <style type="text/css">
        *{
            margin: 0;
            padding: 0;
        }
        .box{
            width: 301px;
            border-top: 2px solid blue;
            margin: 100px auto;
        }
        .box .top{
            border-left: 1px solid #999;
            overflow: hidden;
        }
        .box .top h3{
            float: left;
            width: 99px;
            height: 40px;
            border-right: 1px solid #999;
            border-bottom: 1px solid #999;
            background:#ddd;
            font-size: 18px;
            font-family: "微软雅黑";
            line-height: 40px;
            text-align: center;
        }
        .box .top h3.new{
            border-bottom: none;
            background: none;
        }
        .box .bottom div{
            padding: 10px;
            height: 150px;
            background: skyblue;
            display: none;
        }
        .box .bottom div.now{
            display: block;
    </style>
</head>
<body>
    <div class="box">
        <div class="top">
            <h3 class="new">新闻</h3>
            <h3>娱乐</h3>
            <h3>体育</h3>
        </div>
        <div class="bottom">
            <div class="now">新闻内容</div>
            <div>娱乐内容</div>
            <div>体育内容</div>
        </div>
    </div>
</body>
</html>
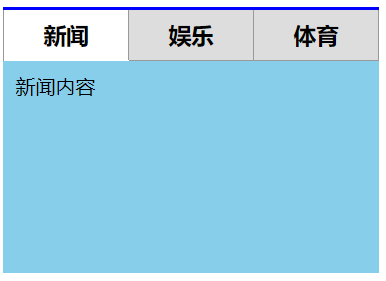
效果图↓

来源:https://www.cnblogs.com/StevenSunYiwen/p/11504059.html
