问题
I try to do something similar to this post: related question
Now I try to combine several stencils. The combined stencil looks as expected, however the inverted group is either black or white, depending on the order of the group created. The result I get:

It seems that the grouping still takes some Blend-information of the childs, or maybe I just don't get the idea of the blends. Any Idea how I can achieve an overlay as in the old question but with several stencils?
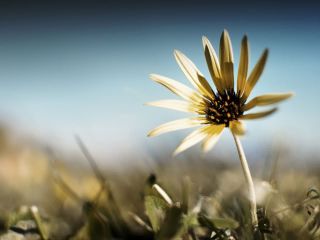
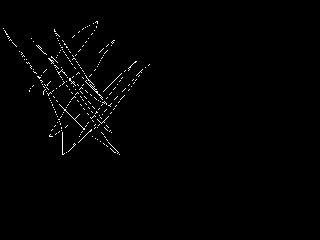
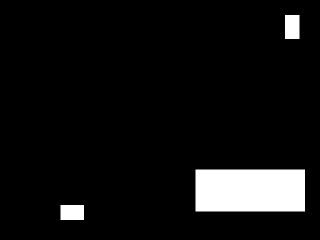
Here are the images:


package application;

import javafx.application.Application;
import javafx.geometry.Insets;
import javafx.scene.Group;
import javafx.scene.Scene;
import javafx.scene.effect.BlendMode;
import javafx.scene.image.Image;
import javafx.scene.image.ImageView;
import javafx.scene.layout.HBox;
import javafx.scene.paint.Color;
import javafx.scene.shape.Rectangle;
import javafx.stage.Stage;

public class Main extends Application {
@Override
public void start(Stage stage) {
    Image original = new Image(getClass().getResourceAsStream("image.jpg"));

    Image stencil1 = new Image(getClass().getResourceAsStream("stencil.jpg"));

    Image stencil2 = new Image(getClass().getResourceAsStream("stencil2.jpg"));

    Image stencil3 = new Image(getClass().getResourceAsStream("stencil3.jpg"));

    ImageView iv = new ImageView(stencil1);
    ImageView iv2 = new ImageView(stencil2);
    ImageView iv3 = new ImageView(stencil3);

    iv2.setBlendMode(BlendMode.ADD);
    iv3.setBlendMode(BlendMode.ADD);
    Group stencil = new Group();

    stencil.getChildren().add(iv);
    stencil.getChildren().add(iv2);
    stencil.getChildren().add(iv3);

    Rectangle whiteRect = new Rectangle(original.getWidth(), original.getHeight());
    whiteRect.setFill(Color.WHITE);
    whiteRect.setBlendMode(BlendMode.DIFFERENCE);

    Group inverted = new Group(stencil, whiteRect);

    // display the original, composite image and stencil.
    HBox layout = new HBox(10);
    layout.getChildren().addAll(new ImageView(original), inverted, stencil);
    layout.setPadding(new Insets(10));
    stage.setScene(new Scene(layout));
    stage.show();

}

public static void main(String[] args) {
    launch();
}
}
回答1:
I finally figured it out myself. The trick is to create always new instances of the ImageView objects, as the blending modes are applied down the scene-graph 'till the imageview-objects.
here is the code snipped that worked for me:
package application;
    import javafx.application.Application;
    import javafx.geometry.Insets;
    import javafx.scene.Group;
    import javafx.scene.Scene;
    import javafx.scene.effect.BlendMode;
    import javafx.scene.image.Image;
    import javafx.scene.image.ImageView;
    import javafx.scene.layout.HBox;
    import javafx.scene.paint.Color;
    import javafx.scene.shape.Rectangle;
    import javafx.stage.Stage;

    public class Main extends Application {

        private ImageView originalImageView;
        private ImageView stencilImageView;
        private Image original;
        private Image stencil;
        private Image stencil2;

        private Rectangle whiteRect;
        private Group inverted;

        private Group overlaidBlack;

        private Rectangle redRect;

        private Group redStencil;
        private Group overlaidRed;

        private ImageView stencilImageView2;
        private Group to;
        private Group to2;


        @Override
        public void start(Stage stage) {

            original = new Image(getClass().getResourceAsStream("image.jpg"));

            stencil = new Image(getClass().getResourceAsStream("stencil.jpg"));
            stencil2 = new Image(getClass().getResourceAsStream("stencil2.jpg"));

            stencilImageView = new ImageView(stencil);

            // first invert the stencil so that it is black on white rather than white on black.
            whiteRect = new Rectangle(stencil.getWidth(), stencil.getHeight());
            whiteRect.setFill(Color.WHITE);
            whiteRect.setBlendMode(BlendMode.DIFFERENCE);

            stencilImageView2 = new ImageView(stencil2);

            stencilImageView2.setBlendMode(BlendMode.ADD);

            to = new Group(stencilImageView, stencilImageView2);

            ImageView tmpIv = new ImageView(stencil2);
            tmpIv.setBlendMode(BlendMode.ADD);
            to2 = new Group(new ImageView(stencil), tmpIv);

            inverted = new Group(to, whiteRect);

            originalImageView = new ImageView(original);

            overlaidBlack = new Group(originalImageView, inverted);

            inverted.setBlendMode(BlendMode.MULTIPLY);

            overlaidBlack = new Group(originalImageView, inverted);

            // create a new mask with a red tint (red on black).
            redRect = new Rectangle(stencil.getWidth(), stencil.getHeight());
            redRect.setFill(Color.RED);
            redRect.setBlendMode(BlendMode.MULTIPLY);

            redStencil = new Group(to2, redRect);

            redStencil.setBlendMode(BlendMode.ADD);

            overlaidRed = new Group(overlaidBlack, redStencil);

            // display the original, composite image and stencil.
            HBox layout = new HBox(10);
            layout.getChildren().addAll(new ImageView(original), overlaidRed);

            layout.setPadding(new Insets(10));
            stage.setScene(new Scene(layout));
            stage.show();
        }

        public static void main(String[] args) {
            launch();
        }
    }
来源:https://stackoverflow.com/questions/29695808/combine-images-for-overlay