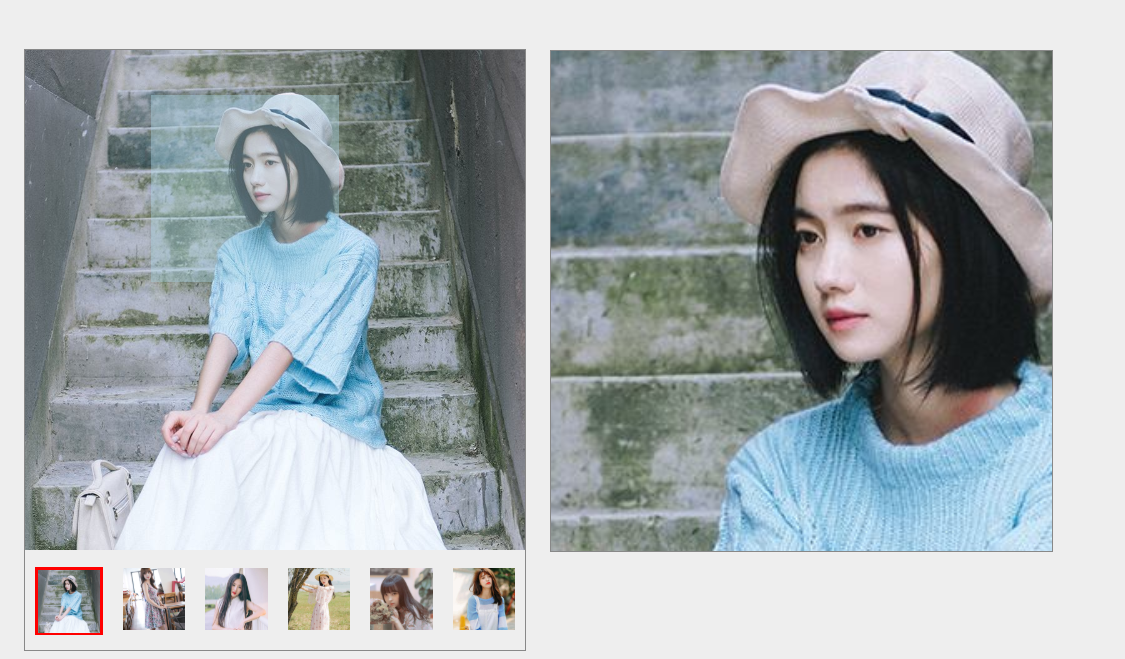
思路分析:
1.鼠标切换图片列表时,.pic盒子中的图片相对应切换
2.在.pic中生成一个.zoom的盒子,移动该盒子时类似对.pic盒子中的图片进行剪切
2.1 动态获取.zoom盒子相对.pic盒子的background-positin属性值
2.2 对.zoom盒子的移动范围进行限制(只在.pic盒子中移动)
3.将剪切的图片按比例放大显示到.details的盒子中
注:放大比例 = 左边盒子的大小 / 里面进行剪切的盒子大小,该比例值作为右边盒子显示内容的大小
代码如下:


1 <!DOCTYPE html> 2 <html lang="en"> 3 <head> 4 <meta charset="UTF-8"> 5 <meta name="viewport" content="width=device-width, initial-scale=1.0"> 6 <meta http-equiv="X-UA-Compatible" content="ie=edge"> 7 <title>原生js实现图片放大镜</title> 8 <link rel="stylesheet" href="./css/style.css"> 9 </head> 10 11 <body> 12 13 <div id="wrap"> 14 <div class="pic"> 15 <img src="./images/1.jpg" alt=""> 16 <div class="zoom"></div> 17 </div> 18 <ul class="list"> 19 <li class="current"> 20 <img src="./images/1.jpg" alt=""> 21 </li> 22 <li> 23 <img src="./images/2.jpg" alt=""> 24 </li> 25 <li> 26 <img src="./images/3.jpg" alt=""> 27 </li> 28 <li> 29 <img src="./images/4.jpg" alt=""> 30 </li> 31 <li> 32 <img src="./images/5.jpg" alt=""> 33 </li> 34 <li> 35 <img src="./images/6.jpg" alt=""> 36 </li> 37 </ul> 38 <div class="details"></div> 39 40 41 <script src="./js/index.js"></script> 42 </body> 43 </html>


@charset "utf-8"; * { margin: 0; padding: 0; } li{ list-style: none; } body { background-color: #eee; } #wrap { position: relative; width: 400px; height: 480px; margin: 50px auto; border: 1px solid #888; } #wrap .pic img { width: 400px; height: 400px; } #wrap .pic .zoom { position: absolute; top: 0; left: 0; width: 150px; height: 150px; background-color: lightblue; opacity: .4; cursor: move; } #wrap .list { display: flex; margin-top: 10px; justify-content: space-around; } #wrap .list li{ cursor: pointer; } #wrap .list .current{ border: 2px solid red; } #wrap .list img { width: 50px; height: 50px; vertical-align: bottom; /* 解决图片底部留白,改变对齐方式,默认基线对齐 */ } #wrap .details { position: absolute; /* display: none; */ top: 0; left: 400px; width: 400px; height: 400px; margin-left: 20px; border: 1px solid #888; background-image: url('/images/1.jpg'); background-size: 266%; } 

1 var list = document.querySelector(' .list '), 2 img = document.querySelector(' .pic img '), 3 li_list = list.querySelectorAll(' li '), 4 pic = document.querySelector(' #wrap .pic '), 5 zoom = document.querySelector(' .zoom '), 6 details = document.querySelector(' .details ') 7 8 list.addEventListener('click', function (e) { 9 e = e || window.event 10 // console.log(e.target) 11 if (e.target.tagName == 'IMG') { 12 img.src = e.target.src; 13 details.style.backgroundImage = 'url(' + e.target.src + ')'; 14 // console.log(e.target.parentNode) 15 li_list.forEach(function (item) { 16 console.log(item) 17 item.className = ''; // 每次遍历六个li元素并清除类名 18 }) 19 e.target.parentNode.className = 'current'; // 通过e.target找到其父元素并添加上类名 20 // console.log(li_list) 21 } 22 }, false) 23 24 pic.addEventListener('mousemove', function (e) { 25 e = e || window.event 26 var x = e.clientX, 27 y = e.clientY; 28 cx = pic.getBoundingClientRect().left; // getBoundingClientRect()获取某个元素相对于视窗的位置集合 29 cy = pic.getBoundingClientRect().top; 30 tx = x - cx - 75; 31 ty = y - cy - 75 32 // console.log(e) 33 // console.log(x,y) 34 // console.log(cx,cy) 35 36 // 对.zoom盒子移动范围进行限制 37 if(tx < 0){ 38 tx = 0; 39 } 40 if(tx > 250){ 41 tx = 250 42 } 43 if(ty < 0){ 44 ty = 0; 45 } 46 if(ty > 250){ 47 ty = 250 48 } 49 50 details.style.backgroundPosition = (tx / 250 * 100 + '%') + (ty / 250 * 100 + '%') 51 52 zoom.style.left = tx + 'px' 53 zoom.style.top = ty + 'px'; 54 }) 最终效果:

总结:
整体先实现静态效果,然后根据需求进行一步步逻辑代码的编写,从而实现整个效果