官方地址:https://github.com/happyfish100/fastdfs
一、先下载个包,然后解压(自己找个目录下载即可)
[root@localhost soft]# wget https://github.com/happyfish100/fastdfs/archive/master.zip
--2019-09-16 05:26:36--  https://github.com/happyfish100/fastdfs/archive/master.zip
Resolving github.com (github.com)... 13.250.177.223
Connecting to github.com (github.com)|13.250.177.223|:443... connected.
HTTP request sent, awaiting response... 302 Found
Location: https://codeload.github.com/happyfish100/fastdfs/zip/master [following]
--2019-09-16 05:26:37--  https://codeload.github.com/happyfish100/fastdfs/zip/master
Resolving codeload.github.com (codeload.github.com)... 13.229.189.0
Connecting to codeload.github.com (codeload.github.com)|13.229.189.0|:443... connected.
HTTP request sent, awaiting response... 200 OK
Length: unspecified [application/zip]
Saving to: ‘master.zip’

    [    <=>                                                                                                                                                                                            ] 482,045      645KB/s   in 0.7s

2019-09-16 05:26:38 (645 KB/s) - ‘master.zip’ saved [482045]

[root@localhost soft]# unzip master.zip
Archive:  master.zip
14edb44071b27599a5fc8c818b643eed6fe15e11
   creating: fastdfs-master/....
二、进入fastdfs-master/docker/dockerfile_network目录,执行打包命令
[root@localhost soft]# cd fastdfs-master/docker/dockerfile_network
[root@localhost dockerfile_network]#
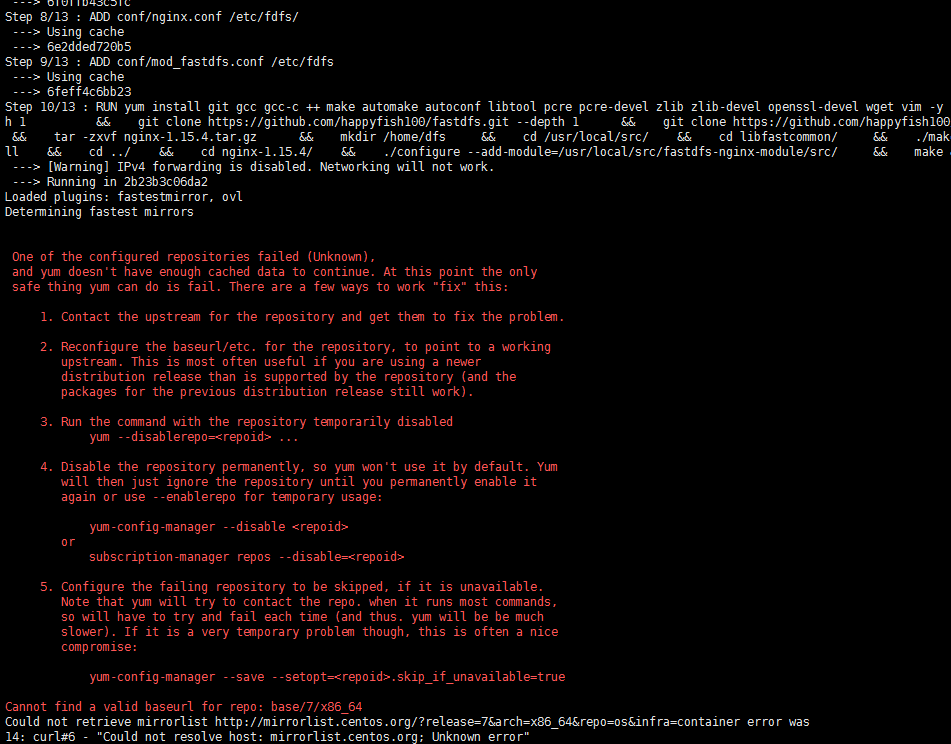
打包(注意,你的宿主机内存至少要2G,不然会报错如下:)我之前只分配给宿主机1G内存,明显不够用。

好,执行命令打包:(注意最后有个点)
[root@localhost dockerfile_network]# docker build -t local/fastdfs:latest .
Sending build context to Docker daemon   68.1kB
Step 1/13 : FROM centos
 ---> 67fa590cfc1c
Step 2/13 : ADD conf/client.conf /etc/fdfs/
 ---> Using cache
 ---> f6d4d01d7cf4
Step 3/13 : ADD conf/http.conf /etc/fdfs/
 ---> Using cache
 ---> 09b5d6e42010
Step 4/13 : ADD conf/mime.types /etc/fdfs/
 ---> Using cache
 ---> 01ba930f4e2a
Step 5/13 : ADD conf/storage.conf /etc/fdfs/
 ---> Using cache
 ---> 628d5f17543d
Step 6/13 : ADD conf/tracker.conf /etc/fdfs/
 ---> Using cache
 ---> b62b681c8ee8
Step 7/13 : ADD fastdfs.sh /home
 ---> Using cache
 ---> 6f0ffb43c5fc
Step 8/13 : ADD conf/nginx.conf /etc/fdfs/
 ---> Using cache
 ---> 6e2dded720b5
Step 9/13 : ADD conf/mod_fastdfs.conf /etc/fdfs
 ---> Using cache
 ---> 6feff4c6bb23
Step 10/13 : RUN yum install git gcc gcc-c ++ make automake autoconf libtool pcre pcre-devel zlib zlib-devel openssl-devel wget vim -y   &&    cd /usr/local/src    &&    git clone https://github.com/happyfish100/libfastcommon.git --depth 1          &&    git clone https://github.com/happyfish100/fastdfs.git --depth 1      &&    git clone https://github.com/happyfish100/fastdfs-nginx-module.git --depth 1     &&    wget http://nginx.org/download/nginx-1.15.4.tar.gz      &&    tar -zxvf nginx-1.15.4.tar.gz      &&    mkdir /home/dfs     &&    cd /usr/local/src/    &&    cd libfastcommon/     &&    ./make.sh && ./make.sh install    &&    cd ../    &&    cd fastdfs/     &&    ./make.sh && ./make.sh install    &&    cd ../    &&    cd nginx-1.15.4/    &&    ./configure --add-module=/usr/local/src/fastdfs-nginx-module/src/     &&    make && make install    &&    chmod +x /home/fastdfs.sh
 ---> Using cache
 ---> 59424d66e1a1
Step 11/13 : VOLUME /etc/fdfs
 ---> Using cache
 ---> d72d68fd5ebf
Step 12/13 : EXPOSE 22122 23000 8888 80
 ---> Using cache
 ---> f0c2d84a954e
Step 13/13 : ENTRYPOINT ["/home/fastdfs.sh"]
 ---> Using cache
 ---> fc76c652493b
Successfully built fc76c652493b
Successfully tagged local/fastdfs:latest
(额,这是我第二次打包,我第一次打包输出好多内容的,你们自行体会,你们应该能看见 ---> Using cache 利用了缓存)

到这里,镜像就打包好了。后面告诉你怎么玩。