Matplotlib 入门
使用思路:建立画板-建立画布-绘制图像-添加辅助显示
import matplotlib.pyplot as plt

# 创建画布
plt.figure()

# 绘制图像
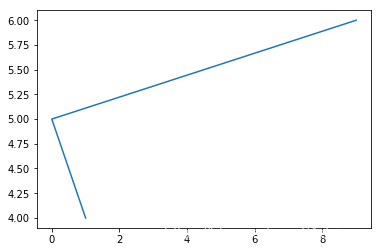
plt.plot([1,0,9],[4,5,6])

# 显示图像
plt.show()

实例:一周天气情况
plt.figure(figsize=(15,5),dpi=80)
plt.plot([1,2,3,4,5,6,7],[18,17,11,11,19,20,18])
plt.savefig("1.PNG")
plt.show()

实例2:1小时内每分钟温度变化
import random
import matplotlib.pyplot as plt
# 获取数据
x = range(60)
y_shanghai = [random.uniform(16,18) for i in x]
y_beijing = [random.uniform(1,3) for i in x]
# 创建画布
plt.figure(figsize=(15,5),dpi=80)
# 绘制图像
plt.plot(x,y_shanghai,linestyle="-.",label="上海")
plt.plot(x,y_beijing,color="r",label="北京")
# 绘制图例
plt.legend()
# 设置x、y轴刻度
# 设置文字显示
x_label = ["11点{}分".format(i)for i in x]
y_label = ["{}℃".format(i)for i in range(40)]
# 显示刻度
plt.xticks(x[::5],x_label[::5])
plt.yticks(range(0,40,5),y_label[::5])
# 显示网格
plt.grid(linestyle="--",alpha=0.5)
# 添加描述信息
plt.xlabel("时间")
plt.ylabel("温度")
plt.title("1小时温度变化")
# 显示图
plt.show()

多个坐标系显示 plt.subplots
# 获取数据
x = range(60)
y_shanghai = [random.uniform(16,18) for i in x]
y_beijing = [random.uniform(1,3) for i in x]

# 创建画布
figure,axes = plt.subplots(nrows=1,ncols=2,figsize=(20,5),dpi=80)

# 绘制图像
axes[0].plot(x,y_shanghai,linestyle="-.",label="上海")
axes[1].plot(x,y_beijing,color="r",label="北京")

# 绘制图例
axes[0].legend()
axes[1].legend()

# 设置x、y轴刻度
# 设置文字显示
x_label = ["11点{}分".format(i)for i in x]
y_label = ["{}℃".format(i)for i in range(40)]

# 显示刻度
axes[0].set_xticks(x[::5])
axes[0].set_xticklabels(x_label[::5])
axes[0].set_yticks(range(0,40,5))
axes[0].set_yticklabels(y_label[::5])
axes[1].set_xticks(x[::5])
axes[1].set_xticklabels(x_label[::5])
axes[1].set_yticks(range(0,40,5))
axes[1].set_yticklabels(y_label[::5])

# 显示网格
axes[0].grid(linestyle="--",alpha=0.5)
axes[1].grid(linestyle="--",alpha=0.5)

# 添加描述信息
axes[0].set_xlabel("时间")
axes[0].set_ylabel("温度")
axes[0].set_title("1小时温度变化")
axes[1].set_xlabel("时间")
axes[1].set_ylabel("温度")
axes[1].set_title("1小时温度变化")

# 显示图
plt.show()

绘制数学函数图像
import numpy as np
x = np.linspace(-1,1,100)
y = 1 + 2*x

plt.figure(figsize=(20,5),dpi=80)

plt.plot(x,y)
plt.grid(linestyle="--",alpha=0.5)
plt.show()

散点图绘制
# 导入数据

x = [225.98, 247.07, 253.14, 457.85, 241.58, 301.01,  20.67, 288.64,
     163.56, 120.06, 207.83, 342.75, 147.9 ,53.06, 224.72,  29.51,
     21.61,483.21, 245.25, 399.25, 343.35]

y = [196.63, 203.88, 210.75, 372.74, 202.41, 247.61,  24.9 , 239.34,
    140.32, 104.15, 176.84, 288.23, 128.79,  49.64, 191.74,  33.1 ,
    30.74, 400.02, 205.35, 330.64, 283.45]

# 绘制画布
plt.figure(figsize=(20,5),dpi=80)

# 绘制图像
plt.scatter(x,y)

# 显示图像
plt.show()

绘制柱状图 -对比电影票房收
# 准备数据
movie_names = ['雷神3:诸神黄昏','正义联盟','东方快车谋杀案','寻梦环游记','全球风暴', '降魔传','追捕','七十七天','密战','狂兽','其它']
tickets = [73853,57767,22354,15969,14839,8725,8716,8318,7916,6764,52222]

# 绘制画布
plt.figure(figsize=(20,5),dpi=80)

# 绘制图像

plt.bar(movie_names,tickets,color=['#60acfc','#32d3eb','#5bc49f','#feb64d','#ff7c7c','#9287e7','#ff99cc','#666999','c','g','#cc3399'],width=0.5)

# 绘制网格
plt.grid(linestyle="--",alpha=0.5)

# 添加标题
plt.title("电影票房收入对比")

# 显示图像
plt.show()

柱状图对比
# 准备数据
movie_name = ['雷神3:诸神黄昏','正义联盟','寻梦环游记']
first_day = [10587.6,10062.5,1275.7]
first_weekend=[36224.9,34479.6,11830]

x = range(len(movie_name))
# 绘制画布
plt.figure(figsize=(20,5),dpi=80)

# 绘制图像

plt.bar(x,first_day,color=['#60acfc'],width=0.2,label="首日票房")
plt.bar([i+0.2 for i in x],first_weekend,color=['#ff7c7c'],width=0.2,label="首周票房")

# 绘制图例
plt.legend()

# 绘制网格
plt.grid(linestyle="--",alpha=0.5)

# 修改刻度
plt.xticks([i+0.1 for i in x],movie_name)

# 添加标题、X轴、Y轴标识
plt.title("电影票房收入对比")
plt.xlabel("电影名称")
plt.ylabel("收入")

# 显示图像
plt.show()

持续更新中
来源:https://blog.csdn.net/Adviser_/article/details/100030989