发布自己的镜像
DockerHub
1、地址 https://hub.docker.com/ 注册自己的账号!
2、确定这个账号可以登录
3、在我们服务器上提交自己的镜像
[root@dockertest tomcat]# docker login --help
Usage: docker login [OPTIONS] [SERVER]
Log in to a Docker registry.
If no server is specified, the default is defined by the daemon.Options:
-p, --password string Password
--password-stdin Take the password from stdin
-u, --username string Username# 登录dockerhub
[root@localhost tomcat]# docker login -u 账号
Password:
WARNING! Your password will be stored unencrypted in /root/.docker/config.json.
Configure a credential helper to remove this warning. See
https://docs.docker.com/engine/reference/commandline/login/#credentials-storeLogin Succeeded
4、登录完毕后就可以提交镜像了,就是一步 docker push
# push自己的镜像到服务器上!
[root@localhost tomcat]# docker push diytomcat
The push refers to repository [docker.io/library/diytomcat]
c5593011cd68: Preparing
d3ce40b8178e: Preparing
02084c67dcc9: Preparing
2b7c1c6c89c5: Preparing
0683de282177: Preparing
denied: requested access to the resource is denied # 拒绝# push镜像的问题?
[root@localhost tomcat]# docker push xxxxxx/diytomcat:1.0
The posh refers to repository [docker.io/xxxxx/diytomcat2]
An image dose not exist locally with the tag: xxxxxx/diytomcat2# 解决:增加一个tag docker tag 指定镜像的id dockerhub的用户名/镜像重命名:[tag]
[root@localhost tomcat]# docker tag bb64ab96b432 账号/tomcat:1.0# docker push上去即可!自己发布的镜像,尽量带上版本号
[root@localhost tomcat]# docker push xxxxxx/tomcat:1.0
The push refers to repository [docker.io/library/tomcat]
c5593011cd68: Preparing
d3ce40b8178e: Preparing
02084c67dcc9: Preparing
2b7c1c6c89c5: Preparing
0683de282177: Preparing
注意:镜像的重命名前一定要加当前的dockerhub的用户名,否则将会push失败!!!!
提交的时候也是按照镜像的层级来进行提交的!
阿里云镜像服务上
1、登录阿里云
2、找到容器镜像服务
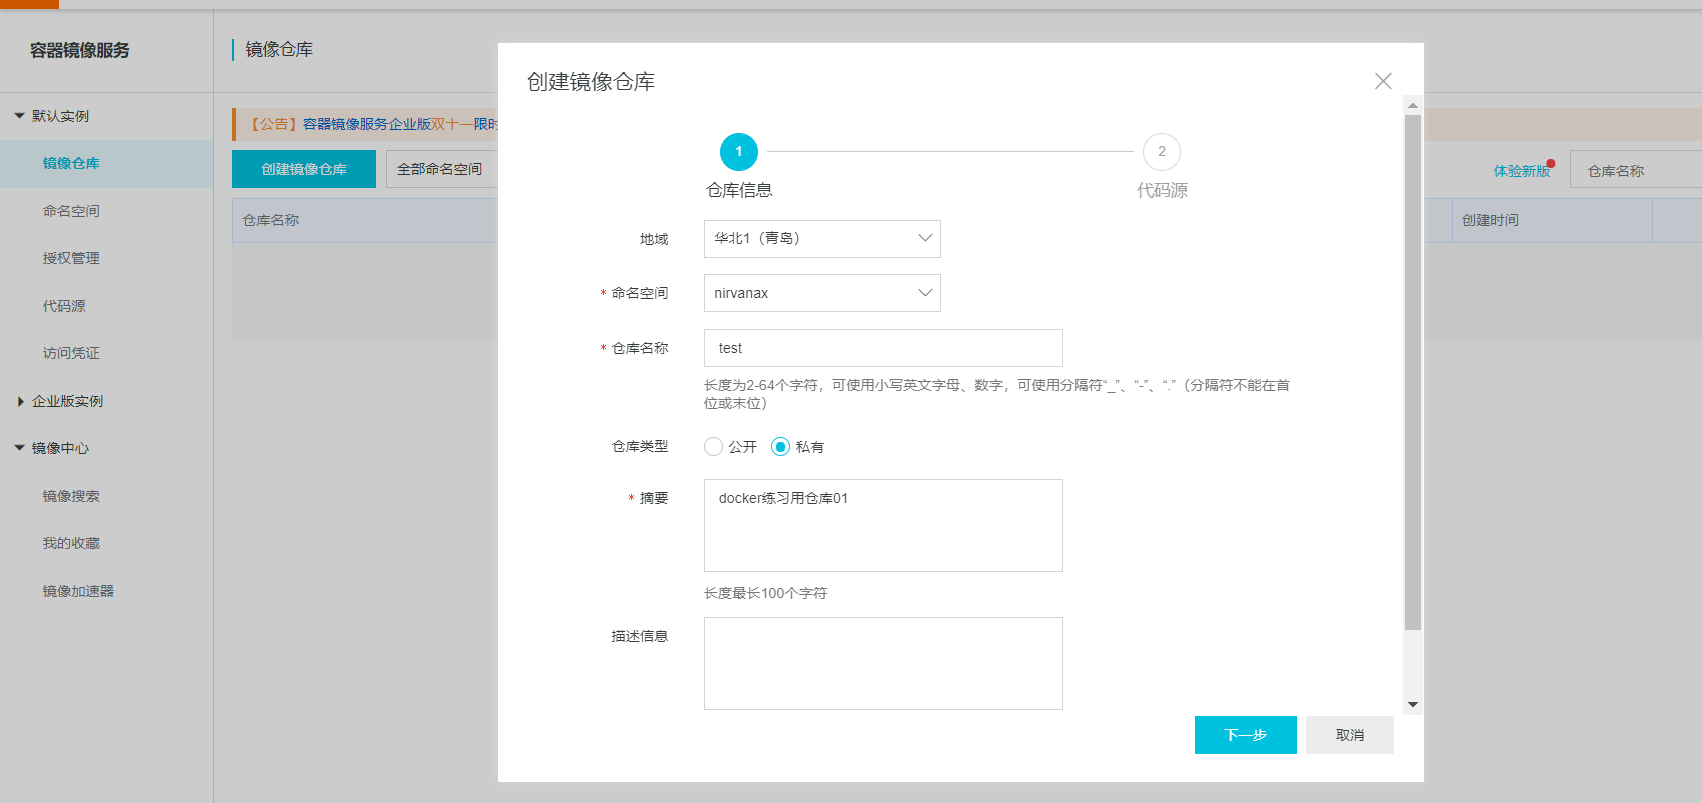
3、创建命名空间(一个账号只能创建3个命名空间)
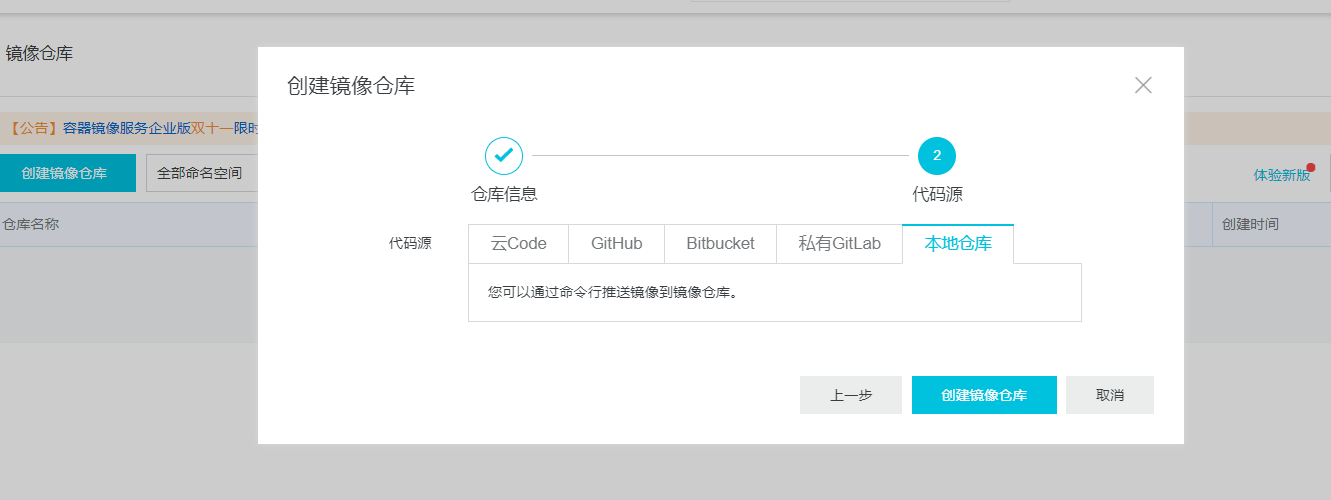
4、创建容器镜像
5、浏览阿里云页面
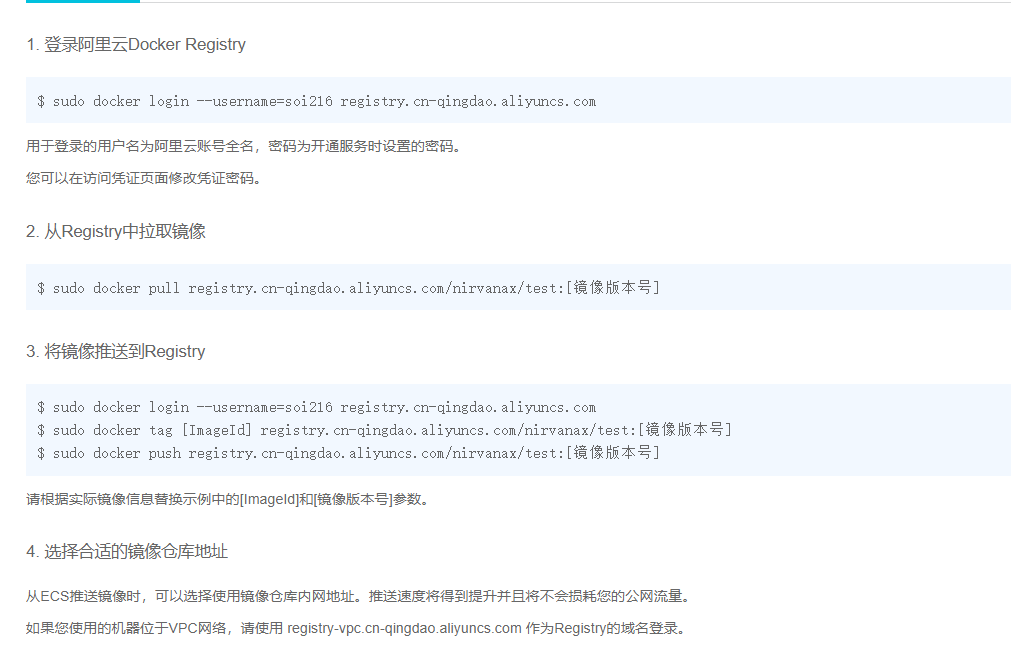
使用阿里云容器镜像的参考官方指南即可!!!(即上图)
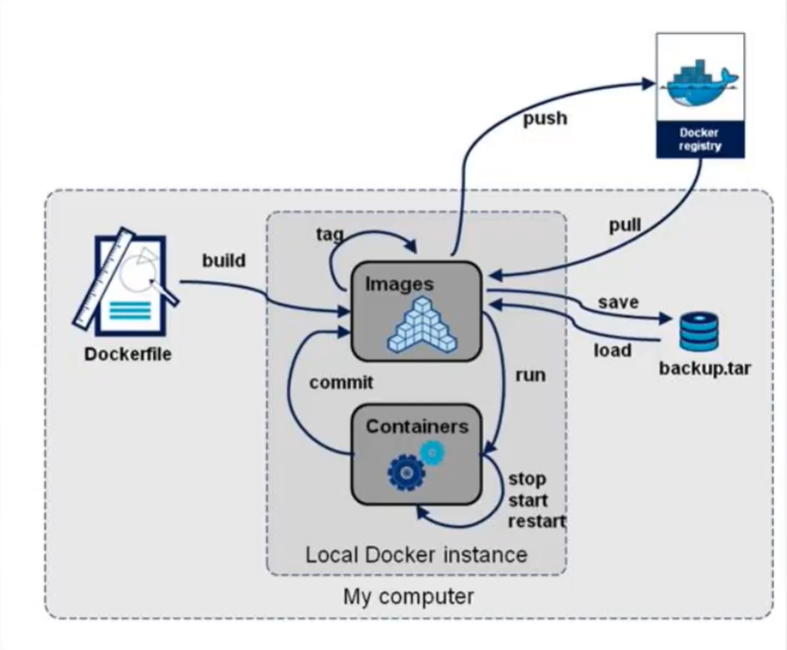
小结:
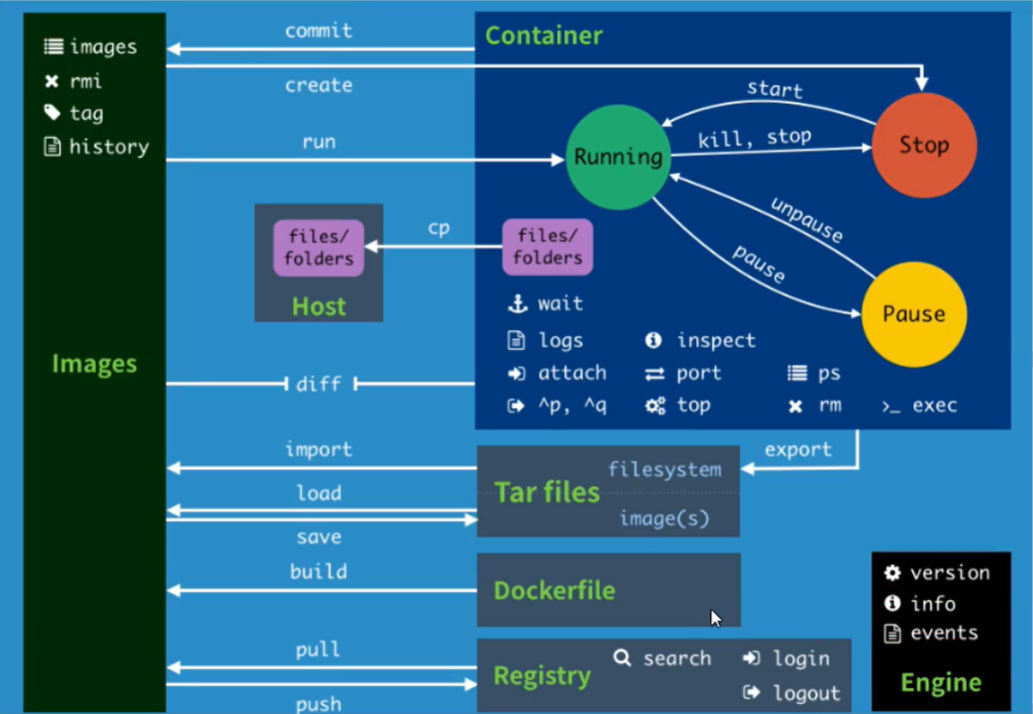
来源:oschina
链接:https://my.oschina.net/u/4005625/blog/4920941

