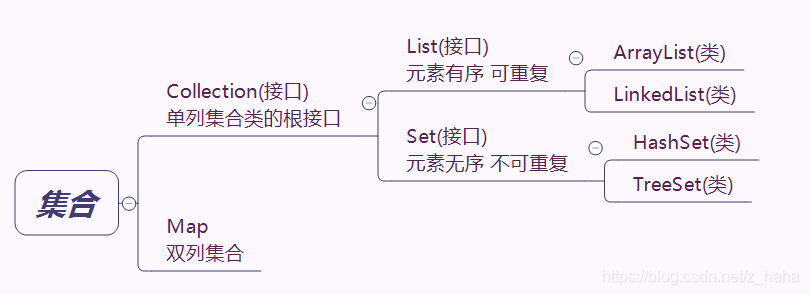
集合–Collection
集合是长度可变的容器
Collection 使用示例
public static void main(String[] args) {
    //Collection是所有单列集合的父接口
    //因此在Collection中定义了单列集合(List和Set)通用的一些方法
    //这些方法可用于操作所有的单列集合

    //创建集合
    Collection<String> collection = new ArrayList<>();

    //添加元素
    collection.add("test1");
    collection.add("test2");
    System.out.println(collection);

    //判断元素是否在集合内
    boolean if_contain = collection.contains("test1");
    if(if_contain == true){
        System.out.println("test1存在于集合中");
    }

    //删除集合中的元素
    collection.remove("test1");
    System.out.println(collection);

    //查看集合中的元素个数
    System.out.println("元素个数: " + collection.size());

    //将集合转换为Obeject数组
    Object[] objects = collection.toArray();
    for(int i = 0;i<objects.length;++i){
        System.out.println(objects[i]);
    }

    //清空集合
    collection.clear();

    //判断集合是否为空
    boolean if_empty = collection.isEmpty();
    if(if_contain == true){
        System.out.println("集合为空");
    }
}
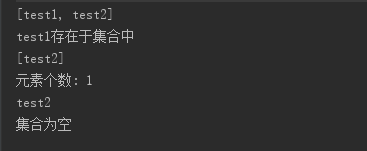
输出结果
Iterator迭代器
顾名思义,主要是用来遍历元素的
使用示例
public static void main(String[] args) {

    //创建集合
    Collection<String> collection = new ArrayList<>();

    //添加元素
    collection.add("test1");
    collection.add("test2");

    //构造迭代器
    //迭代器的泛型是取出来的元素的类型
    Iterator<String> iterator = collection.iterator();

    //遍历元素
    while(iterator.hasNext()){
        String string = iterator.next();
        System.out.println(string);
    }
}
输出结果
注意迭代器在使用第一个next之前,索引的地方是在第0个元素之前
遍历元素也可以使用增强版的for循环
结构
for(数据类型 变量 : 集合/数组){

}
使用示例
public static void main(String[] args) {

    //创建迭代器
    Collection<String> collection = new ArrayList<>();

    //添加元素
    collection.add("test1");
    collection.add("test2");

    for(String str : collection){
        System.out.println(str);
    }
}
输出结果
泛型的使用
泛型类和泛型方法的使用
public class test_class<TEST> {
    //这里的TEST表示任意类型都可以
    public TEST a;

    public void Set(TEST test){
        this.a = test;
    }

    public TEST Get(){
        return a;
    }
}

public static void main(String[] args) {
   test_class<String> stringtest_class = new test_class<String>();
   stringtest_class.Set("ceshi");
   System.out.println(stringtest_class.Get());
}
输出结果
泛型接口的使用
public interface test_interface<T> {
    public abstract T fun();
}
- 定义类时确定类型
public class test_class implements test_interface<String> {
    @Override
    public String fun(String str) {
        return str;
    }
}
- 在创建对象时确定类型
public class test_class<T> implements test_interface<T> {
    @Override
    public T fun(T t) {
        return t;
    }
}

public static void main(String[] args) {
    test_class<String> str = new test_class<>();
    System.out.println(str.fun("ceshi"));
}
当不知道使用什么类型来接受数据的时候可以使用通配符接收数据
通配符也可以用来设置泛型的上限和下限
类型名称 <? extends 某类 > 对象名称
只接收某类及其子类

类型名称 <? super 某类 > 对象名称
只接收某类及其基类
使用示例
public class Main {
    //可接受任意
    public static void test(Collection <?> collection){}
    //可接受Number及其子类
    public static void test_extends(Collection<? extends Number> collection){}
    //可接受Number及其基类
    public static void test_super(Collection<? super Number> collection){}
    public static void main(String[] args) {
        Collection<Integer> integers = new ArrayList<>();
        Collection<Number> numbers = new ArrayList<>();
        Collection<String> strings = new ArrayList<>();

        test(integers);
        test(numbers);
        test(strings);

        //Number是Integer的基类
        test_extends(integers);
        test_extends(numbers);
        test_extends(strings);//报错


        test_super(integers);//报错
        test_super(strings);//报错
        test_super(numbers);
    }
}
来源:CSDN
作者:z_haha
链接:https://blog.csdn.net/z_haha/article/details/104403668