swagger-ui集成
相信无论是前端还是后端开发,都或多或少地被接口文档折磨过。前端经常抱怨后端给的接口文档与实际情况不一致。后端又觉得编写及维护接口文档会耗费不少精力,经常来不及更新。其实无论是前端调用后端,还是后端调用后端,都期望有一个好的接口文档。但是这个接口文档对于程序员来说,就跟注释一样,经常会抱怨别人写的代码没有写注释,然而自己写起代码起来,最讨厌的,也是写注释。所以仅仅只通过强制来规范大家是不够的,随着时间推移,版本迭代,接口文档往往很容易就跟不上代码了。
swagger简介
Swagger是一款RESTFUL接口的文档在线自动生成+功能测试功能软件。Swagger是一个规范和完整的框架,用于生成、描述、调用和可视化RESTfu风格的web服务。目标是使客户端和文件系统作为服务器一同样的速度来更新文件的方法,参数和模型紧密集成到服务器。这个解释简单点来讲就是说,swagger是一款可以根据restful风格生成的接口开发文档,并且支持做测试的一款中间软件。
swagger-ui集成步骤
(在一个现有的springboot项目中集成测试的,不要在意包路径以及类的名称)
1、集成swagger相关依赖
<!-- swagger-api 依赖开始 -->
<dependency>
    <groupId>io.springfox</groupId>
    <artifactId>springfox-swagger2</artifactId>
    <version>2.6.1</version>
</dependency>
<dependency>
    <groupId>io.springfox</groupId>
    <artifactId>springfox-swagger-ui</artifactId>
    <version>2.6.1</version>
</dependency>
<!-- swagger-api 依赖结束 -->
引入相关jar包以后,可打开springfox-swagger-ui-2.6.1.jar下面的:\META-INF\resources\
可看到jar包中自带的swagger-ui.html,以及/webjars/下面html所引用到的相关前端渲染代码(css、js、fonts、images…)
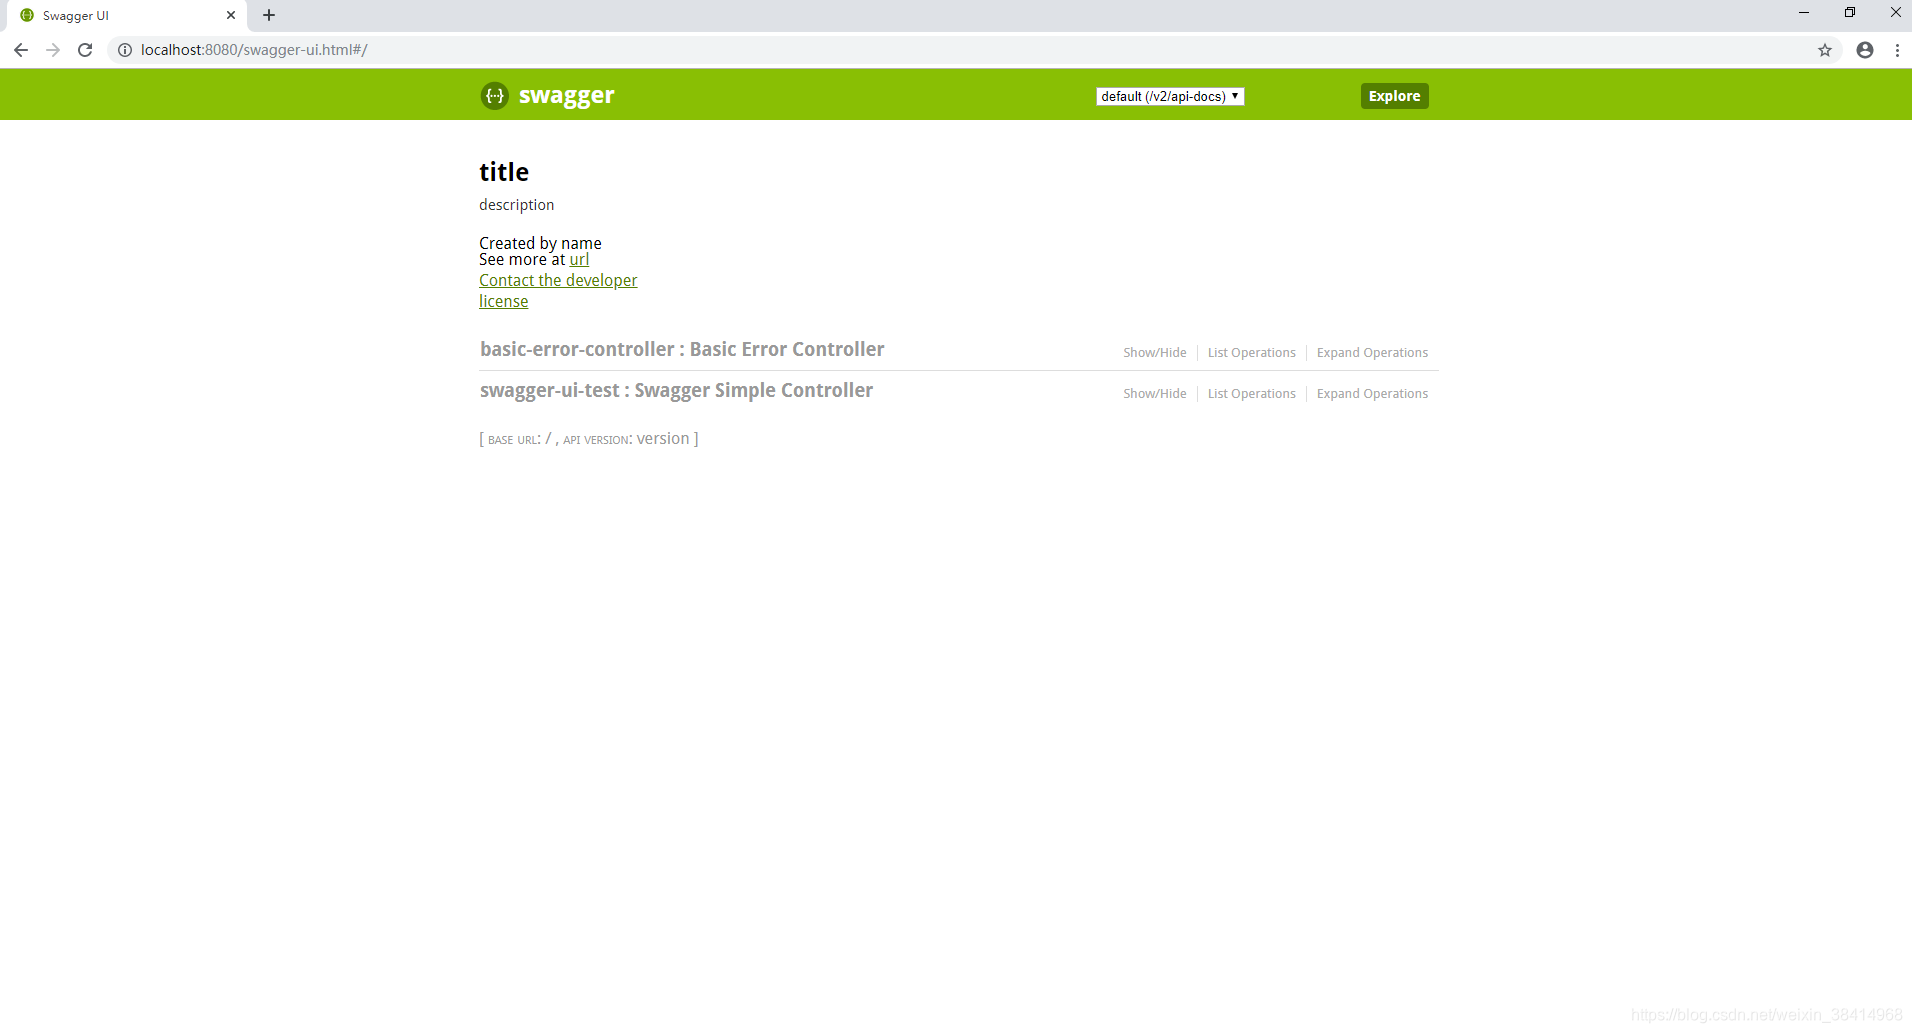
搭建成功后的swagger页面就是这个html
2、配置swagger相关信息
import org.springframework.context.annotation.Bean;
import org.springframework.context.annotation.ComponentScan;
import org.springframework.context.annotation.Configuration;
import springfox.documentation.service.ApiInfo;
import springfox.documentation.service.Contact;
import springfox.documentation.spi.DocumentationType;
import springfox.documentation.spring.web.plugins.Docket;

/**
 * swagger相关配置
 *
 * @auther SwaggerConfig
 * @create xxxx/xx/xx
 */

@Configuration // 标注此类是一个配置类
@ComponentScan(basePackages = {"com.redis.simple.redissimple.controller"}) // 扫描要加载的包路径
public class SwaggerConfig {

    @Bean
    public Docket customDocket(){
        return new Docket(DocumentationType.SWAGGER_2)
                .apiInfo(apiInfo());
    }

    private ApiInfo apiInfo() {

        return new ApiInfo("title", // 文档标题
                "description", // 文档描述
                "version", // 文档版本
                "termsOfServiceUrl",
                new Contact("name","url","email"), // 作者信息
                "license",
                "licenseUrl");
    }

}
3、配置相关的访问映射
import org.springframework.context.annotation.Configuration;
import org.springframework.web.servlet.config.annotation.ResourceHandlerRegistry;
import org.springframework.web.servlet.config.annotation.WebMvcConfigurer;

/**
 * 配置相关的访问映射
 *
 * @auther SwaggerMvcConfig
 * @create xxxx/xx/xx
 */

@Configuration
public class SwaggerMvcConfig implements WebMvcConfigurer {

    @Override
    public void addResourceHandlers(ResourceHandlerRegistry registry) {

		// 配置前端访问此路径,映射到 springfox-swagger-ui-2.6.1.jar下面的:\META-INF\resources\swagger-ui.html
        registry.addResourceHandler("swagger-ui.html")
                .addResourceLocations("classpath:/META-INF/resources/");

		// 加载swagger-ui.html同级目录下webjars下相关的前端代码(css、js、fonts、images...)
        registry.addResourceHandler("/webjars/**")
                .addResourceLocations("classpath:/META-INF/resources/webjars/");
    }
}
4、编写测试接口
import io.swagger.annotations.Api;
import io.swagger.annotations.ApiImplicitParam;
import io.swagger.annotations.ApiImplicitParams;
import io.swagger.annotations.ApiOperation;
import org.springframework.web.bind.annotation.GetMapping;
import org.springframework.web.bind.annotation.RequestParam;
import org.springframework.web.bind.annotation.RestController;

/**
 * @auther SwaggerSimpleController
 * @create xxxx/xx/xx
 */
@RestController
@Api(tags = {"swagger-ui-test"}) // 描述该类的作用
public class SwaggerSimpleController {

    @ApiOperation("swagger-ui 接口") // 描述方法的作用
    @ApiImplicitParams({ // 描述该接口的所有参数
            @ApiImplicitParam(name = "name",paramType = "query",value = "名称",required = true)
    })
    @GetMapping(value = "swaggerSimple")
    public String swaggerSimple(@RequestParam String name){
        return "hello : "+name;
    }

}
5、启动类配置启用swagger并且启动项目
@SpringBootApplication
@EnableSwagger2 // 启用swagger-ui
public class RedisSimpleApplication {

    public static void main(String[] args) {
        SpringApplication.run(RedisSimpleApplication.class, args);
    }

}
6、访问:http://localhost:8080/swagger-ui.html

swagger常用注解
@Api :用在类上,说明该类的作用
@ApiOperation :用在方法上,说明方法的作用
@ApiImplicitParams :用在方法上包含一组参数说明
@ApiImplicitParam :用在@ApiImplicitParams注解中,指定一个请求参数的各个方面
    paramType:参数放在哪个地方
        header-->请求参数的获取:@RequestHeader
        query-->请求参数的获取:@RequestParam
        path(用于restful接口)-->请求参数的获取:@PathVariable
        body(不常用)
        form(不常用)
    name:参数名
    dataType:参数类型
    required:参数是否必须传
    value:参数的意思
    defaultValue:参数的默认值
@ApiResponses :用于表示一组响应
@ApiResponse :用在@ApiResponses中,一般用于表达一个错误的响应信息
    code:数字,例如400
    message:信息,例如"请求参数没填好"
    response:抛出异常的类
@ApiModel:描述一个Model的信息(这种一般用在post创建的时候,使用@RequestBody这样的场景,请求参数无法使用@ApiImplicitParam注解进行描述的时候)
    @ApiModelProperty:描述一个model的属性
    response:抛出异常的类
@ApiModel:描述一个Model的信息(这种一般用在post创建的时候,使用@RequestBody这样的场景,请求参数无法使用@ApiImplicitParam注解进行描述的时候)
    @ApiModelProperty:描述一个model的属性
来源:CSDN
作者:只为伊人2232
链接:https://blog.csdn.net/weixin_38414968/article/details/103483324